Linux Tutorial
Each of you should now have access to a Linux terminal. In Ubuntu, run the Terminal application (Open the Dash by clicking the Ubuntu icon in the upper-left, type “terminal”, and select the Terminal application from the results that appear.)
You must now complete a tutorial to familiarize yourself with the Linux command-line. Carefully read through and practice the examples found in Sections 1-5 of this Linux tutorial.
Getting the Repo
You are provided with a repository of starting code, available here: https://github.com/byu-cpe/ecen330_student.
You can fetch this code from Github, and copy it into a folder called ecen330 in your home directory, using the following command:
git clone https://github.com/byu-cpe/ecen330_student ~/ecen330
Do this now. Once checked out, you need to run one setup step:
cd ~/ecen330
make setup
Open Folder using VSCode
Now that you have a folder of the lab code located at ~/ecen330, you should open this folder using VSCode. You can do this like so:
code ~/ecen330
VSCode should now be in folder view, and if you click the top-left Explorer button, you should see a file browser with all of the provided code.
Install VSCode Extensions
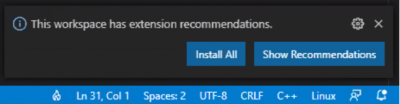
When you open the folder using VSCode, you should see a message indicating that there are recommended extensions for your code. Click Install All.
Important: You should always work on your code by opening the folder like explained above, instead of just individually opening your files in VSCode.It provides several benefits:
- It will load the configurations of VSCode that we have placed in the .vscode folder.
- It makes it easier to manage your files using the folder browser on the left-hand side.
Return to Lab 1 and continue with the next steps.