Table of Contents
Lecture Videos
On June 23, 2021 we had a Vitis HLS Tutorial by Prof Goeders. The video is embedded below:
Timestamps
0:00 Introduction to High Level Synthesis
8:20 Example function
10:39 Introduction to Vitis HLS
17:43 C Simulation
20:15 C Synthesis
28:30 Seeing the generated Verilog
32:42 Thoughts on increasing the performance
38:19 Using Vitis HLS to optimize performance
57:28 Using main memory
Install Vitis HLS
For this assignment we will be using Vitis HLS. You can install Vitis on your local machine (https://www.xilinx.com/support/download.html). If you do this, you should install Vitis 2020.2 on an Ubuntu 18.04 (or newer) machine. To install it will take approximately 100GB.
Note: If you prefer, you can install Vitis on a Windows machine. I haven’t tested this. It should work with the assignment, with a few extra considerations. For example, the Makefile which has been provided to quickly compile and run your design may not work unless you have a build system setup. You can still build and run within Vitis HLS, so it is not a big difference, but keep in mind you may run into problems such as this.
To run the Vitis tools you should do the following:
source /tools/Xilinx/Vitis_HLS/2020.2/settings64.sh
export LIBRARY_PATH=/usr/lib/x86_64-linux-gnu:$LIBRARY_PATH
vitis_hls
The first step will add the Xilinx binaries to your PATH. The second step was needed on my machine to solve a bug (might not be needed with different Ubuntu versions). The last command runs Vitis HLS.
Create Vitis HLS project
Download source code located here
matrixmul.cpp: a source file with a matrix multiplication algorithm in C++.matrixmul.h: the header file that defines the interface for the core functionmatrixmultest_data.h: the header file that contains all the test data.test_results.h: a set of data with correct values based off of the test data for testing the functionalitymatrixmul_test.cpp: a test bench (only useful for simulation) that helps verify your code
Run Vitis (vitis_hls) and create a new project
-
When the GUI opens, select Create Project.
-
Choose a name for your project and place it in your the desired location (I named mine MxM and placed it in Documents/HLS) Select next.
-
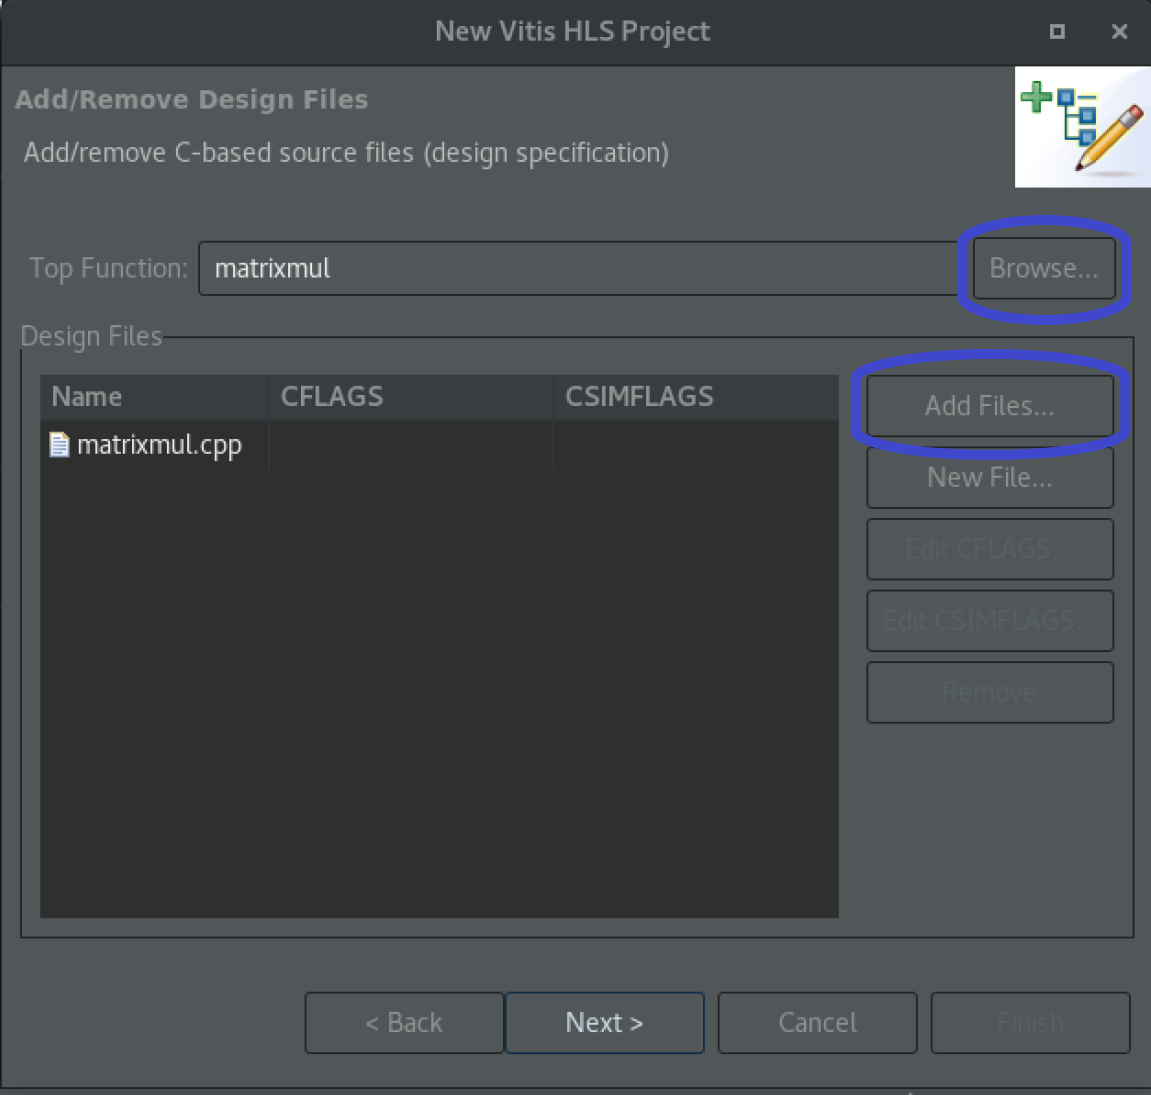
For design files, select add files and choose matrixmul.cpp from the downloaded source code. For the top function browse and choose matrixmul. Select next.
-
For test bench files, select add files and choose matrixmul_test.cpp. Select next.
-
Under solution configuration, you can change the solution name or leave it as “solution1.” Leave the period at 10us and change the board to the xc7z020clg484-1. Select Finish.
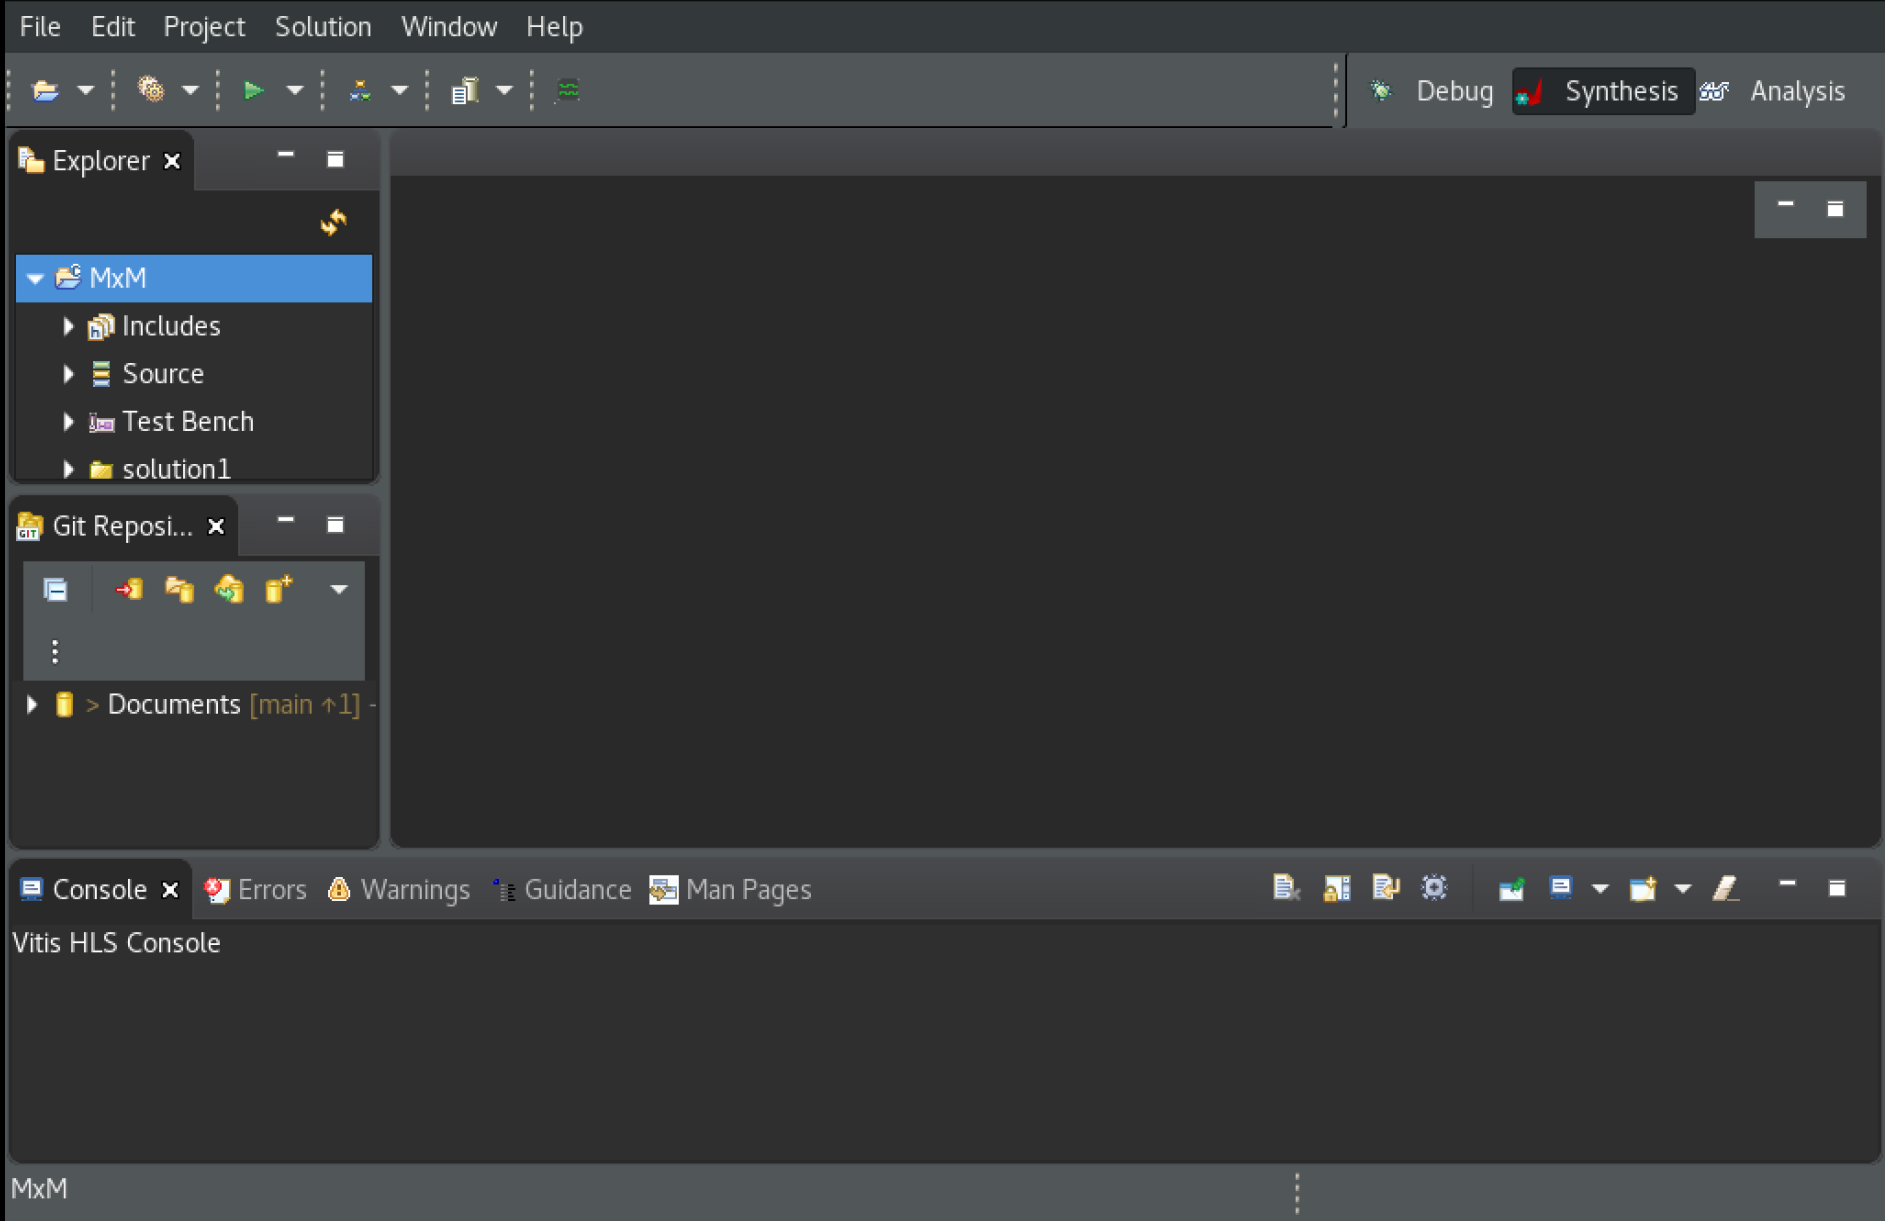
- Looking at the above image, matrimul.cpp can be found under the drop-down menu Source on the left side of the screen. Open it. Changes that you make to the code here with automatically update the code in VS.
Simulating the Code
Once the project is set up, check to see if the code is working. There are two different ways you will run the code, C Simulation and C Synthesis.
C Simulation
C Simulation is much like when you run the code in Visual Studios. It will run the test bench file and print any outputs to the console.
This can be done by either clicking on the down arrow next to the green triangle and selecting C Simulation or by selecting Project at the top of the screen and then clicking on C Simulation. Select okay on the window that pops up and wait for the code to run.
This project has three test cases. After running the simulation, the console should print out three success statements. If this did not happen, be sure that the code does not contain any modifications and all the data files have been downloaded and saved into the same folder as your design and test bench files.
C Synthesis
C Synthesis is the simulation run to determine what resources will be used on the board.
-
It is run by selecting the green triangle located towards the top of the screen.
-
After running screen like the one below will appear.
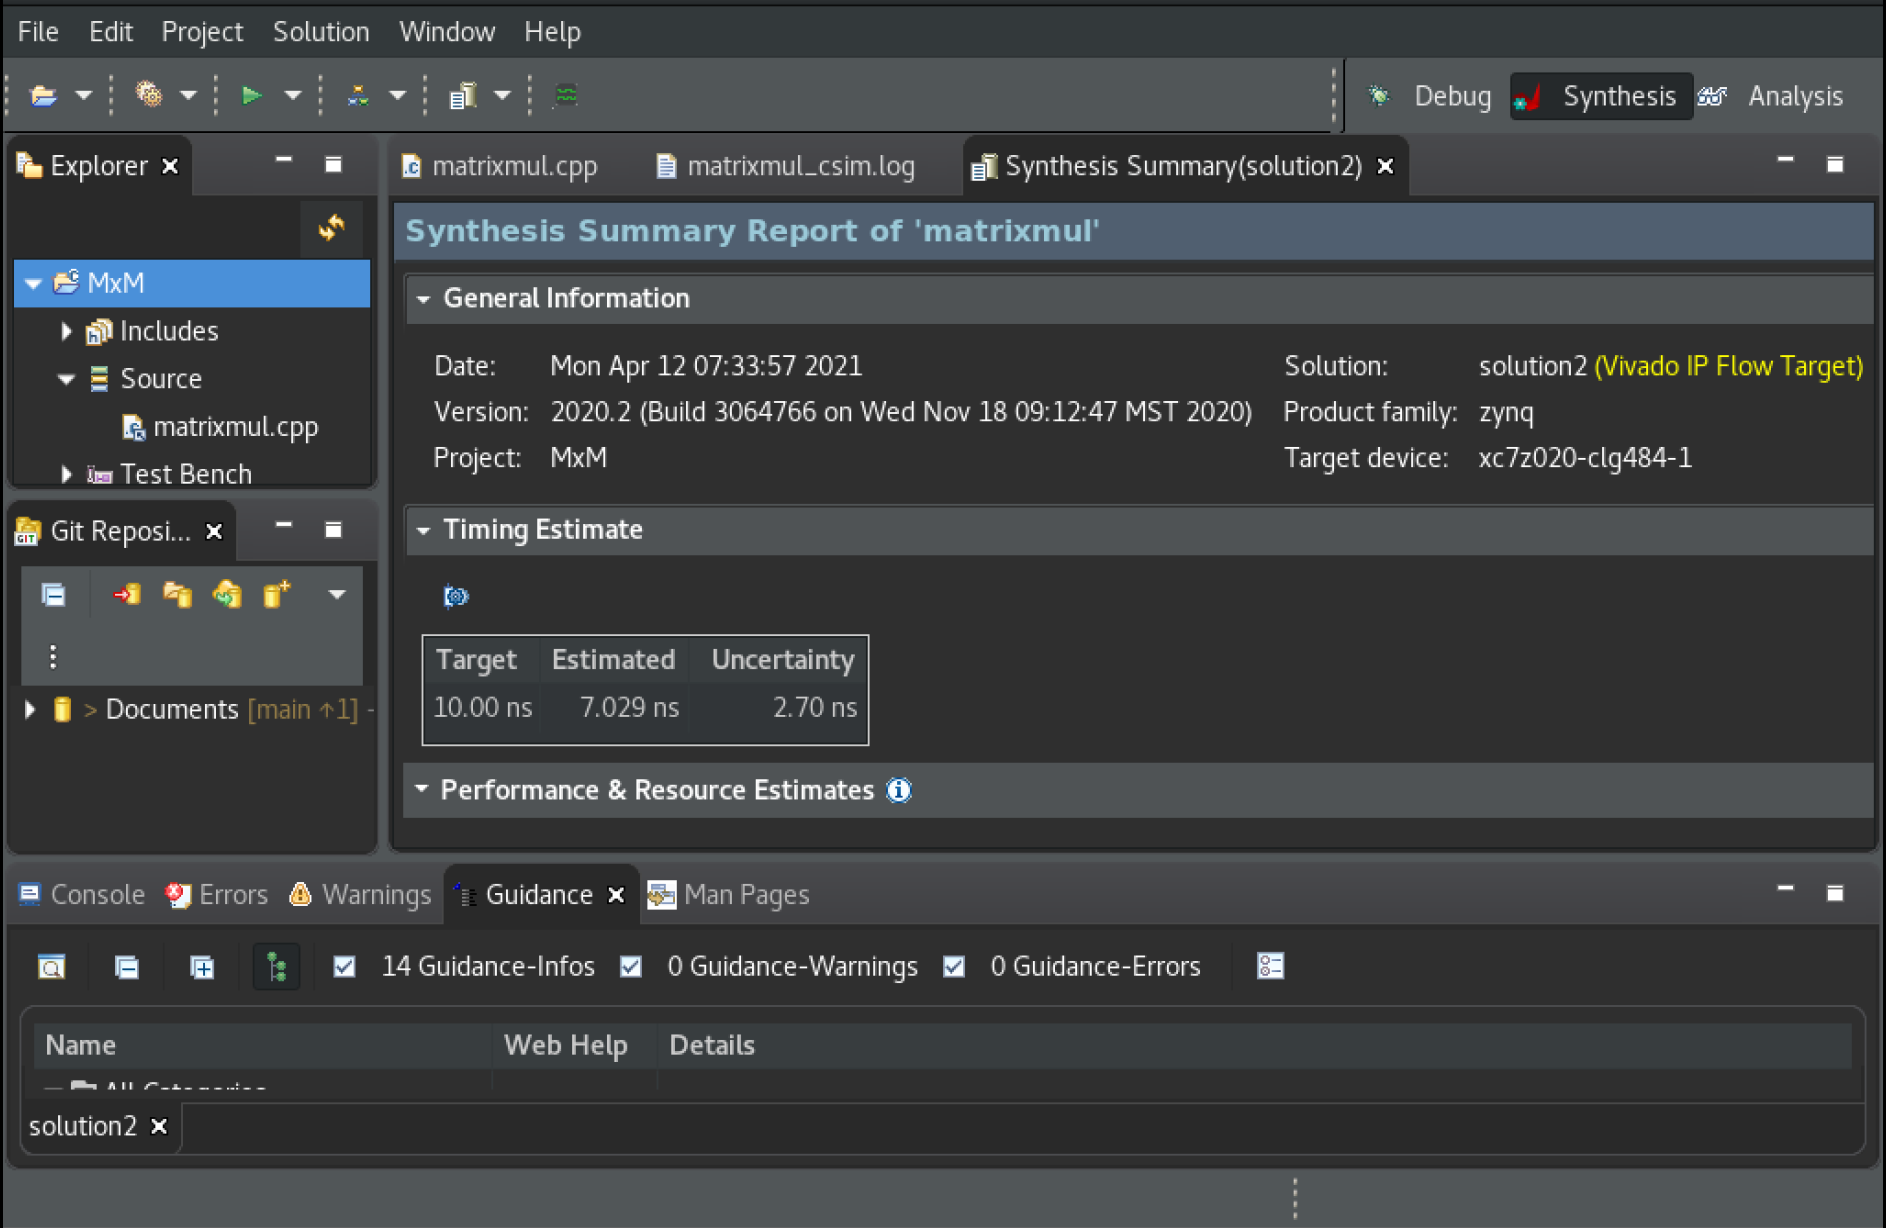
- Scroll in the Synthesis Summary Report section. The part that will be focused on during this tutorial is the section is the first box under Performance and Resource Estimates, as shown below.
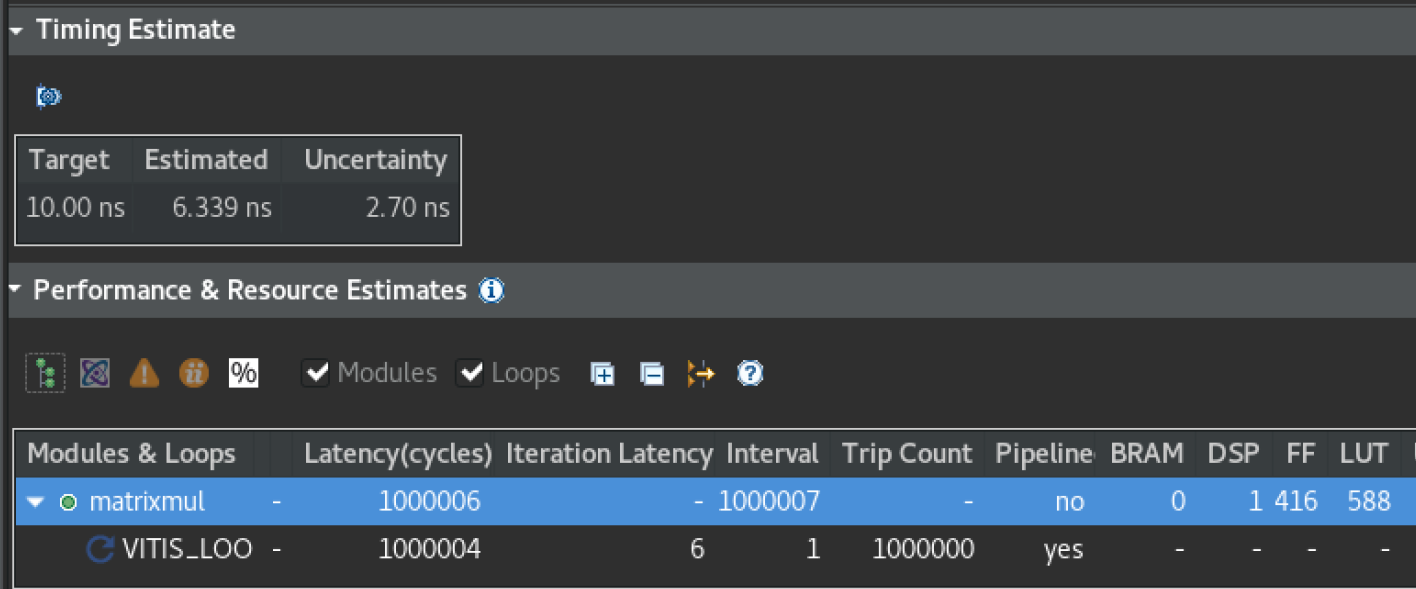
- Take note of the unoptimized latency and the amount of resources. These are the values we will compare to in the next section.
Adding HLS Optimizations
This section will focus on adding optimizations to the program in order to decrease the latency.
.PNG)
-
As seen in the image above, there is a Directives window. If this window is not there, go to Window->Show View->Show Directives.
-
These optimizations can be added in a few different ways, this tutorial will show how to add pragmas in code and directives in the GUI.
-
You may do either one of these options or a mixture of the two, but be sure before synthesizing that there is just one of each command.
Helpful tip: Before starting, name all of your for loops. This is done simply by adding “[name]: “ in front of the for of each loop. Doing this makes it easier to add Directives and makes the code more organized. I named my for loops row, col, and product respectively.
Pragmas
Adding Pragmas to the code automatically updates the directives in the GUI.
For a full list of the different pragmas, what they are, and what they do, see the user guide starting in Chapter 16. This will be useful as you explore different optimizations.
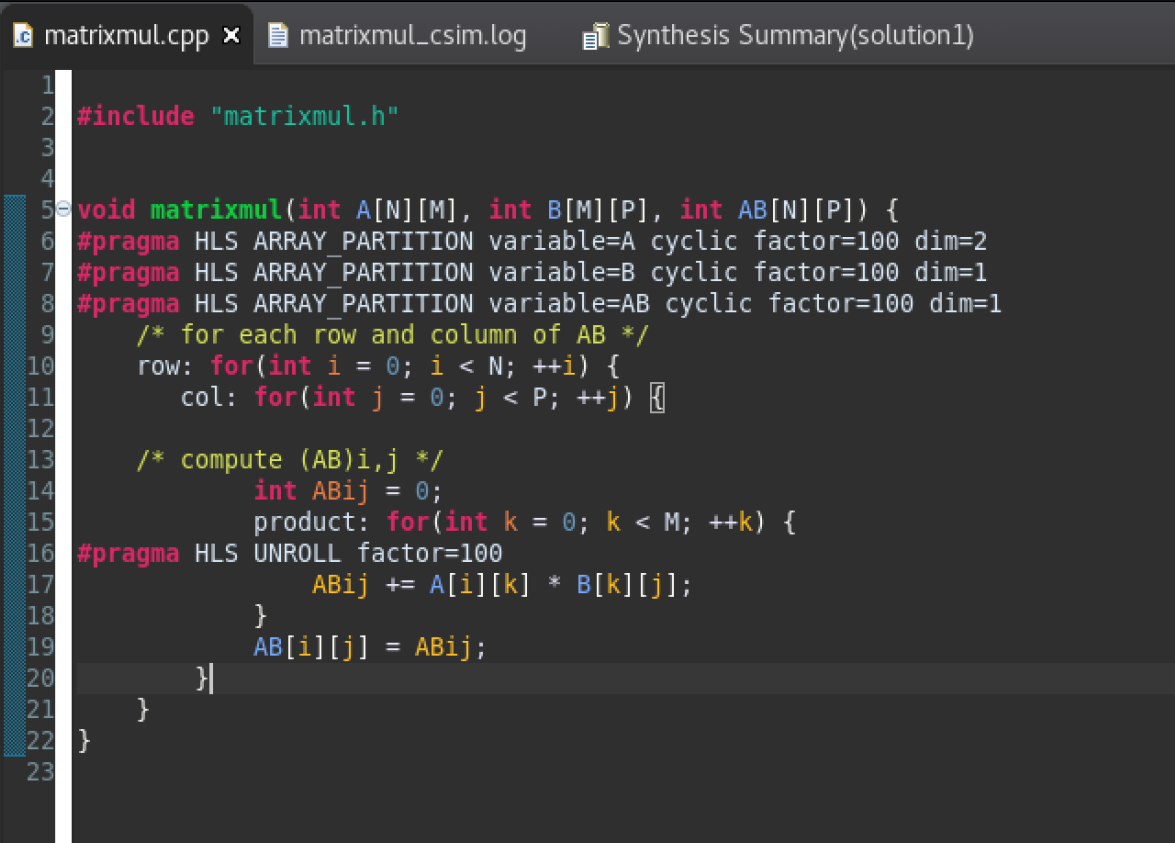
- To start, enter the following lines of code into matrixmul.cpp just inside the function:
#pragma HLS ARRAY_PARTITION variable=A cyclic factor=100 dim=2
#pragma HLS ARRAY_PARTITION variable=B cyclic factor=100 dim=1
#pragma HLS ARRAY_PARTITION variable=AB cyclic factor=100 dim=1
-
These lines partition out the arrays into different memory blocks so more can be accessed at a time. For more detail check out the user guide linked above.
-
And inside the third for loop which I have named product, include the following line:
#pragma HLS UNROLL factor=100
Altogether the code should look like:
Directives
Adding Directives in the Directives window does not change the code in any way.
-
Go to the Directives window if not already up with Window->Show View->Show Directives.
-
If you comment out any pragmas that have already been written and save, the commands will disappear from the Directives window. To add a new directive, right click one of the variables, functions, or loops and select Insert Directive
-
Here a new window will pop up with all the different options of commands and their various input.
-
See if you can recreate the commands from the pragmas (inside of the pink box) inside this directive window.
Once you finish, your Directives window should look like the image below:
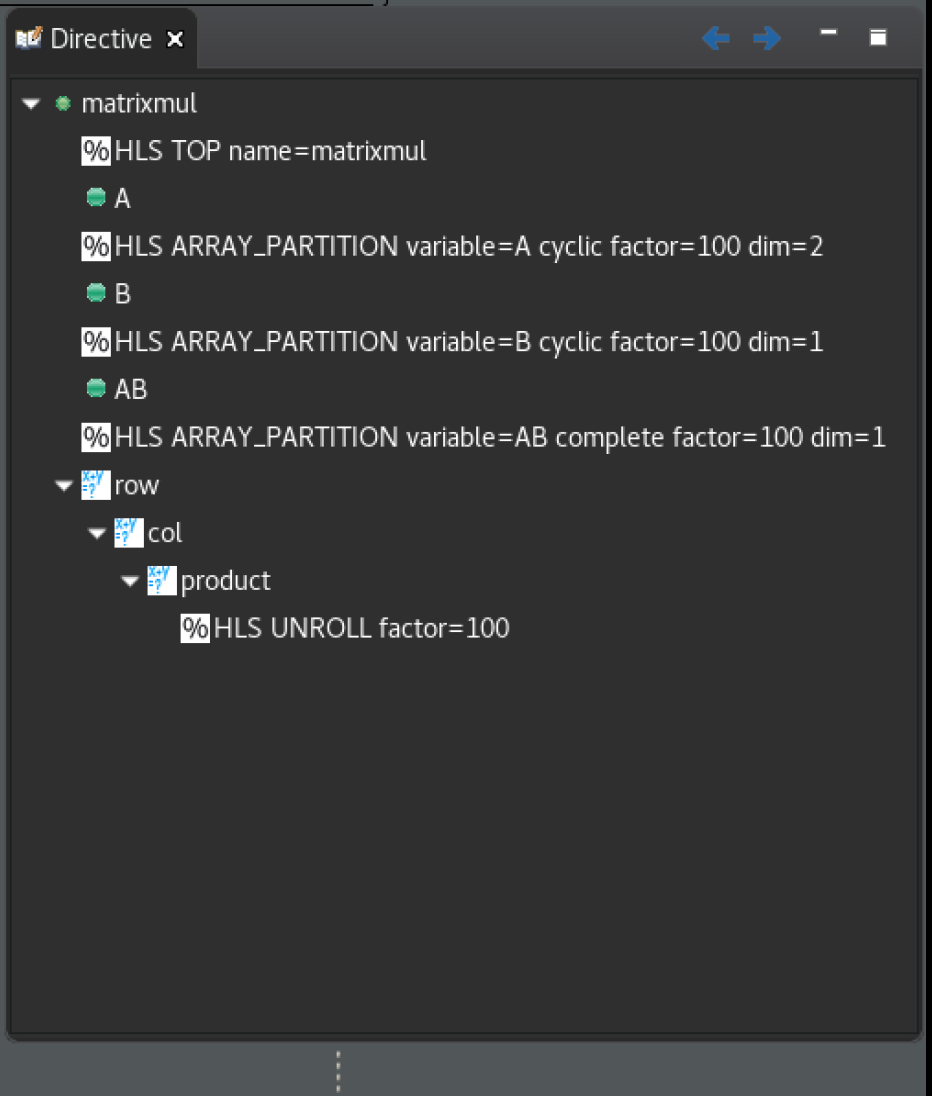
If you create a pragma and a directive for the same command, you would see it twice in the Directives window. Don’t do this. Choose one or the other and check your window for duplicates.
Synthesize
Once everything is completed, run C synthesis.
Compared to the values shown before, what is the new latency? How many times better is it than the original, unoptimized version? (Hint: the new latency should be under 50,000)
Explore
See what other commands you can add to reduce the latency. Play around, see what makes things better and worse. Try to get the latency as low as you possibly can.
Watch your resources to ensure that you don’t exceed the amount of resources available on the board that was selected for this solution.
Additional Notes
Some optimizations that can be done aren’t in pragmas or directives but changing the code itself. Feel free to play around with the written code but be sure to run C Simulation to ensure that the code is still working correctly. It doesn’t matter how fast the code runs if it doesn’t work right.
If you would like to try a new optimization but don’t want to lose what you have, you can create a new solution. To do this, select Project from the top tool bar and then New Solution. This new solution will appear in the Explorer drop down menu on the left.