In order to award badges, the BYU Computing Boot Camp is currently considering using a mixture of project-based assessments and code-based assessments.
For project-based assessments, users will create an end-product that will involve using creativity to make something new out of the subject material. This will require these projects to be reviewed by humans due to the many types of submissions that can be received. Staff of the Computing Boot Camp website will review submissions and manually award badges if they believe the project proves that the user has sufficient knowledge in the subject.
For code-based assessments, users will be required to create software that conforms to specified instructions, meaning that an automated pass-off test can be used to evaluate the user’s work and then award the badge.
Whether a project-based assessment or a code-based assessment is used to award the badge for a specified sub-module will be up to the discretion of the staff of the BYU Immerse Program.
This guide will attempt to explain how to create an automated pass-off test in order to implement a code-based assessment. This is a complicated guide, and may require a couple of read-throughs for you to fully understand it, so don’t lose hope if parts of this are going over your head. In addition, I’m not a perfect writer, so if something doesn’t seem to be adding up, a quick Google search should be enough to fill in the gaps.
How it works
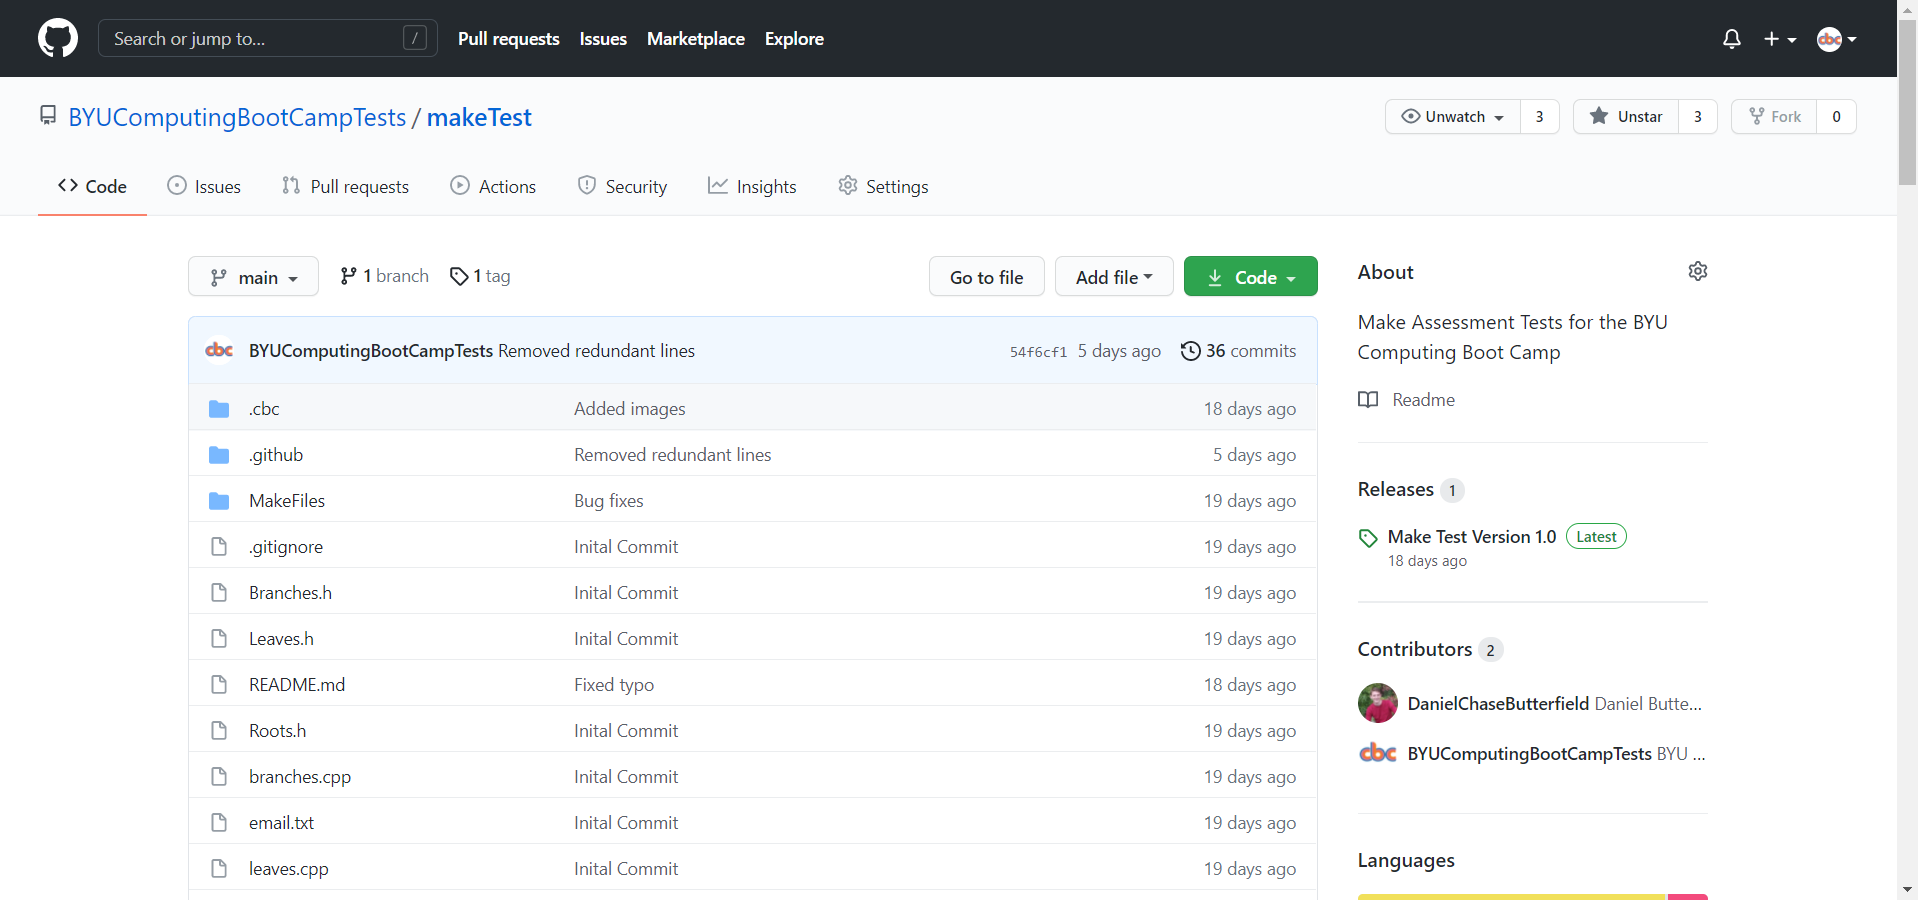
First, I want to explain how the Automated Pass-off Tests are currently set up, so that you can understand why we are doing what we are doing. Currently, we are using a GitHub Repository with Github Actions to automated the testing process. The makeTest repository, that is owned by BYUComputingBootCampTests, is a fully functional automated testing repository for the Make Mini-badge. Click on the button below to go to the repository and see if you can earn the badge! You can also go there and take a look at the README.md, which should give you a good basic understanding of the setup.
EARN THE MAKE BADGE
▶
Using the makeTest repository as an example, I’ll outline the process. First of all, the user needs to fork the repository, write the necessary code, and then submit a pull request. This is necessary because it gives us a way of finding the user’s code through the pull request that has been submitted. It also gives us the liberty of providing starter files for the user to work with along with a README.md that contains instructions.
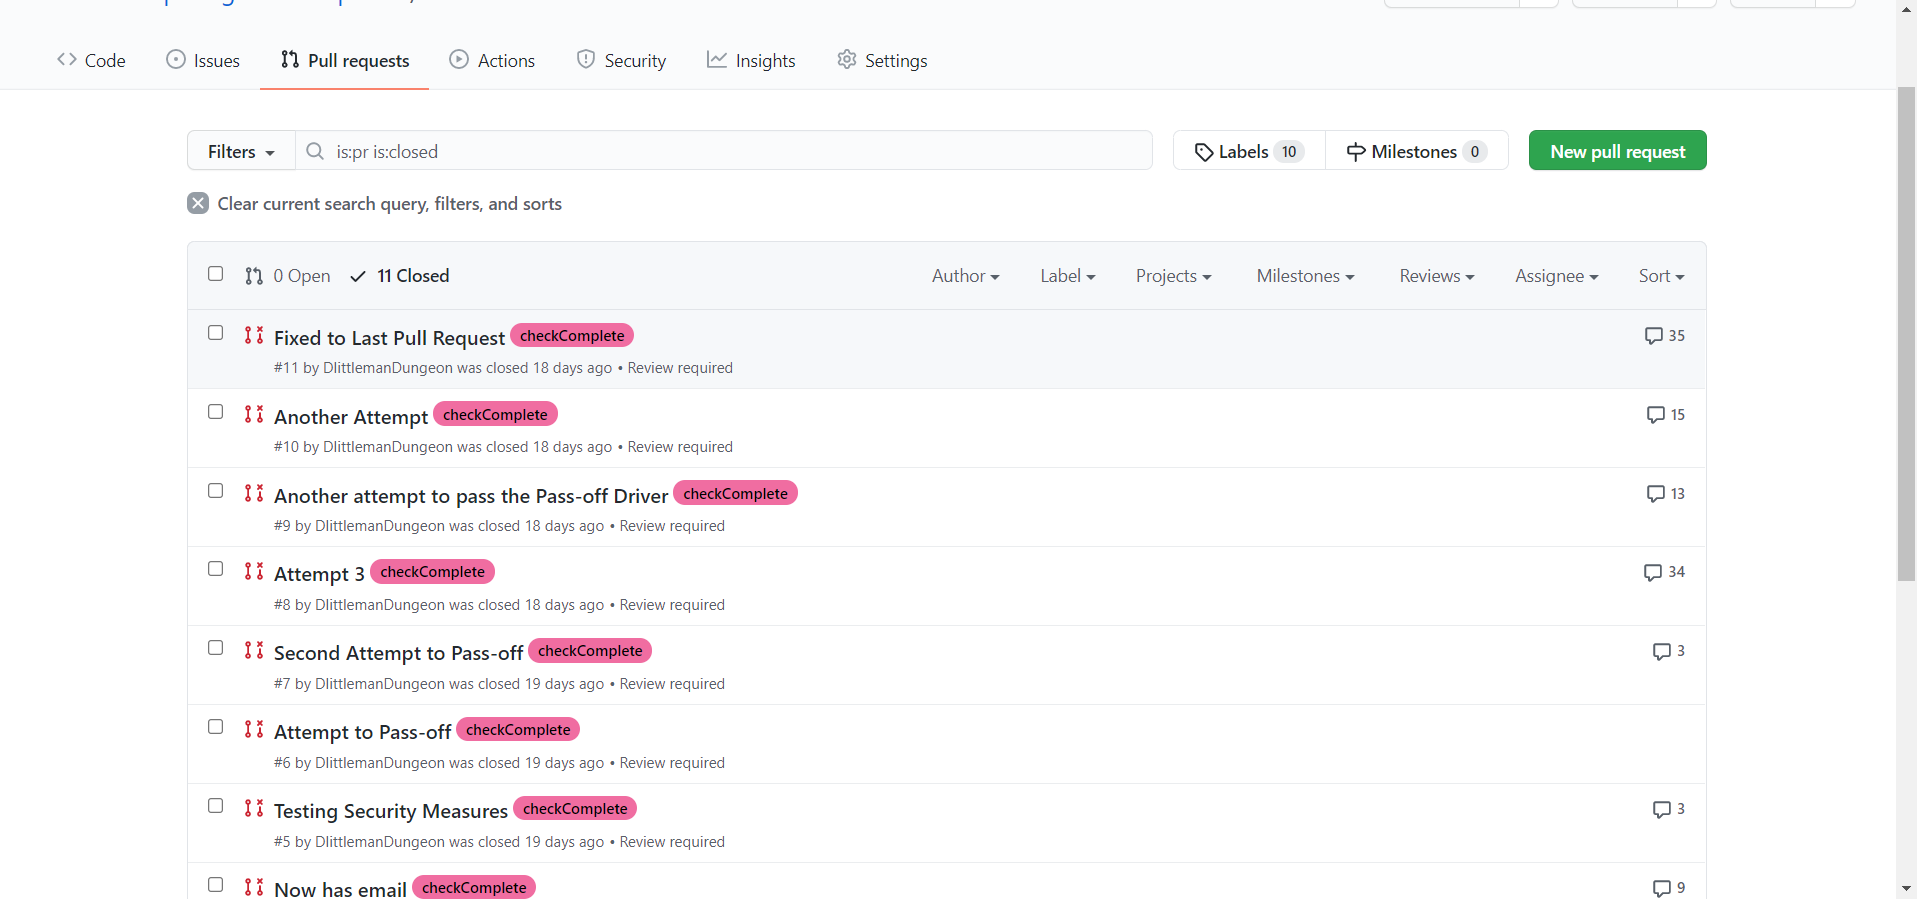
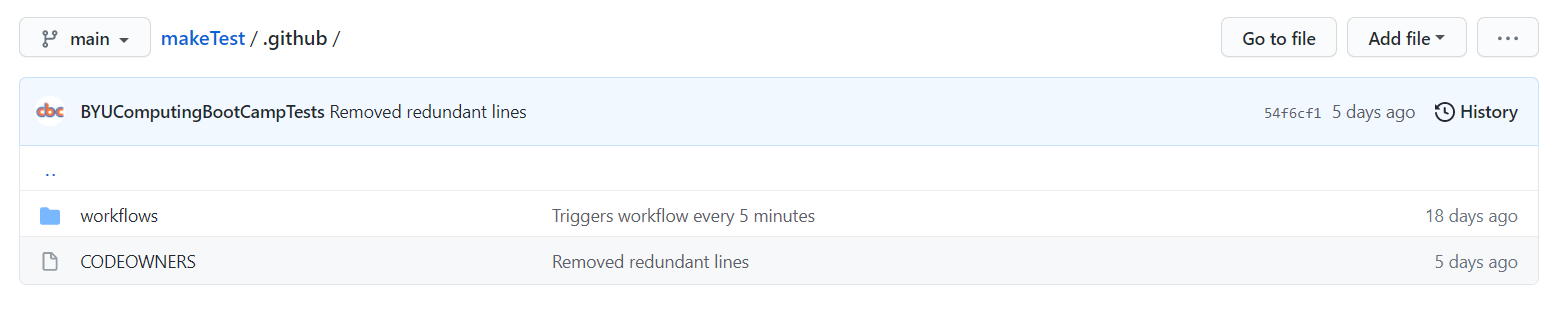
You may be wondering, “What happens if the pull request gets merged? Wouldn’t that potentially mess up the repository?” You’d be correct, and for that reason the framework is set up so that the user only needs to submit a pull request, not merge one. The pass-off files will automatically pull the necessary code from the user’s pull request so that no merging is necessary. In addition, if we allowed merging, users could potentially edit the pass-off tests to cheat the system (more on that later). For this reason, the makeTest repository has settings enabled that don’t allow merging without approving reviews from CODEOWNERS (users on GitHub with “ownership” over the code). The CODEOWNERS file, which is always found within a .github folder in a repository, specifies which users own which code. The makeTest repository has deemed the BYUComputingBootCampTests user as a CODEOWNER for all the files in the repository, which effectively means that nothing can be merged without our approval. This stops any malicious activity from users.
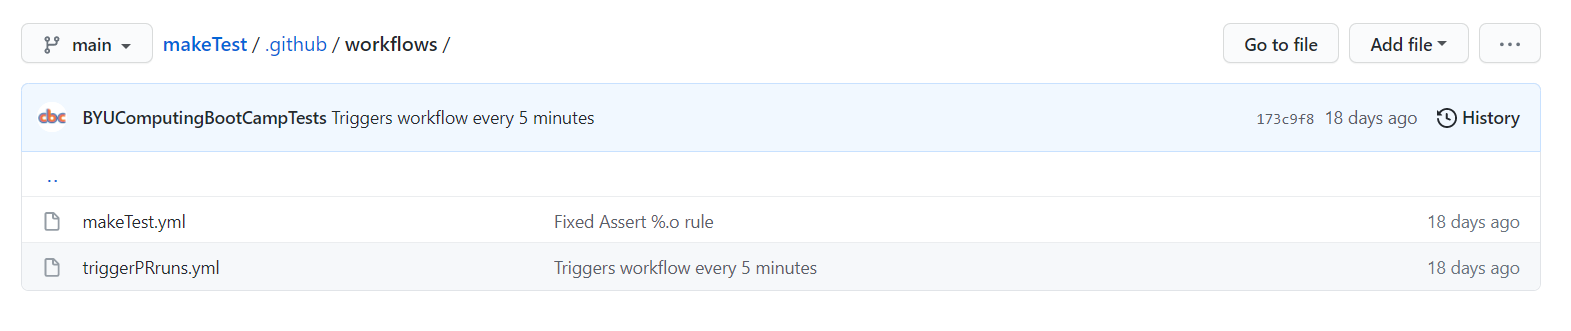
After the user submits their pull request, GitHub Actions comes into play. GitHub Actions allows for automated commands to be run on a machine with the repository’s contents. Using this functionality, we can have the machine execute pass-off code to evaluate the user’s code. The actions are triggered by workflow files, that are always stored in the .github/workflows folder in a GitHub repository. If the workflow files aren’t present here, you won’t be able to use them. The workflow files are set up to run once every 5 minutes (but with delay on GitHub’s side, this ends up averaging to around every 20 minutes), and once these files run, they look to see if there are any open pull requests. If there are, they start to work their pass-off magic.
Because these workflow files are stored within the repository itself, that means that every single user has access to look inside these workflow files and edit them if they so desire. This is what would allow users to “cheat the system” if we allowed merging in our repository. All they would have to do is remove all the pass-off lines of code in the workflow files, and leave the line that submits the badge to them. It’s incredibly easy to do. Because of this, we have set up the framework so that the user’s submitted code and our pass-off code remains separate at all times (This is why the pass-off tests run on a predetermined schedule instead of triggering on a pull request - triggering on a pull request would cause the user’s workflow files to be run, not ours). So, even though it may be a little strange, this is why the user submits a pull request and the repository pulls data from their pull request.
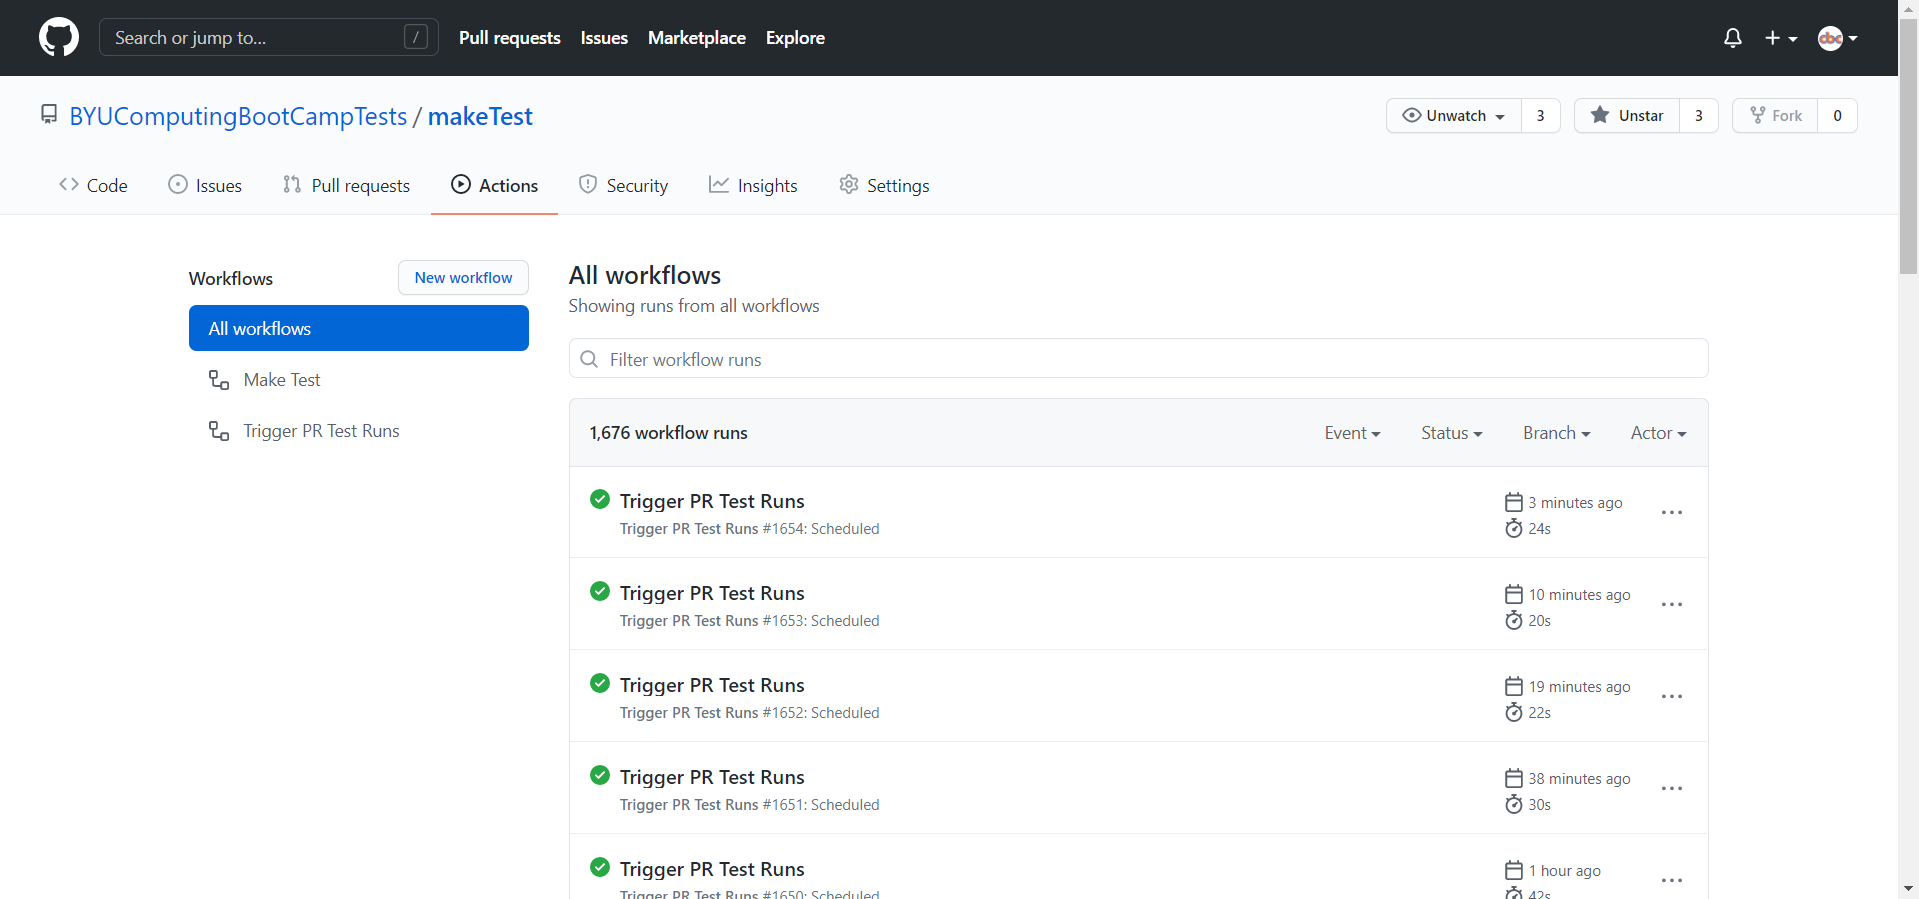
Now, we get into the pass-off magic. There are actually two workflow files that are in the .github/workflows folder, the triggerPRruns.yml workflow and the makeTest.yml. The one that runs every 20 minutes is the triggerPRruns.yml, which I’ll refer to as the “Trigger PR Test Runs” workflow. This workflow is in charge of finding all of the open pull requests, and then using a javascript file in the .cbc folder to trigger the makeTest.yml workflow on each one. Why is this necessary, you may ask? This is to allow us to run multiple tests simultaneously. We want the workflow file to run a test for each of the open pull requests, but GitHub Actions only allows us to trigger a specific workflow once every 5 minutes (at the most). By having two workflows, the Trigger PR Test Runs workflow is triggered once every 20 minutes-ish, and it can trigger the makeTest.yml workflow on each and every open pull request (up to 12, as the tests take some time, and if two Trigger PR Test Runs workflows run concurrently, it will break the repository). So if multiple users submit pull requests, each of their submissions will be tested in around 20 minutes.
The makeTest.yml workflow, which I’ll refer to as the “Make Test” workflow, is what actually tests the user’s code. It goes to the specific pull request, grabs the files we want to test, and then uses script commands to do all sorts of things (like build and compile code, run other programs, run linux commands, etc). The Make Test workflow grabs two Makefiles from the user’s repository, builds code with them, runs the code and asserts that the output is correct, and then issues the Make Badge. All of this is easily facilitated by javascript files that I have written in the .cbc folder, which the Make Test workflow uses frequently. Finally, the Make Test workflow will issue comments on the pull request throughout the testing process, so that the user can know exactly where they passed and exactly what they messed up.

That is the entire process! Hopefully it’s not too complicated to understand. A similar process can be used for all code-based automated testing repositories that we want to make in the future. And since all of this code is publicly available in the .github and .cbc folders, it will be easy to reuse and adapt to other pass-off drivers.
The big question you may have is this: “Why do this instead of having a pass-off on the CBC Website? Wouldn’t that be easier?” That is an excellent question. The main reason why we aren’t doing it on the CBC website is because it doesn’t have a back-end. The back-end of a website authenticates user requests and verifies that the user can only access programs that they are authorized to use. Without a back-end, there is no way that we can stop users from running arbitrary javascript to award themselves the badges without any effort. In addition to that reason, using GitHub means we can use their website for hosting these tests, instead of having to build it all ourselves on the CBC website.
Now that you know how it works and why it’s built this way, I will go into the specifics of each file and how they work exactly, so that you can edit these files according to your pleasure, or even create your own.
.github Folder
This folder contains all of the files that outline workflows and CODEOWNERS. The workflows are contained in the “workflows” folder (and they have to be here to function properly), and the CODEOWNERS file is in this directory.
CODEOWNERS
The CODEOWNERS file is a file specific to GitHub, and specifies which users on the site are “owners” of code in certain parts of the repository. This doesn’t actually make these users owners of the code, as the repository will still be owned by the creator of the repository, but rather acts more like they have duties to protect the code by reviewing changes to it.
The syntax for the CODEOWNERS file is as follows:
<File(s) to be owned> @<User who will be a codeowner for it>
A CODEOWNERS file can have as many of these lines as desired. The CODEOWNERS file in the makeTest repository only has one line in it:
* @BYUComputingBootCampTests
A CODEOWNERS file shares some syntax with the linux terminal, so the * refers to all of the files in the repository. This means that the user “BYUComputingBootCampTests” becomes a CODEOWNER of every file in the repository. And since the makeTest repository is configured to require an approving review from CODEOWNERS before any merges can be performed, we effectively have disabled merging to our repository.
triggerPRruns.yml
The triggerPRruns.yml file contains the following code:
name: Trigger PR Test Runs

on:
  workflow_dispatch:
  schedule:
    - cron: '0/5 * * * *'

jobs:
  triggerRuns:
    runs-on: ubuntu-latest
    steps:
    - name: Checkout Repository
      uses: actions/checkout@v2

    - name: Setup Node.js environment
      uses: actions/setup-node@v2.1.5

    - name: Install octokit/core.js
      run: npm install @octokit/core

    - name: Trigger makeTest.yml for each PR
      run: node .cbc/triggerRunForAllPRs.js ${ secrets.AUTH_TOKEN }
I’ll try to explain this from the top-down.
Every workflow file should have a name. This name will be shown when the workflow file is run in the “Actions” tab of the repository. I’ve named this workflow “Trigger PR Test Runs”. The syntax for naming is as follows:
name: <name of workflow>
Next, the on: defines when a workflow will run. See GitHub Docs - Events that trigger workflows for information on the specific formatting of this part of the yml file. Basically, you can add as many triggers as you want, and triggers can have specific settings (which are denoted by the “-“ and listed after the specific setting). So, in this workflow file, I have two triggers: workflow_dispatch and schedule. workflow_dispatch means that I can manually trigger it at any time, which is useful for debugging. schedule means that the workflow will automatically trigger according to a defined timetable. The line after “schedule:” that says
- cron: '0/5 * * * *
defines the specific timetable that the workflow will run at. See GitHub Docs - Events that trigger workflows for information on the syntax of the “cron” setting. This cron tells GitHub that the workflow should run every 5 minutes (however, with GitHub’s delay, this ends up being around 20 minutes on average).
Next, are the jobs, or tasks that the workflow will run.
jobs:
    triggerRuns:
In this workflow file, I only have one job called “triggerRuns”.
runs-on: ubuntu-latest
This line tells GitHub Actions that I want the following job to be run on the latest Ubuntu version available.
Now, we get to the steps, or specific actions, that the job will do. Steps can be defined using the following syntax:
steps:
  - (name:) (name of first step)
    (id:) (id for first step)
    (uses:) (Action to use)
    (run:) (Bash script commands to run)
  - (name:) (name of second step)
    ...
All of these lines are technically optional, but you need to have at least one of them for a step to actually do something (and for the workflow to properly compile). For all of the options you can use in a step, see the following documentation: [GitHub Docs - jobs.
name: defines the name of the step to use on GitHub.
id: gives the step an id value, by which other steps can refer to this step and receive its output.
uses: tells the step to run a pre-built action, which is basically code that someone else has already built to accomplish a certain task. This can make our lives a lot easier. For example uses: actions/setup-node@v2.1.5 will automatically install Node.js onto the machine.
run: tells the step to run the following bash script commands.
You can have as many steps as you want in a job. I’ll now explain the specific steps that I have in the Trigger PR Test Runs workflow:
- name: Checkout Repository
  uses: actions/checkout@v2
This step downloads the repository onto the ubuntu machine.
- name: Setup Node.js environment
  uses: actions/setup-node@v2.1.5
This step sets up Node.js on the ubuntu machine for running javascript files.
- name: Install octokit/core.js
  run: npm install @octokit/core
This step installs octokit/core.js, so we can make API calls to the GitHub API using javascript.
- name: Trigger makeTest.yml for each PR
  run: node .cbc/triggerRunForAllPRs.js ${ secrets.AUTH_TOKEN }
This step runs my custom triggerRunForAllPRs.js file, that uses API requests to the GitHub API to trigger a pass-off test for each open PR in the repository. Note the ${ secrets.AUTH_TOKEN }. This tells GitHub Actions to replace this section with the variable value contained in secrets.AUTH_TOKEN. For the javascript file to successfully make
API calls, it needs an authorized token for the BYUComputingBootCampTests user.
(IMPORTANT NOTICE: For the statement ${ secrets.AUTH_TOKEN }, the single curly brackets should actually be DOUBLE curly brackets. Throughout this entire guide, all matching double curly brackets have been replaced with single curly brackets so that they aren’t automatically replaced by markdown or HTML. But they are actually double curly brackets in the workflow files, so be sure to use double curly brackets when editing them)
As you can see, this workflow doesn’t actually trigger any tests directly. Rather, it just sets up the necessary infrastructure to call a javascript file, which handles the pass-off triggering.
For information on how to use the “triggerRunForAllPRs.js” file, see the section with the same name below.
makeTest.yml
The makeTest.yml contains a lot of code, so I won’t copy it as one big code block. Instead, I’ll go through each line and explain what it does. I’ll assume that you already have the context explained in “triggerPRruns.yml” section. If you haven’t read that yet, go read it now.
name: Make Test
Here, I give this workflow the name of “Make Test”.
on:
  repository_dispatch:
    types:
      [test_pr]
This tells the workflow to trigger on a GitHub API call, and the types: [test_pr] line tells it that the API call must specify the event_type as “test_pr” for it to
trigger this workflow.
jobs:
  runTests:
    runs-on: ubuntu-latest
    steps:
This defines a job called “runTests”, tells it to run on the latest version of a ubuntu machine, and tells the file that we are about to outline some steps.
- name: Checkout Repository
  uses: actions/checkout@v2

- name: Setup Node.js environment
  uses: actions/setup-node@v2.1.5

- name: Install octokit/core.js
  run: npm install @octokit/core

- name: Install xmlhttprequest
  run: npm install xmlhttprequest
These steps download the repository, set-up Node.js on the machine, and install octokit/core.js and xmlhttprequest for making API calls with Javascript. octokit/core.js is used to make API requests to the GitHub API, and xmlhttprequest is used to make API calls to the Badgr API (for issuing badges).
- name: Get a Pull Request's Repo Name that isn't already being checked
  run: node .cbc/getRepoInfo.js ${ secrets.AUTH_TOKEN } full_name > repo.txt

- name: Save Repository name as Output Variable
  id: repo
  uses: juliangruber/read-file-action@v1
  with:
    path: repo.txt
These steps are a little bit confusing, but are a workaround for some of the limitations of GitHub Actions. The first step calls a javascript file that finds a pull request that isn’t currently being checked (we use labels to be able to detect this), and then outputs the name of the forked repository that corresponds to the pull request. This name is saved to a file. The second step takes the repository name from that file and saves it as an output for use later in the workflow. This name is used later on in the workflow to download the user’s code from their forked repository.
You may be thinking, why not just save the output of the javascript file as a variable? Well, Github Actions wasn’t made to be a pass-off driver, and so it doesn’t really have variables in the traditional sense of the word. So, instead, we use this workaround so that the pull request’s name ends up as an output variable of the second step with the id of “repo”.
For information on how to use the “getRepoInfo.js” file, see the section with the same name below.
For information on how to use the juliangruber/read-file-action@v1 action, see Read File - GitHub Marketplace.
- name: Get the Pull Request's Number
  run: node .cbc/getRepoInfo.js ${ secrets.AUTH_TOKEN } number > number.txt

- name: Save Repository Number as Output Variable
  id: number
  uses: juliangruber/read-file-action@v1
  with:
    path: number.txt
This is the same as the last two steps, except it gets the number of the pull request instead of the name of the corresponding repository. The pull request’s number ends up as an output variable of the step with the id of “number”. The pull request number is used later to make comments on the pull request so that the user can easily see how the pass-off went.
- name: Add "currentlyBeingChecked" label
  run: node .cbc/addLabel.js ${ secrets.AUTH_TOKEN } ${ steps.number.outputs.content } currentlyBeingChecked
This step calls a javascript file that adds the label “currentlyBeingChecked” to the pull request. This allows the getRepoInfo.js code to tell if a pull request is already
being tested so that it doesn’t test a user’s code twice, or miss a pull request. Notice that the javascript file takes in the number of the pull request, through the variable ${ steps.number.outputs.content }. The steps.number finds the step with the id of “number”, and the .outputs.content gets the output of that action (which is the number of the pull request.
For information on how to use the “addLabel.js” file, see the section with the same name below.
  #Problem 1 Testing
- name: Get Make File for Problem 1
  id: getMakeFile1
  run: node .cbc/getFile.js ${ secrets.AUTH_TOKEN } ${ steps.repo.outputs.content } MakeFiles/MakeFile1.txt > Makefile

- name: Comment
  run: node .cbc/makeComment.js ${ secrets.AUTH_TOKEN } ${ steps.number.outputs.content } "Makefile1.txt found"
Now, we start the actual testing of the files. Since the pull request has been labeled, we can be confident that no other makeTest.yml workflow will start to test this pull request.
The first step above calls a javascript file that downloads a file from the forked repository and saves it onto our machine for testing. The MakeFiles/MakeFile1.txt is the file designated for the first problem, so we should find a functional Makefile there. Notice that the javascript file takes in the name of the forked repository through the variable ${ steps.repo.outputs.content }. This is the same as ${ steps.number.outputs.content } from before, however changing number to repo tells GitHub Actions to get the output of the step with the id of “repo” instead of “number”.
The second step calls a javascript file that leaves a comment on the pull request that says “Makefile1.txt found”. It uses the number of the pull request to do so. Note that if the previous step failed because MakeFiles/MakeFile1.txt didn’t exist, then this step won’t run because the GitHub Action will have already terminated. At the end of the workflow are steps that will output an error comment on the pull request if certain steps fail. For example, if the first step above fails, a step found later in the workflow will output “Error - No Makefile1.txt found”. This setup makes it easy for the user to see what went wrong with their code.
For information on how to use the “addLabel.js” file or the “makeComment.js” file, see the section with the same name below.
- name: Run Make
  id: runMake
  run: make

- name: Comment
  run: node .cbc/makeComment.js ${ secrets.AUTH_TOKEN } ${ steps.number.outputs.content } "Makefile1.txt ran"
The first step above simply runs the make command, to see if the user’s Makefile will run.
The second step leaves a comment on the pull request, just like in the previous snippet. This comment says “Makefile1.txt ran”. Almost every testing step in this workflow is followed by a comment step, so from now on I won’t reference it in the documentation (since it should already be pretty clear what it does). However, I will leave it the comment steps in the code snippets that I copy.
- name: Run program
  id: runProgram
  run: ./tree > output.log

- name: Comment
  run: node .cbc/makeComment.js ${ secrets.AUTH_TOKEN } ${ steps.number.outputs.content } "Problem 1 tree executable ran"
This step tries to run the executable that the make command should have generated, and saves its output to a file called “output.log”.
- name: Read Output
  id: output
  uses: juliangruber/read-file-action@v1
  with:
    path: output.log

- name: Assert Proper Output
  id: properOutput
  uses: therussiankid92/gat@v1.5
  with:
    assertion: should.equal
    actual: ${ steps.output.outputs.content }
    expected: ${ secrets.PROGRAM_OUTPUT }

- name: Comment
  run: node .cbc/makeComment.js ${ secrets.AUTH_TOKEN } ${ steps.number.outputs.content } "Problem 1 tree executable output is correct"
The first step above uses the juliangruber/read-file-action@v1 action to save the contents of the output.log file as an output of the “output” step. The second step uses
an new action called therussiankid02/gat@v1.5 to assert that the contents of the output match the problem specifications (which can be found in the README.md file). The variable ${ steps.output.outputs.content } holds the actual output, while the GitHub secret ${ secrets.PROGRAM_OUTPUT } holds the expected output. See the section “Repository Settings/Secrets” below for documentation on how to set the values of GitHub secrets.
For information on how to use the therussiankid92/gat@v1.5 action, see Github Action Test Automation (Gat) - GitHub Marketplace.
- name: Make clean
  id: makeClean
  run: make clean

- name: Comment
  run: node .cbc/makeComment.js ${ secrets.AUTH_TOKEN } ${ steps.number.outputs.content } "Makefile1.txt clean function ran"
This step runs make clean in the directory.
- name: Find File
  continue-on-error: true
  run: |
    echo "Found? " > clean.txt
    test -f tree && echo "Yes" >> clean.txt

- name: Read Find Output
  id: find
  uses: juliangruber/read-file-action@v1
  with:
    path: clean.txt

- name: Assert File Gone
  id: fileGone
  uses: therussiankid92/gat@v1.5
  with:
    assertion: should.equal
    actual: ${ steps.find.outputs.content }
    expected: Found?

- name: Comment
  run: node .cbc/makeComment.js ${ secrets.AUTH_TOKEN } ${ steps.number.outputs.content } "Makefile1.txt clean function deleted the tree executable"
The first step above runs a command that outputs “Found? Yes” if the tree executable was found, or just “Found?” if the tree executable wasn’t found. The continue-on-error: true line causes the workflow to continue to run even if this step throws an error. Since we DON’T want to find the file (the make clean command should have deleted it), this allows us to ignore the error thrown when the file isn’t found. The run | allows us to run multiple linux commands in one step, instead of just being restricted to one.
The second and third steps assert that the output of the first step matches the expected output (which is “Found?”).
- name: Assert No Variables, Automatic Variables, Pattern Matching, or Makefile Functions in MakeFile1.txt
  id: assertNoVariables
  run: node .cbc/assertDoesNotContain.js Makefile "$,@,<,%,="

- name: Comment
  run: node .cbc/makeComment.js ${ secrets.AUTH_TOKEN } ${ steps.number.outputs.content } "Makefile1.txt doesn't contain Variables, Automatic Variables, Pattern Matching, or Makefile Functions"
This step calls a javascript file to check that the Makefile doesn’t have the characters $, @, <, %, or = in it. Since these characters are used in Makefiles to create variables, automatic variables, pattern matching, or Makefile Functions, this step verifies that the user followed the specifications in the README.md to not use those features.
For information on how to use the “assertDoesNotContain.js” file, see the section with the same name below.
  #Problem 2 Testing
- name: Get Make File for Problem 2
  id: getMakeFile2
  run: node .cbc/getFile.js ${ secrets.AUTH_TOKEN } ${ steps.repo.outputs.content } MakeFiles/MakeFile2.txt > Makefile

- name: Comment
  run: node .cbc/makeComment.js ${ secrets.AUTH_TOKEN } ${ steps.number.outputs.content } "Makefile2.txt found"

- name: Run Make
  id: runMake2
  run: make

- name: Comment
  run: node .cbc/makeComment.js ${ secrets.AUTH_TOKEN } ${ steps.number.outputs.content } "Makefile2.txt ran"

- name: Run program
  id: runProgram2
  run: ./tree > output.log

- name: Comment
  run: node .cbc/makeComment.js ${ secrets.AUTH_TOKEN } ${ steps.number.outputs.content } "Problem 2 tree executable ran"

- name: Read Output
  id: output2
  uses: juliangruber/read-file-action@v1
  with:
    path: output.log

- name: Assert Proper Output
  id: properOutput2
  uses: therussiankid92/gat@v1.5
  with:
    assertion: should.equal
    actual: ${ steps.output2.outputs.content }
    expected: ${ secrets.PROGRAM_OUTPUT }

- name: Comment
  run: node .cbc/makeComment.js ${ secrets.AUTH_TOKEN } ${ steps.number.outputs.content } "Problem 2 tree executable output is correct"
These steps do the same thing with MakeFiles/MakeFile2.txt as what has been done previously with MakeFiles/MakeFile1.txt. If you don’t understand these lines, go back to their explanations earlier in this guide.
- name: Assert compiled.txt contains all files used
  id: assertCompiled
  run: node .cbc/assertContains.js compiled.txt ${ secrets.COMPILED_TXT }

- name: Comment
  run: node .cbc/makeComment.js ${ secrets.AUTH_TOKEN } ${ steps.number.outputs.content } "compiled.txt contains proper file names"
This step uses a javascript file to make sure that the complied.txt file contains the file names that it should. Asserting proper output with GitHub secrets can be a extremely difficult when the output has multiple lines or newlines in it, so using the javascript file here allows us to easily assert a multi-lined output.
For information on how to use the “assertContains.js” file, see the section with the same name below.
- name: Make clean
  id: makeClean2
  run: make clean

- name: Comment
  run: node .cbc/makeComment.js ${ secrets.AUTH_TOKEN } ${ steps.number.outputs.content } "Makefile2.txt clean function ran"

- name: Check that Files are gone
  continue-on-error: true
  run: |
    echo "Found? " > clean.txt
    test -f tree && echo "Yes" >> clean.txt
    test -f compiled.txt && echo "Yes" >> clean.txt
    test -f *.o && echo "Yes" >> clean.txt
- name: Read Find Output
  id: find2
  uses: juliangruber/read-file-action@v1
  with:
     path: clean.txt

- name: Assert File Gone
  id: fileGone2
  uses: therussiankid92/gat@v1.5
  with:
    assertion: should.equal
    actual: ${ steps.find2.outputs.content }
    expected: Found?

- name: Comment
  run: node .cbc/makeComment.js ${ secrets.AUTH_TOKEN } ${ steps.number.outputs.content } "Makefile2.txt clean function deleted the tree executable, compiled.txt, and .o files"
These steps make sure that the make clean command works, as explained previously.
- name: Assert %.o rule
  id: assertORule
  run: node .cbc/assertContains.js Makefile "%.o:"

- name: Comment
  run: node .cbc/makeComment.js ${ secrets.AUTH_TOKEN } ${ steps.number.outputs.content } "Makefile2txt contains a %.o rule"

- name: Assert no "main", "leaves", "Leaves", "roots", "Roots", "branches", or "Branches" found in Makefile2.txt
  id: assertNoClassNames
  run: node .cbc/assertDoesNotContain.js Makefile "main,leaves,Leaves,roots,Roots,branches,Branches"

- name: Comment
  run: node .cbc/makeComment.js ${ secrets.AUTH_TOKEN } ${ steps.number.outputs.content } "Makefile2txt doesn't have main, leaves, Leaves, roots, Roots, branches, or Branches in it"
These steps assert that MakeFiles/MakeFile2.txt follow the specifications for problem #2.
This is the end of the pass-off tests. If the user’s code has made it this far without the workflow terminating, then they have passed! We can now transition into issuing the Make badge to the user.
  #Issue Badge
- name: Get email.txt
  id: getEmail
  run: node .cbc/getFile.js ${ secrets.AUTH_TOKEN } ${ steps.repo.outputs.content } email.txt > email.txt

- name: Save Email as Output Variable
  id: userEmail
  uses: juliangruber/read-file-action@v1
  with:
    path: email.txt

- name: Comment
  run: node .cbc/makeComment.js ${ secrets.AUTH_TOKEN } ${ steps.number.outputs.content } "Email found - ${ steps.userEmail.outputs.content }"
These steps get the email.txt file from the user’s forked repository, and save it as an output variable. The comment outputs the email that was found, so that the user can easily see if they had a typo in their email or forgot to enter it.
- name: Issue Badge
  id: issueBadge
  run: node .cbc/badgeAPI.js ${secrets.USERNAME} ${secrets.PASSWORD} ${ steps.userEmail.outputs.content }

- name: Comment
  run: node .cbc/makeComment.js ${ secrets.AUTH_TOKEN } ${ steps.number.outputs.content } "Badge Issued. Congratulations!"
This step uses a javascript file to call the Badgr API and issue a badge to the user’s email found in a previous step. The javascript file takes in the username and password of the BYU Computing Boot Camp Test’s Badgr account in order to get authorization to issue the badge. Note that if the user’s email is invalid, this step will throw an error, and the user won’t receive the badge. However, if the email is valid, but isn’t the user’s email, Badgr will still issue the badge to that email.
For information on how to use the “badgeAPI.js” file, see the section with the same name below.
  #Failure Output for Problem 1
- name: Failure Comment
  if: always() && steps.getMakeFile1.outcome == 'failure'
  run: node .cbc/makeComment.js ${ secrets.AUTH_TOKEN } ${ steps.number.outputs.content } "Error - No Makefile1.txt found"

- name: Failure Comment
  if: always() && steps.runMake.outcome == 'failure'
  run: node .cbc/makeComment.js ${ secrets.AUTH_TOKEN } ${ steps.number.outputs.content } "Error - Makefile1.txt didn't run"

- name: Failure Comment
  if: always() && steps.runProgram.outcome == 'failure'
  run: node .cbc/makeComment.js ${ secrets.AUTH_TOKEN } ${ steps.number.outputs.content } "Error - Problem 1 tree executable crashed"

- name: Failure Comment
  if: always() && steps.properOutput.outcome == 'failure'
  run: node .cbc/makeComment.js ${ secrets.AUTH_TOKEN } ${ steps.number.outputs.content } "Error - Problem 1 tree executable output was incorrect"

- name: Failure Comment
  if: always() && steps.makeClean.outcome == 'failure'
  run: node .cbc/makeComment.js ${ secrets.AUTH_TOKEN } ${ steps.number.outputs.content } "Error - Makefile1.txt clean didn't run"

- name: Failure Comment
  if: always() && steps.fileGone.outcome == 'failure'
  run: node .cbc/makeComment.js ${ secrets.AUTH_TOKEN } ${ steps.number.outputs.content } "Error - Makefile1.txt clean didn't delete the tree executable"

- name: Failure Comment
  if: always() && steps.assertNoVariables.outcome == 'failure'
  run: node .cbc/makeComment.js ${ secrets.AUTH_TOKEN } ${ steps.number.outputs.content } "Error - Makefile1.txt has Variables, Automatic Variables, Pattern Matching, or Makefile Functions"

  #Failure Output for Problem 2
- name: Failure Comment
  if: always() && steps.getMakeFile2.outcome == 'failure'
  run: node .cbc/makeComment.js ${ secrets.AUTH_TOKEN } ${ steps.number.outputs.content } "Error - No Makefile2.txt found"

- name: Failure Comment
  if: always() && steps.runMake2.outcome == 'failure'
  run: node .cbc/makeComment.js ${ secrets.AUTH_TOKEN } ${ steps.number.outputs.content } "Error - Makefile2.txt didn't run"

- name: Failure Comment
  if: always() && steps.runProgram2.outcome == 'failure'
  run: node .cbc/makeComment.js ${ secrets.AUTH_TOKEN } ${ steps.number.outputs.content } "Error - Problem 2 tree executable crashed"

- name: Failure Comment
  if: always() && steps.properOutput2.outcome == 'failure'
  run: node .cbc/makeComment.js ${ secrets.AUTH_TOKEN } ${ steps.number.outputs.content } "Error - Problem 2 tree executable output was incorrect"

- name: Failure Comment
  if: always() && steps.assertCompiled.outcome == 'failure'
  run: node .cbc/makeComment.js ${ secrets.AUTH_TOKEN } ${ steps.number.outputs.content } "Error - compiled.txt doesn't exist, or doesn't contain all files used"

- name: Failure Comment
  if: always() && steps.makeClean2.outcome == 'failure'
  run: node .cbc/makeComment.js ${ secrets.AUTH_TOKEN } ${ steps.number.outputs.content } "Error - Makefile2.txt clean didn't run"

- name: Failure Comment
  if: always() && steps.fileGone2.outcome == 'failure'
  run: node .cbc/makeComment.js ${ secrets.AUTH_TOKEN } ${ steps.number.outputs.content } "Error - Makefile2.txt clean didn't delete the tree executable, compiled.txt, or all of the .o files"\

- name: Failure Comment
  if: always() && steps.assertORule.outcome == 'failure'
  run: node .cbc/makeComment.js ${ secrets.AUTH_TOKEN } ${ steps.number.outputs.content } "Error - Makefile2txt doesn't contain a %.o rule"

- name: Failure Comment
  if: always() && steps.assertNoClassNames.outcome == 'failure'
  run: node .cbc/makeComment.js ${ secrets.AUTH_TOKEN } ${ steps.number.outputs.content } "Error - Makefile2txt contains main, leaves, Leaves, roots, Roots, branches, or Branches"

  #Failure Output for Issue Badge
- name: Failure Comment
  if: always() && steps.getEmail.outcome == 'failure'
  run: node .cbc/makeComment.js ${ secrets.AUTH_TOKEN } ${ steps.number.outputs.content } "Error - No email.txt found"

- name: Failure Comment
  if: always() && steps.issueBadge.outcome == 'failure'
  run: node .cbc/makeComment.js ${ secrets.AUTH_TOKEN } ${ steps.number.outputs.content } "Error - Badge issue failed - Email Address wasn't valid"
These steps handle failure output when one of the previous steps fails. They use the javascript file “makeComment.js” to make this comment on the pull request. The line if: always() %% steps.<idOfStep>.outcome == 'failure' is key to the functionality of these steps. We want an error message to be output when a step crashes or throws an error. However, default behavior for workflow files is that the entire workflow terminates after an error is thrown. To get around this, we use if: always(), which means that the step will run even if a previous step threw an error. However, we don’t want every error message to print when the workflow file terminates prematurely, just one. For this reason, the always() is anded with steps.<idOfStep>.outcome == 'failure'. This means that the step will only run if its corresponding step is the one that threw the error. Just replace <idOfStep> with the id of the step that corresponds to it. This allows us to outline all of the error messages in order and in an easy to read manner.
  #Close Pull Request
- name: Close Pull Request
  if: always()
  uses: peter-evans/close-pull@v1
  with:
    pull-request-number:  ${ steps.number.outputs.content }
    comment: Auto-closing pull request after submission
    delete-branch: false
This step closes the pull request that was just tested, so that a future workflow doesn’t try to test it. Notice that we use if: always() to make sure that the pull request is closed even if the user’s code doesn’t pass.
- name: Remove Previous Labels
  if: always()
  run: node .cbc/removeAllLabels.js ${ secrets.AUTH_TOKEN } ${ steps.number.outputs.content }

- name: Add "checkComplete" label
  if: always()
  run: node .cbc/addLabel.js ${ secrets.AUTH_TOKEN } ${ steps.number.outputs.content } checkComplete
These steps use javascript to remove all of the labels on the pull request and add the “checkComplete” label to it, so that the user can tell that their pull request was tested. Again, notice that we use if: always() here.
For information on the “removeAllLabels.js” file, see the section with the same name below.
And that’s it! That’s the entirety of the makeTest.yml file. It’s a big one, but hopefully you can see how all of the steps combine together to make an effective and transparent pass-off test.
.cbc Folder
This folder contains all of the javascript files I wrote to assist the workflow files, and an image file.
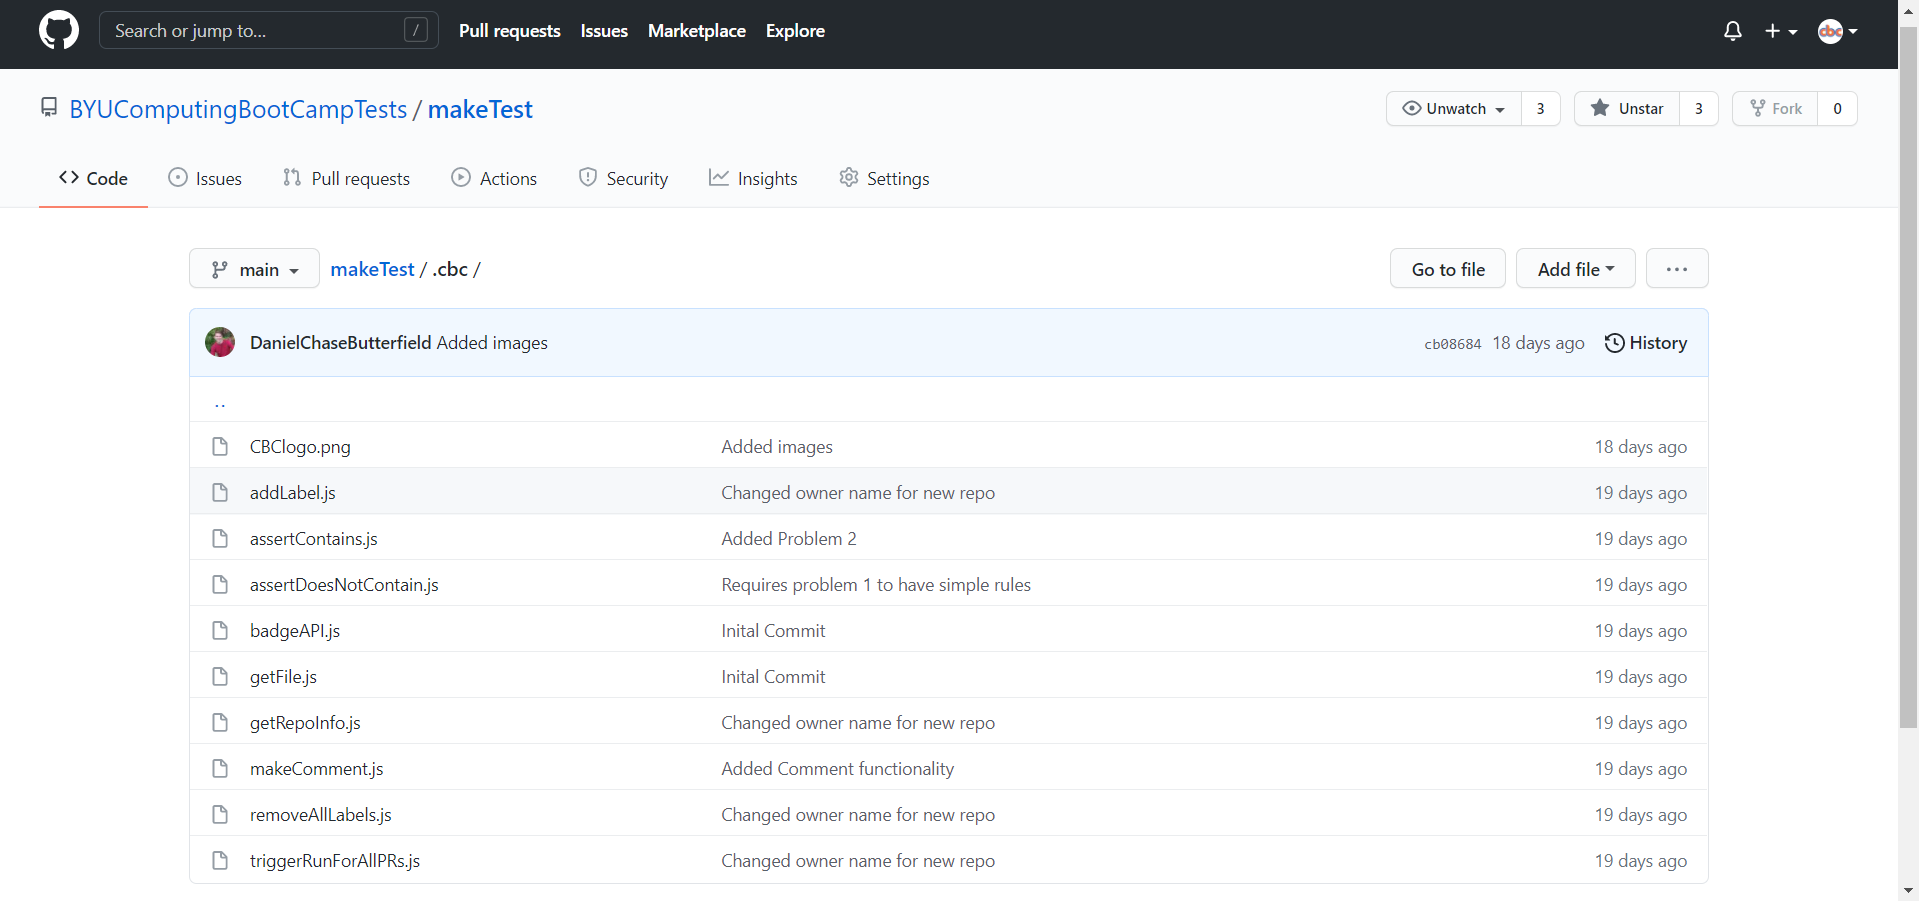
CBClogo.png

This is simply the logo of the BYU Computing Boot Camp, for use in the README.md of the repository.
addLabel.js
The addLabel.js file contains the following code:
const { Octokit } = require("@octokit/core");

const addLabel = async (authToken, issueNumber, labelToAdd) => {
    const octokit = new Octokit({auth: authToken});
    const response = await octokit.request("POST /repos/{owner}/{repo}/issues/{issue_number}/labels", {
        owner: "BYUComputingBootCampTests",
        repo: "makeTest",
        issue_number: issueNumber,
        labels: [labelToAdd]
      });

}

// Start
var authToken = process.argv[2];
var issueNumber = process.argv[3];
var labelToAdd = process.argv[4];
addLabel(authToken, issueNumber, labelToAdd);
It is used to add labels to pull requests on GitHub.
Usage: node .cbc/addLabel.js <authToken> <pullRequestNumber> <nameOfLabelToAdd>
This file requires the @octokit/core package in order to send API requests to GitHub. This is why npm install @octokit/core needs to be run in the workflow. It also contains a function called addLabel, which uses an API call to add a label to the pull request with the corresponding number. The file takes 3 parameters, an authentication token for authorizing edits to the repository (authToken), the number of the pull request we want to edit (issueNumber), and the name of the label that we want to add (labelToAdd).
An example use of this code would be node .cbc/addLabel.js ${ secrets.AUTH_TOKEN } ${ steps.number.outputs.content } checkComplete. This would add the “checkComplete” label to the pull request with the number specified.
assertContains.js
The assertContains.js file contains the following code:
const fs = require('fs')

var fileToReadPath = process.argv[2];
var required = process.argv[3].split(',');

const data = fs.readFileSync(fileToReadPath, 'utf8')
required.forEach(string => {
    assertContains(data, string);
});

function assertContains(data, string) {
    if(!data.includes(string)) {
        throw ("Error: File does not contain " + string);
    }
}
It is used to verify that a file contains specified strings.
Usage: node .cbc/assertContains.js <filePath> <requiredStrings>
The code requires fs in order to read the contents of the any file that is provided. It contains a function called assertContains() that asserts that “string” can be found in “data”. Otherwise, it throws an error, which stops the GitHub Action workflow and causes the user to not receive the badge. The code takes two parameters, the file path for the data string and a string with all the required substrings (separated by commas).
An example use of this code would be node .cbc/assertContains.js Makefile "%.o:,tree". This would throw an error if the “Makefile” file didn’t contain the strings “%.o:” or “tree”.
assertDoesNotContain.js
The assertDoesNotContain.js file contains the following code:
const fs = require('fs')

var fileToReadPath = process.argv[2];
var notAllowed = process.argv[3].split(',');

const data = fs.readFileSync(fileToReadPath, 'utf8')
notAllowed.forEach(string => {
    assertDoesNotContain(data, string);
});

function assertDoesNotContain(data, string) {
    if(data.includes(string)) {
        throw ("Error: File contains " + string);
    }
}
It is used to verify that a file does not contain specified strings.
Usage: node .cbc/assertDoesNotContain.js <filePath> <stringsNotAllowed>
The code requires fs in order to read the contents of the provided file. It contains a function called assertDoesNotContain() that asserts that some data string does not contain some smaller string inside it. Otherwise, it throws an error, which stops the GitHub Action workflow and causes the user to not receive the badge. The code takes two parameters, the file path for the data string and all the strings that are not allowed to be in the data string (separated by commas).
An example use of this code would be node .cbc/assertDoesNotContain.js Makefile "main,leaves,Leaves,roots,Roots,branches,Branches". This would throw an error if the “Makefile” file contained “main”, “leaves”, “Leaves”, “roots”, “Roots”, “branches”, or “Branches”.
badgeAPI.js
The badgeAPI.js file contains the following code:
var XMLHttpRequest = require("xmlhttprequest").XMLHttpRequest;
var computingBootCampId = '0YOSWoQPQO-ehX8P3o7ZFw';
var makeBadgeEntityID = 'opPKYN_pQFi6UWl1Q_aT5Q';

//Program starts here
var username = process.argv[2];
var password = process.argv[3];
var userEmail = process.argv[4];

//Check to make sure there are contents for each arguments
if(username.localeCompare('') == 0 || password.localeCompare('') == 0 || userEmail.localeCompare('') == 0){
    throw "Error: Missing argument";
}

var accessToken = getAuthenticationToken(username, password);
issueAssertionToTestUser(computingBootCampId, makeBadgeEntityID, userEmail, accessToken);


//This function can be used to get an authentication token to make requests with the server for the Computing Boot Camp
function getAuthenticationToken(username, password) {
    var url = "https://api.badgr.io/o/token";

    var xhr = new XMLHttpRequest();
    xhr.open("POST", url, false);
    xhr.setRequestHeader("Content-Type", "application/x-www-form-urlencoded");

    xhr.onreadystatechange = function () {
        if (xhr.readyState === 4) {
            console.log(xhr.status);
            console.log(xhr.responseText);
    }};

    var data = "username=" + username + "&password=" + password;

    xhr.send(data);

    if(xhr.status != 200)  {
        throw "Error: Invalid Credentials for the BYU Computing BootCamp - Please contact the BYU Computing BootCamp \
through the Support section on the README.md for help"
    }
    var accessToken = JSON.parse(xhr.responseText).access_token;
    return accessToken;
}

//This function uses a refresh Token to make a certain authToken reusable again to make requests with the server.
//If you have a refresh token but not the corresponding authToken that goes with it, you'll have to get a new
//authentication token.
function refreshStoredAuthToken() {
    var url = "https://api.badgr.io/o/token";

    var xhr = new XMLHttpRequest();
    xhr.open("POST", url, false);
    xhr.setRequestHeader("Content-Type", "application/x-www-form-urlencoded");

    xhr.onreadystatechange = function () {
        if (xhr.readyState === 4) {
            console.log(xhr.status);
            console.log(xhr.responseText);
    }};

    var data = "grant_type=refresh_token&refresh_token=" + refreshToken;

    xhr.send(data);
    return JSON.parse(xhr.responseText);
}

//This function will take an authToken and get the issuerInformation tied to that account
function getIssuerInformation (authToken) {
    var url = "https://api.badgr.io/v2/issuers";

    var xhr = new XMLHttpRequest();
    xhr.open("GET", url, false);

    xhr.setRequestHeader("Authorization", "Bearer " + authToken);

    xhr.onreadystatechange = function () {
        if (xhr.readyState === 4) {
           console.log(xhr.status);
           console.log(xhr.responseText);
        }};

     xhr.send();

     return JSON.parse(xhr.responseText);
}

//This function will take an authToken and issuerID and return the badgeClass information for that Issuer
function getBadgeClassInformation(issuerEntityID) {
    var url = "https://api.badgr.io/v2/issuers/" + issuerEntityID + "/badgeclasses";
    var xhr = new XMLHttpRequest();
    xhr.open("GET", url, false);

    xhr.setRequestHeader("Authorization", "Bearer " + accessToken);

    xhr.onreadystatechange = function () {
        if (xhr.readyState === 4) {
           console.log(xhr.status);
           console.log(xhr.responseText);
        }};

     xhr.send();

     return JSON.parse(xhr.responseText);
}

//This function will take an authToken, issuerId and badgeID and issue a badge to the person with the information provided.
function issueAssertionToTestUser(issuerEntityID, badgeEntityID, userEmail, accessToken) { //Assertion is another name for Badge
    //Issue the Assertion that we want to
    var url = "https://api.badgr.io/v2/issuers/" + issuerEntityID + "/assertions";

    var xhr = new XMLHttpRequest();
    xhr.open("POST", url, false);

    xhr.setRequestHeader("Content-Type", "application/json");
    xhr.setRequestHeader("Authorization", "Bearer " + accessToken);

    xhr.onreadystatechange = function () {
        if (xhr.readyState === 4) {
            console.log(xhr.status);
            console.log(xhr.responseText);
    }};

    var data = {"badgeclass": badgeEntityID,
        "recipient":{
        "identity": userEmail,
        "hashed":false,
        "type":"email",
        },
        "notify":true,};
    var dataString = JSON.stringify(data);

    xhr.send(dataString);

    if(xhr.status != 201) throw "Error: Invalid Email Address - Please put a valid email address into email.txt on your \
Forked Repository";
    else console.log("Success! Make Badge has been issued to" + userEmail);
    //return JSON.parse(xhr.responseText);
}
This file is used to send API requests to the Badgr API, specifically to issue badges to users.
Usage: node .cbc/badgeAPI.js <cbcUsername> <cbcPassword> <userEmail>
The file requires xmlhttprequest in order to send API calls to Badgr. It contains multiple functions:
getAuthenticationToken() is used to get an authToken from the Badgr API that corresponds to the username and password, so we can use it for future API calls. It takes in the username and password as parameters, and returns the authToken.
refreshStoredAuthToken() can be used to refresh an authToken, but it is currently unused.
getIssuerInformation() can be used to get information on any Issuer in the Badgr API. It takes in the issuer id as a parameter. I originally used it to get the id of the BYU Computing Boot Camp issuer, which is now stored as a variable at the top of the file. This value is necessary for issuing a badge, but since we already have the issuer id, the function is currently unused. It takes an authToken as a parameter.
getBadgeClassInformation() can be used to get information on all the badges stored in an issuer. It takes in the issuer id as a parameter. I used this to get the id of the “Make” badge, so that we could issue it. When making new automated pass-off tests, you’ll need to use this function to get the id of the badge that you want to issue. But since the Make badge id is already stored as a variable at the top of the file, this function is currently unused.
issueAssertionToTestUser() is used to issue the badge to the user. It takes four parameters, the issuer id, the badge id (to know which badge to give), the user’s email (so it knows who to give it to), and an authentication token.
The code currently only uses getAuthenticationToken() and issueAssertionToTestUser() to get an authentication token and issue a badge to the user. If it fails, it will throw an error so that the GitHub Actions workflow terminates and the user is notified that they didn’t receive the badge. It takes in three parameters, the username of the Computing Boot Camp’s Badgr account, the corresponding password, and the email of the user that should receive the badge. If any of these are missing, the file will throw an error.
An example use of this code would be node .cbc/badgeAPI.js ${secrets.USERNAME} ${secrets.PASSWORD} fakeEmail@fake.com. This would use the username and password stored in GitHub secrets, and if they were valid, it would issue the Make badge to “fakeEmail@fake.com”.
getFile.js
The getFile.js file contains the following code:
const { Octokit } = require("@octokit/core");

const getFile = async (authToken, repoInfo, filePath) => {
    const octokit = new Octokit({auth: authToken});
    const response = await octokit.request('GET /repos/{owner}/{repo}/contents/{path}', {
        owner: repoInfo[0],
        repo: repoInfo[1],
        path: filePath
      })

    console.log(Buffer.from(response.data.content, 'base64').toString('binary'));
}

var authToken = process.argv[2];
var repoInfo = process.argv[3].split("/");
var filePath = process.argv[4];
getFile(authToken, repoInfo, filePath);
This file downloads a file from a repository on GitHub, and is used to download the user’s code off of their forked repository.
Usage: node .cbc/getFile.js <authToken> <repoInfo> <filePath>
This code requires the @octokit/core package in order to send API calls to GitHub. It has a function called getFile() that downloads the file at “filePath” from the repository that corresponds with the information provided in “repoInfo”. The code takes three parameters, the authentication token for the API call, the repository info that is formatted as ownerName/repoName, and the file path of the file you want to download inside that repository.
An example use of this code would be node .cbc/getFile.js ${ secrets.AUTH_TOKEN } BYUComputingBootCampTests/makeTest .github/CODEOWNERS". This would download the file “CODEOWNERS” in the “.github” folder from the repository “makeTest” owned by “BYUComputingBootCampTests”.
getRepoInfo.js
The getRepoInfo.js file contains the following code:
const { Octokit } = require("@octokit/core");

const getRepoInfo = async (authToken, infoNeeded) => {
    const octokit = new Octokit({auth: authToken});
    const response = await octokit.request("GET /repos/{owner}/{repo}/pulls?state=open", {
        owner: "BYUComputingBootCampTests",
        repo: "makeTest"
      });

    let index = 0;
    //While there are still repositories that are open
    while(response.data.length > index) {
      //If the repository doesn't have a "currently being checked" label
      let label = "hi";
      if(response.data[index].labels.length != 0) {
        label = response.data[index].labels[0];
      }
      if(response.data[index].labels.length == 0 || label.name.toString().localeCompare("currentlyBeingChecked") != 0) {
        if(infoNeeded.toString().localeCompare('full_name') == 0) {
          repoInfo = response.data[index].head.repo.full_name;
          process.stdout.write(repoInfo);
          return;
        } else {
          repoInfo = response.data[index].number;
          var repoNumber = repoInfo.toString();
          process.stdout.write(repoNumber);
          return;
        }
      }
      index++;
    }
    throw "No Repositories waiting to be checked";
}

var authToken = process.argv[2];
var infoNeeded = process.argv[3];
getRepoInfo(authToken, infoNeeded);
This file gets the first pull request that isn’t already being checked, and returns either the full name of the repository that corresponds to the pull request or the number of the pull request.
Usage: node .cbc/getRepoInfo.js <authToken> <infoNeeded>
This code requires the @octokit/core package in order to send API calls to GitHub. It has a function called getRepoInfo() that gets a list of all the open pull requests. The function then finds the first open pull request that doesn’t have the “currentlyBeingChecked” label, and then returns either the full name of the repository (formatted as ownerName/repoName) or the number of the pull request, depending on the infoNeeded parameter (“full_name” causes the name to be returned, while anything else causes the number to be returned). This file takes two parameters, an authentication token for the API calls, and a string that defines which information should be returned.
An example use of this code would be node .cbc/getRepoInfo.js ${ secrets.AUTH_TOKEN } full_name. This would output the full name of the repository that corresponds to the first open pull request without the label “currentlyBeingChecked”.
makeComment.js
The makeComment.js file contains the following code:
const { Octokit } = require("@octokit/core");

const makeComment = async (authToken, issueNumber, comment) => {
    const octokit = new Octokit({auth: authToken});
    const response = await octokit.request("POST /repos/{owner}/{repo}/issues/{issue_number}/comments", {
        owner: "BYUComputingBootCampTests",
        repo: "makeTest",
        issue_number: issueNumber,
        body: comment
      });

}

// Start
var authToken = process.argv[2];
var issueNumber = process.argv[3];
var comment = process.argv[4];
makeComment(authToken, issueNumber, comment);
This code is used to issue comments on pull requests on GitHub.
Usage: node .cbc/makeComment.js <authToken> <pullRequestNumber> <commentToPost>
This code requires the @octokit/core package in order to send API calls to GitHub. It has a function called makeComment() that leaves a specified comment on a pull request in the BYUComputingBootCampTests/makeTest repository that corresponds to the issue number. This code takes three parameters, an authentication token for API calls, the issue number of the pull request, and the comment that you want posted.
An example use of this code would be node .cbc/makeComment.js ${ secrets.AUTH_TOKEN } 9 "BYU was here". This would leave the comment “BYU was here” on the pull request with the issue number 9 in the BYUComputingBootCampTests/makeTest repository.
removeAllLabels.js
The removeAllLabels.js file contains the following code:
const { Octokit } = require("@octokit/core");

const deleteAllLabels = async (authToken, issueNumber) => {
    const octokit = new Octokit({auth: authToken});
    const response = await octokit.request("DELETE /repos/{owner}/{repo}/issues/{issue_number}/labels", {
        owner: "BYUComputingBootCampTests",
        repo: "makeTest",
        issue_number: issueNumber
    });
}

// Start
var authToken = process.argv[2];
var issueNumber = process.argv[3];
deleteAllLabels(authToken, issueNumber);
This code is used to remove all of the labels from a pull request.
Usage: node .cbc/removeAllLabels.js <authToken> <pullRequestNumber>
This code requires the @octokit/core package in order to send API calls to GitHub. It has a function called deleteAllLabels() that simply removes any labels that are on the pull request with the corresponding issue number (in the makeTest repository). This codes takes two parameters, an authentication token for sending API calls, and the issue number of the pull request.
An example use of this code would be node .cbc/removeAllLabels.js ${ secrets.AUTH_TOKEN } 9". This would remove all labels on the pull request with the issue number 9 in the BYUComputingBootCampTests/makeTest repository.
triggerRunForAllPRs.js
The triggerRunForAllPRs.js file contains the following code:
const { Octokit } = require("@octokit/core");

const triggerRunForAllPRs = async (authToken) => {
    const octokit = new Octokit({auth: authToken});
    const response = await octokit.request("GET /repos/{owner}/{repo}/pulls?state=open", {
        owner: "BYUComputingBootCampTests",
        repo: "makeTest"
      });

    console.log(response)
    var numberOfPRs = response.data.length;
    if(numberOfPRs > 12) numberOfPRs = 12; //So that the github action doesn't overlap with the next scheduled round
    for(let i = 0; i < numberOfPRs; i++) {
        const octokitMakeTest = new Octokit({auth: authToken});
        const responseNew = await octokitMakeTest.request("POST /repos/{owner}/{repo}/dispatches", {
            owner: "BYUComputingBootCampTests",
            repo: "makeTest",
            event_type: "test_pr"
        });
        sleep(10000); //Wait 10 seconds so the last workflow has time to label the PR as "currently being checked"
    }
}

function sleep(milliseconds) {
    const date = Date.now();
    let currentDate = null;
    do {
      currentDate = Date.now();
    } while (currentDate - date < milliseconds);
  }

// Start
var authToken = process.argv[2];
triggerRunForAllPRs(authToken);
This function is used to run a workflow for each currently open pull request in the makeTest repository.
Usage: node .cbc/triggerRunForAllPRs.js <authToken>
This code requires the @octokit/core package in order to send API calls to GitHub. It has a sleep() function that will stop javascript execution for the amount of milliseconds given as a parameter, and it has a triggerRunForAllPRs() function that takes in an authentication token as a parameter, uses it to get the oldest 12 pull requests, and starts the Make Test workflow on them one by one: waiting 10 seconds between each. This stops the workflows from interfering with each other and working on the same pull requests. It starts with the oldest, goes to the next oldest, and so on. This code takes in one parameter, the authentication token for making GitHub API requests.
An example use of this code would be node .cbc/triggerRunForAllPRs.js ${ secrets.AUTH_TOKEN }. This would call the Make Test workflow on the 12 oldest pull requests.
Due to the specific functionality of this javascript file, you’ll only want to use it in the triggerPRruns.yml file, in order to avoid creating an infinite loop.
Creating an automated pass-off test (Automated Setup)
The easiest way to make a new pass-off test is using our modelTest git repository. You’ll need to login to GitHub as the BYUComputingBootCampTests user. You can get the email and password from Zephram Tripp. Then open up this page and follow the instructions to make a repo from the model. The manual setup instructions are preserved below in case you find the automated setup doesn’t work for you.
Creating an automated pass-off test (Manual Setup)
Alright, now it’s time to make a completely new pass-off test! I’ll walk through it step-by-step as much as I can, however due to the fact that many of the tests will have to vary significantly according to the subject matter being tested, some sections will be up to your creative vision.
The first step is to make a new repository on GitHub for this new automated pass-off test. Login to GitHub as the BYUComputingBootCampTests user. You can get the email and password from Daniel Butterfield (who is currently working in Professor Mangelson’s lab). Create a new public repository, and give it the name of the subject matter being tested, followed by “Test”. For example, if I wanted to make an automated test for the Python sub-module, I would name my repository “pythonTest”.
After creating the repository, copy over the .github and .cbc folders from the makeTest repository into this one, so that you can re-use a lot of the same code. Also, copy over the .gitignore file, the email.txt file, and the README.md file. There are edits that you’ll have to make to a lot of these files so that they work in the new repository and a lot of settings to configure. I’ll go through them one by one:
Repository Settings/Secrets (Manual Setup)
These are the changes that you’ll need to make to the repository itself for the workflow files to run at all.
First, make sure that the branch name of the repository is called “main” instead of “master”. Look-up how to change this if it isn’t.
Second, go to Settings and make sure that only the “Issues” feature is checked. We don’t need the other features, and they might just end up confusing the user.
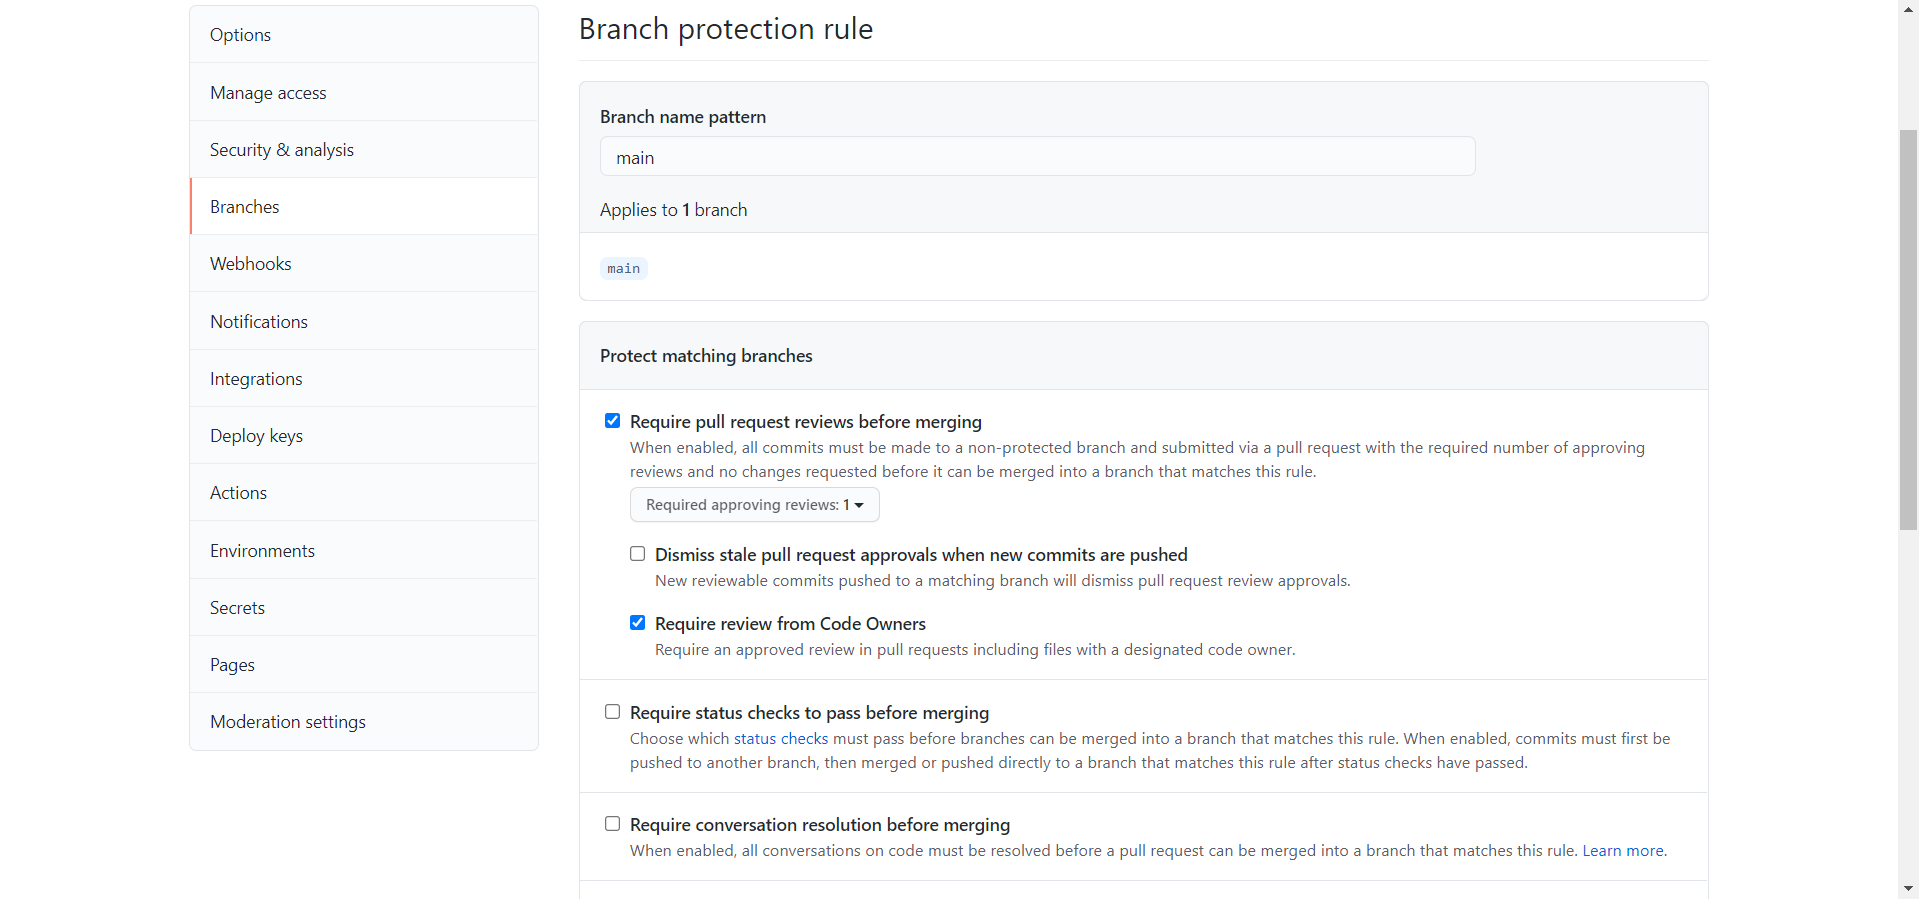
Third, while you’re still in Settings, go to the “Branches” tab on the left and click “Add Rule”. Set the branch name pattern as “main” and check the following boxes:
- Require pull request reviews before merging
- Require review from Code Owners
This will stop the users from merging pull requests without our approval, so that the repository can function as designed. However, when you are creating/making edits to the repository, you might want to disable this temporarily to make it easy to push to the repository.
Fourth, go to the “Actions” tab, hit the “Allow all actions” button, and then hit “Save”. This will let our workflow files run any action they want to.
Finally, go to the “Secrets” tab. This is where you’ll put the username and password for the Badgr account, as well as the authentication token for the GitHub API, so that the Github workflows can use them without them being leaked to the public. Contact Daniel Butterfield in Professor Mangelson’s lab for access to the username, password, and auth token. Save the username in a secret called “USERNAME”, save the password in a secret called “PASSWORD”, and save the auth token in a secret called “AUTH_TOKEN”. Note that if you want to test output in the workflow files, but you don’t want the user to be able to see the expected output, you can create more secrets here to hold the expected output. Just come back here later when you know what secrets you want to create.
.cbc/addLabel.js
To use this file, you’ll need to value on line 7 from makeTest to the name of the new repository.
.cbc/badgeAPI.js
To use this file, you’ll need to edit line 3 so that it contains the entity ID of the badge you want to submit. Currently, it states:
var makeBadgeEntityID = 'opPKYN_pQFi6UWl1Q_aT5Q';
To get the ID of the badge you want to reward, go to the Badgr page for the badge. The URL for the page will be of the form “https://badgr.com/public/badges/<BadgeEntityId>”, so just copy the slug from the URL and paste it into this spot.

Find the badge that you want to reward, and make note of its entity ID. If you can’t seem to find the badge, then it probably hasn’t been added to the Badgr account yet. See the sub-module “How to create a badge” in the module “Badges” on the CBC website for information on how to add a badge to Badgr. Now replace the entity ID on line 3 with the entity ID of the badge that you want to reward. Now, it should be ready to issue the proper badge for your repository.
.cbc/getRepoInfo.js
To use this file, you’ll need to value on line 7 from makeTest to the name of the new repository.
.cbc/makeComment.js
To use this file, you’ll need to value on line 7 from makeTest to the name of the new repository.
.cbc/removeAllLabels.js
To use this file, you’ll need to value on line 7 from makeTest to the name of the new repository.
.cbc/triggerRunForAllPRs.js
To use this file, you’ll need to value on line 7 AND on line 17 from makeTest to the name of the new repository.
Remember to change both, or this WILL NOT work.
.github/workflows/makeTest.yml
First, you’ll probably want to change the name of this file to match your repositories name. For example, if I’m making a pythonTest repository, I’d probably rename it to pythonTest.yml.
On line 1, change it from Make Test to <repository name> Test.
This is the point where the changes are up to your creative interpretation and engineering intuition. The testing process will vary drastically depending on the subject matter. For example, the makeTest repository relies a lot on running actual make commands in the terminal, and then testing for proper output. If I were to make a pythonTest repository, I’d instead write a lot of python unit tests and have them assert proper output. The point is that the exact steps will vary significantly. So, to help you with this process, I’ll outline which lines of code you’ll want to KEEP THE SAME in this file and which ones will have to be replaced with testing lines more specific to your subject material.
You’ll want to keep lines 3 through 45, which download all the necessary packages for the javascript files to run correctly, and handle the complicated process of running tests on multiple repositories at the same time. I’d highly recommend you NOT TO TOUCH this code unless you know what you’re doing, as this will cause you many hours of frustration and debugging if you don’t. Since it works as it is, there isn’t any reason to mess with this unless you want to add another npm install line or if you know the system well enough to want to improve it.
Lines 46 through 213 are the actual tests, so most (if not all) of this should change. Notice how I segmented this into two sections, a section for question 1 and a section for question 2. You should also do this for each of your questions, as it will keep you sane and stop you from losing your place in the file. Also notice that each testing line is followed by a comment line, which outputs the successful completion of the step to the pull request. You’ll have to do this as well, or it can become very difficult for a user to know where their code went wrong. You can use all of the javascript files available in the .cbc folder, any linux terminal commands, and any other tools you can think of as a means to test the user’s code, as long as you can trigger it through the workflow file. Be sure to save any additional files that you write to the .cbc folder so that other students can use them in future testing repositories. If you want to test specific output without users being able to see it, use a GitHub Secret (as described in the “Repository Settings/Secrets” section above). If you are wondering if it’s possible to do something through the workflow files, look it up! Google is your friend if you want to do something that we haven’t already implemented in the .cbc folder.
Lines 214 through 234 issue the badge to the user, so you’ll probably want to leave them just as is.
Lines 235 through 308 handle outputting failure messages if any of the testing steps fails. Again, they are organized by problem, and follow the exact order that the testing steps are in. This will keep you sane, I promise. It will be nearly impossible to debug if you don’t. Each “failure comment” step looks like this:
 - name: Failure Comment
   if: always() && steps.<stepID>.outcome == 'failure'
   run: node .cbc/makeComment.js ${ secrets.AUTH_TOKEN } ${ steps.number.outputs.content } <Error message>
So that it triggers on the failure of a certain step, you’ll have to give that step an id: and then put that id into the <stepID> space on the if statement line. To configure the error message outputted, put the message you desire in the <Error message> space on the run line.
Lines 310 through 325 handle closing the pull request after testing and giving it the ‘checkComplete’ label, so you won’t need to edit this.
And those are the changes you’ll need to make to the makeTest.yml file. Be warned, this is the hardest part of making the testing repository. This will probably take 95% of your total time making the repository, and debugging will be a very necessary step. Be sure to use alternate GitHub accounts to submit multiple pull requests at the same time, and then make sure that the results are as expected. For example, if the user forgets to put their email into email.txt, does the repository realize they forget and output an error, or erroneously state that the user was issued their badge? If the user’s code has incorrect output, does the corresponding failure comment get posted? Is the framework for testing repositories working correctly (as in, each repository is getting checked once and without repeats)? If you’re having trouble with the last one, you probably forgot to update some of the .cbc files with the new repository name.
To debug easily, go to the GitHub Actions tab on the repository, navigate to the Trigger PR Test Runs workflow, and hit the “Run Workflow” button. This will allow you to test your workflow files without having to wait 5-20 minutes for it to be triggered automatically. Also, the GitHub Actions tab stores the results of all of the workflow runs, so you can look in there to see exactly what happened when your workflow file ran, all the way to the exact terminal output. This is very useful.
.github/workflows/triggerPRruns.yml
In this file, no changes are required, but you might want to edit line 21 with the new name of the makeTest.yml file.
README.md
You’ll have to change quite a bit in this file, but you’ll probably want to edit this last, as the contents of this file will depend largely on what edits you make in the other files. If you do this file last, the changes to make will be obvious, but if you do it before some other files, the odds are that you’ll have to come back and edit it again after you’re done.
The structure of this file should remain the same, with the Intro, Setup, Problems, Submitting, and Support sections. You’ll want to keep this structure the same so that the testing repositories are consistent across the site.
Once you’re done with all of these edits, move onto the “Deploying the Repository” section below so that the users can access it.
Deploying the Repository
If you’ve just finished the “Creating an automated pass-off test” section, and think your repository is ready to go, there are just a few more things you’ll need to do to deploy it.
First, DEBUG! Make sure that it actually works, and be sure to test edge cases. While I was making the makeTest repository, there were multiple times where I thought it was fully functional, and then one short test later made me realize how wrong I was.
Second, fork the BYU Computing Boot Camp repository, and edit the website so that the corresponding sub-module page has a section that takes the user directly to the testing repository. Make it look just like the Make page on the website:
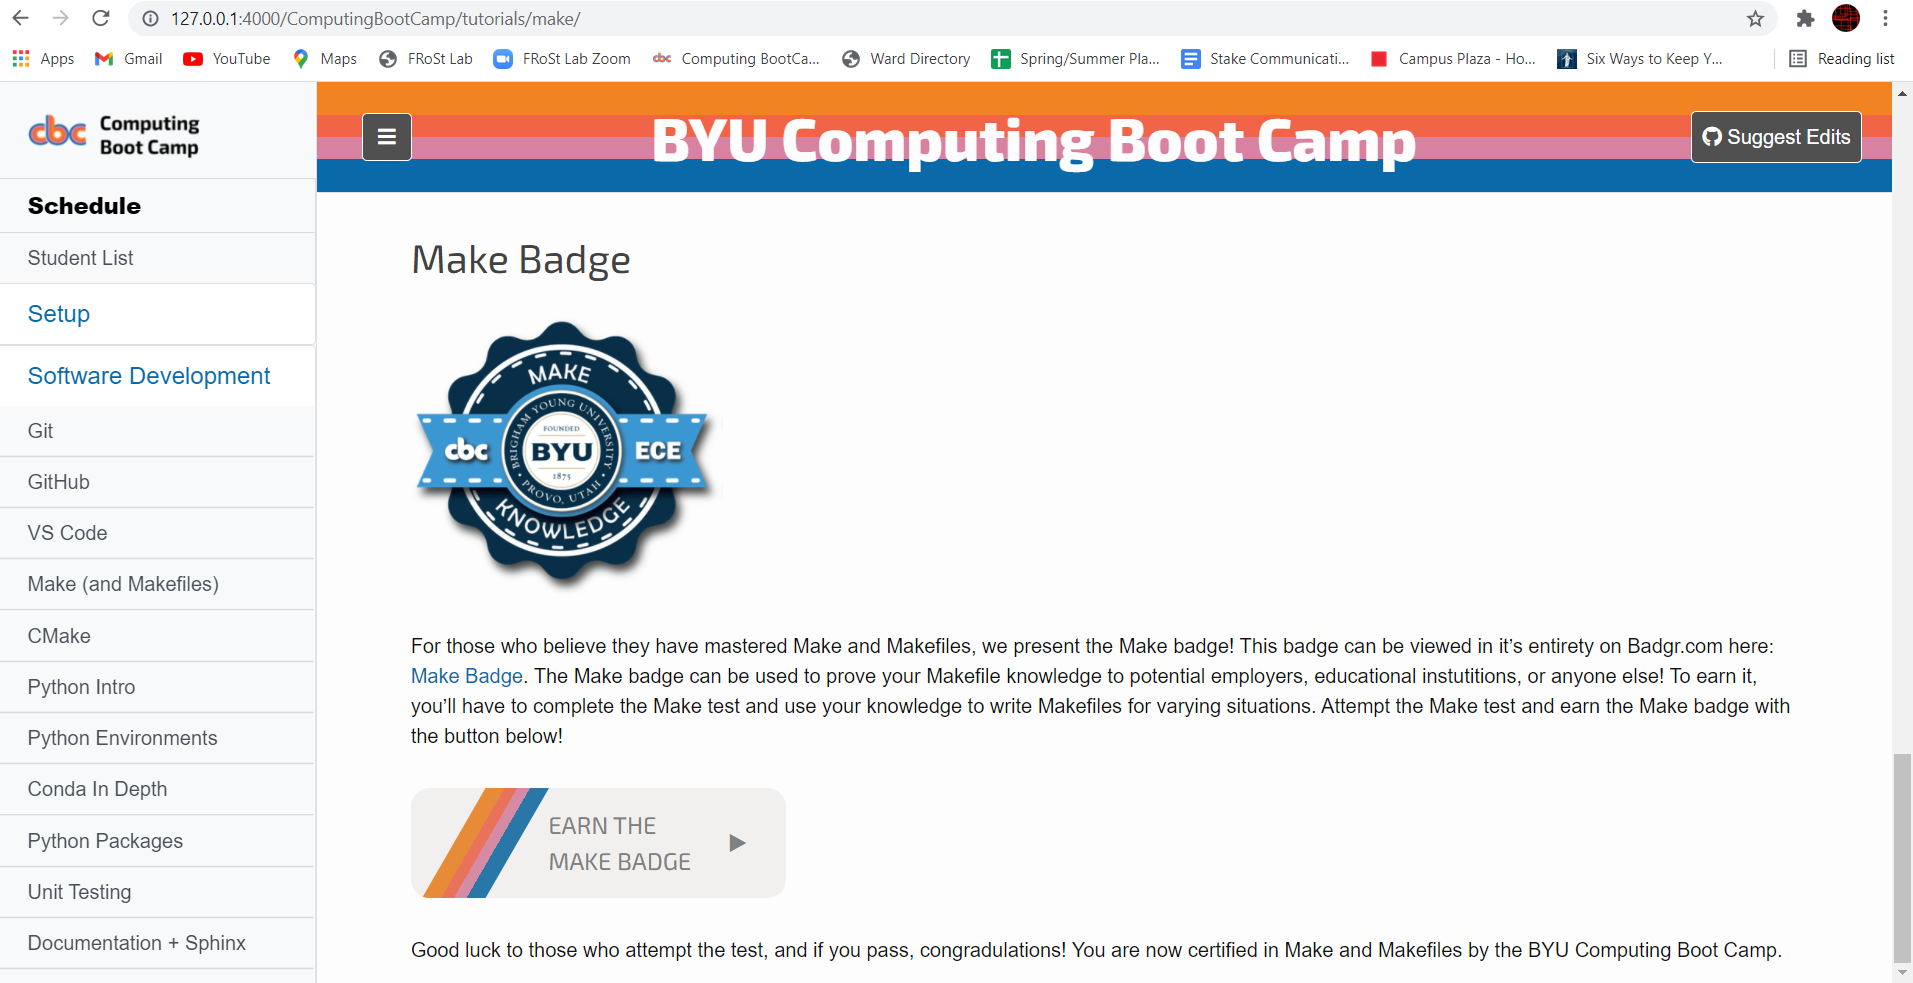
Here is the code to make that possible, so copy and edit it for your testing repository.
## Make Badge
<a href="https://badgr.com/public/badges/opPKYN_pQFi6UWl1Q_aT5Q"><img src="https://media.badgr.com/uploads/badges/8e853a0b-726b-4101-8cb0-4b299926f19d.png" alt="Make Badge" width="250"/></a>
For those who believe they have mastered Make and Makefiles, we present the Make badge! This badge can be viewed in its entirety on Badgr.com here: [Make Badge](https://badgr.com/public/badges/opPKYN_pQFi6UWl1Q_aT5Q). The Make badge can be used to prove your Makefile knowledge to potential employers, educational institutions, or anyone else! To earn it, you'll have to complete the Make test and use your knowledge to write Makefiles for varying situations. Attempt the Make test and earn the Make badge with the button below!
<div class="collapsible" onclick="location.href='https://github.com/BYUComputingBootCampTests/makeTest'">
<p class="activity-label h3-clone">EARN THE MAKE BADGE</p>
<p class="dropdown-arrow h3-clone">▶</p>
</div>
Good luck to those who attempt the test, and if you pass, congratulations! You are now certified in Make and Makefiles by the BYU Computing Boot Camp.
Be sure to replace all of the links with the proper ones, and make sure to preserve all of the functionality (hitting the button should take you to the repository, the badge image should match the badge you are awarding, and clicking on the badge should take you to the badge’s public Badgr page).
When you’re done editing the BYU Computing Boot Camp website, be sure to submit a pull request to the CBC repository so that your changes can actually appear on the website. If your changes are merged, congratulations! Your automated test repository is fully functional and on the CBC website!
Future Plans
Eventually, we’ll want to have some sort of pass-off assessment for every sub-module that has a badge. Whether these pass-offs will be project-based assessments (hand-graded) or code-based assessments (automated tests) is up to you and the rest of the team. However, code-based assessments can be preferred where the BYU Computing Boot Camp staff wouldn’t want to have to manually check user submissions. I personally believe that we should implement these wherever possible, as the BYU Computing Boot Camp doesn’t have active development year-round, and so automatic pass-offs wouldn’t be subject to delays as a manual pass-off system would. However, there are some sub-modules where an automatic pass-off just wouldn’t be possible or would be ill-suited for the subject matter.
So, a tentative starting place would be to implement automated pass-off tests for CMake, Python Intro, Python Packages, Unit Testing, SQL Basics, and Matlab, as those would all translate decently well into automated tests.
Another idea is that when each person is assigned to improve/make a page on the site, they are in charge of making the pass-off test for it. If they decided they want to have an automated test, they can follow the tutorial in this guide to do so.
I was also considering improving the makeTest repository by adding more problems to it (i.e. more Makefiles to implement). This would give the users more experience and more hours with Make and add value to the Make badge. I’m not sure what direction these new Makefiles would take, but preferably it would require the user to make their own creative Makefiles based off of the concepts they learned in the sub-module, instead of just re-making the Makefiles explained on the website, as the current two Makefiles require.