Table of Contents
Lecture Videos
On June 21, 2021 we had a Vivado Vitis Tutorial by Prof Goeders. The video is embedded below:
Timestamps
0:00 Introduction
8:44 Introduction to block design and hardware configuration
29:34 Preparing and generating a bitstream
42:58 Introduction to Vitis and exporting from Vivado
47:52 Example Vitis project
Create Vitis Projects
Run Vitis (vitis), and choose a workspace location. I used lab_vitis/sw for my workspace location.
Create the platform project
The platform project generates the standalone software layer code, which provides a software layer to access hardware and processor features (timers, interrupts, etc) in a bare-metal environment.
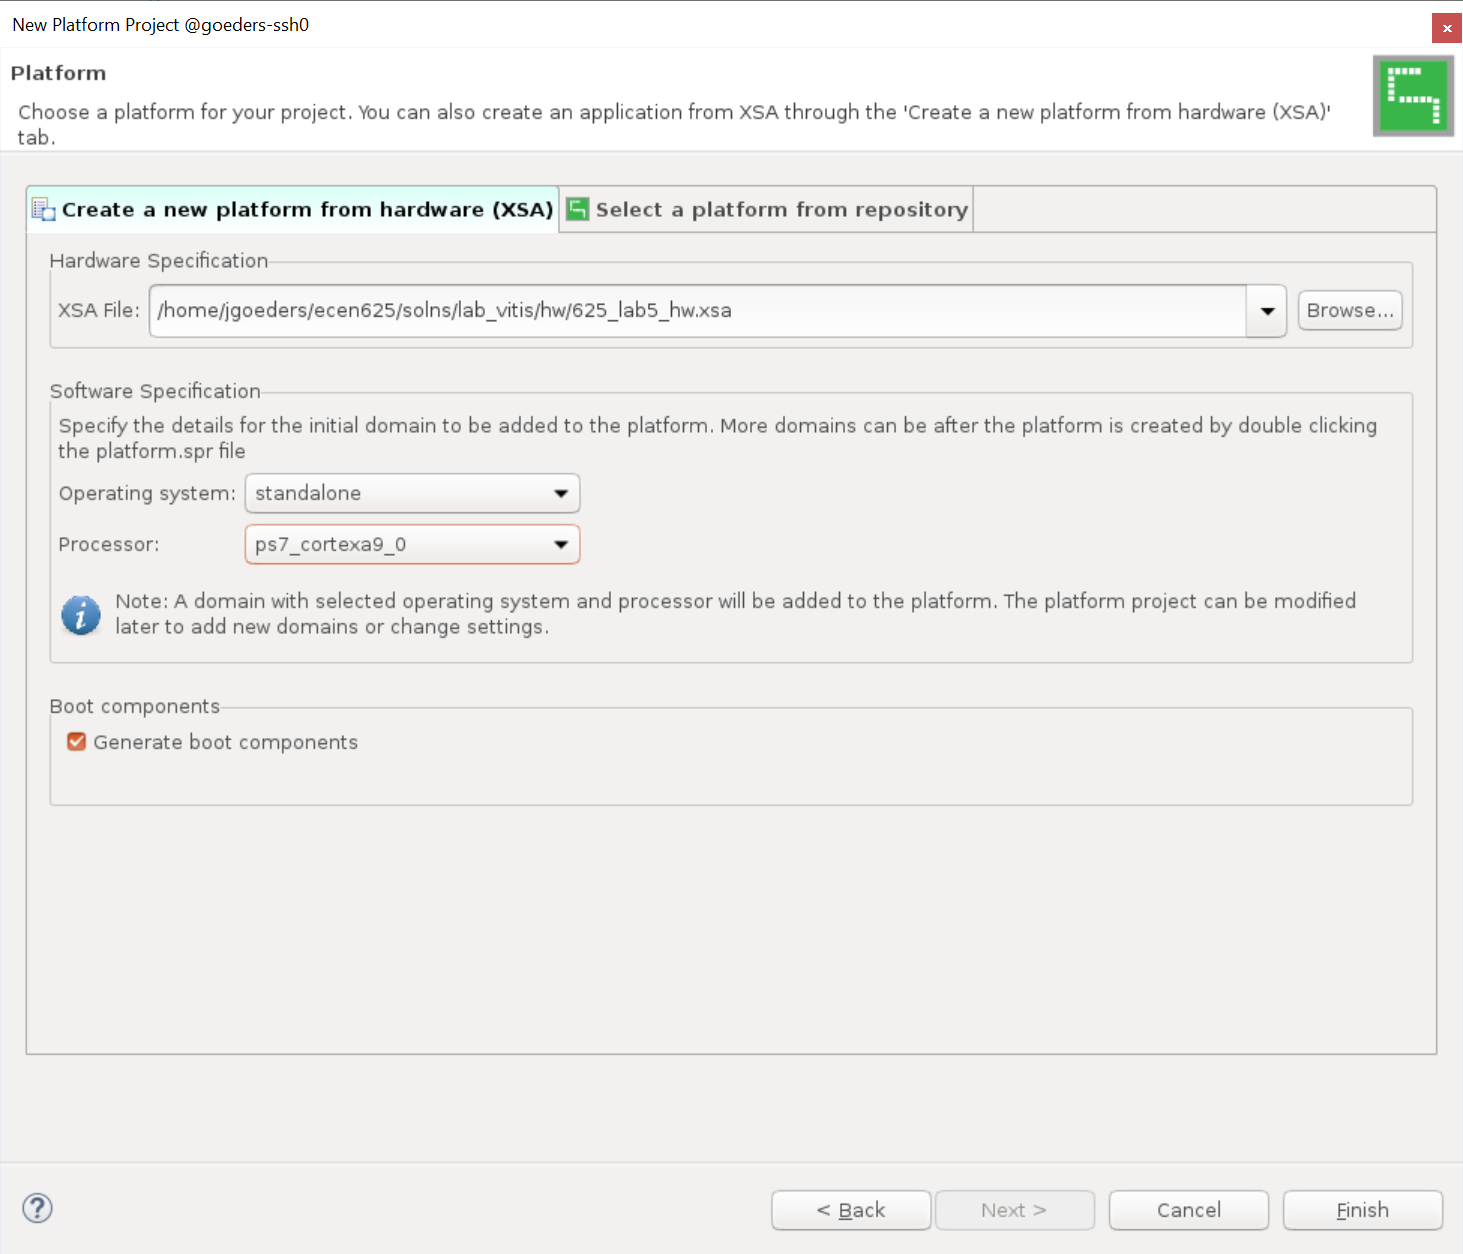
- File->New->Platform Project.
- Chose a Platform Project name. I chose 625_hw.
- Browse to your .xsa file name.
-
Click Finish.
- Change the stdout output. By default, the output from your program will be sent over the physical UART pins present on the board. But instead of having to connect a UART to the board, we will use the option that allows us to send stdout over an virtual UART using the JTAG (USB) connection.
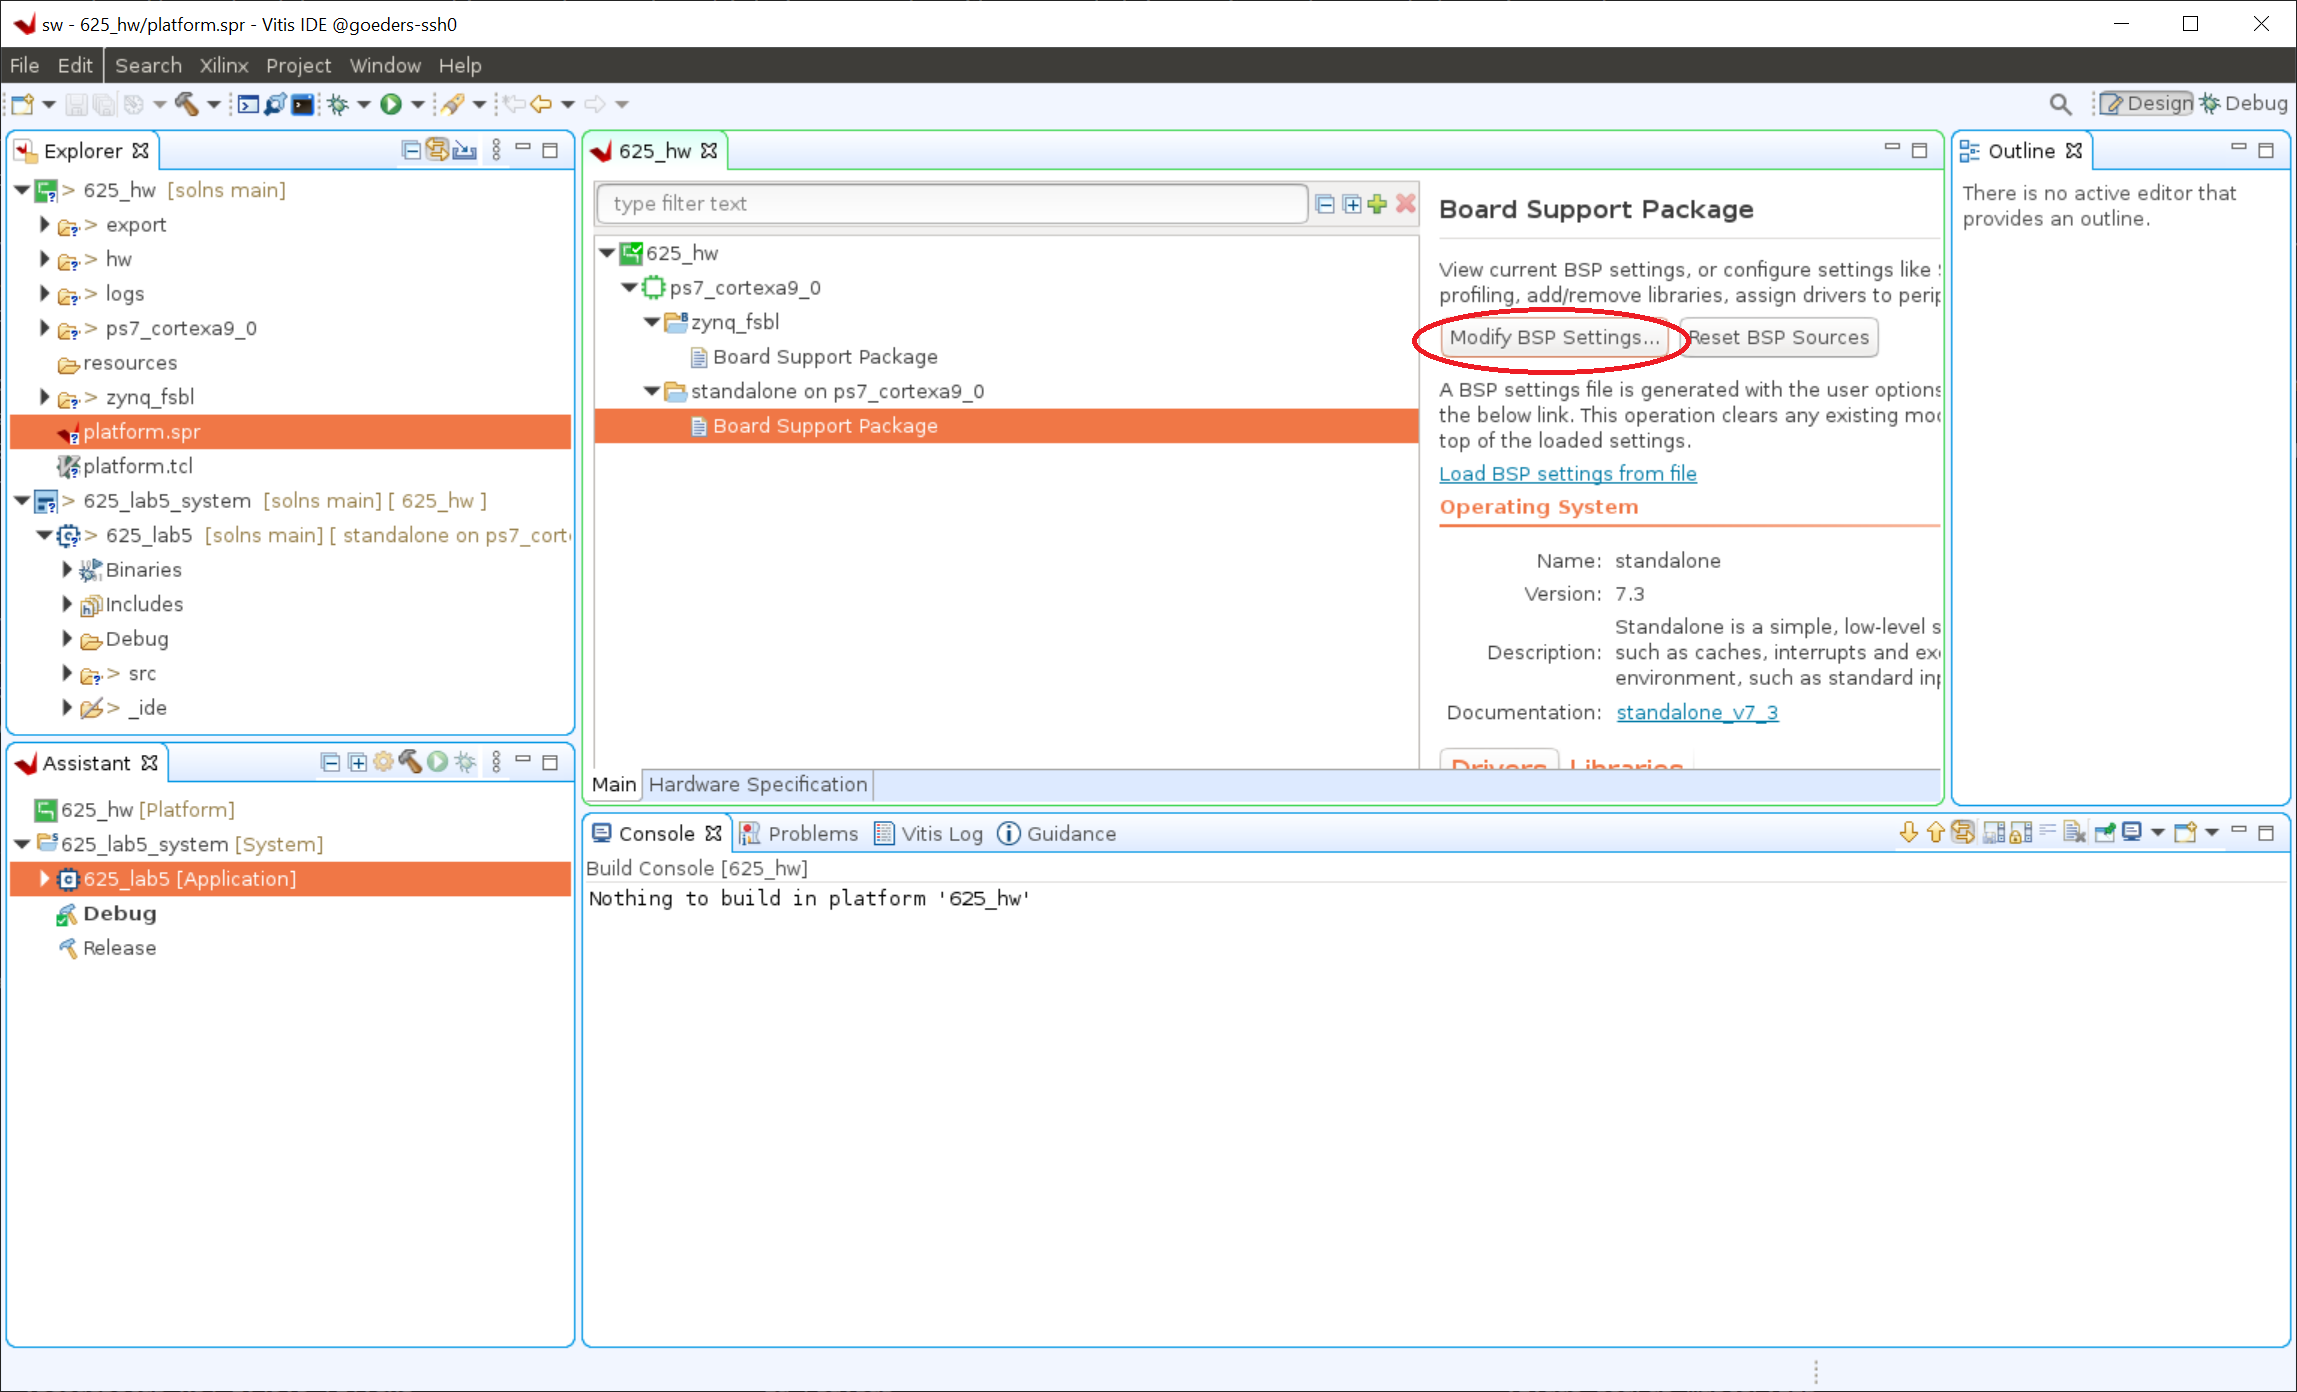
- Expand your platform project, and double click on the platform.spr file. Select the standalone on ps7_cortexa9_0->Board Support Package, and click Modify BSP Settings.
- In the Board Support Package Settings popup, go to the standalone menu, and change stdout to use coresight_comp_0.
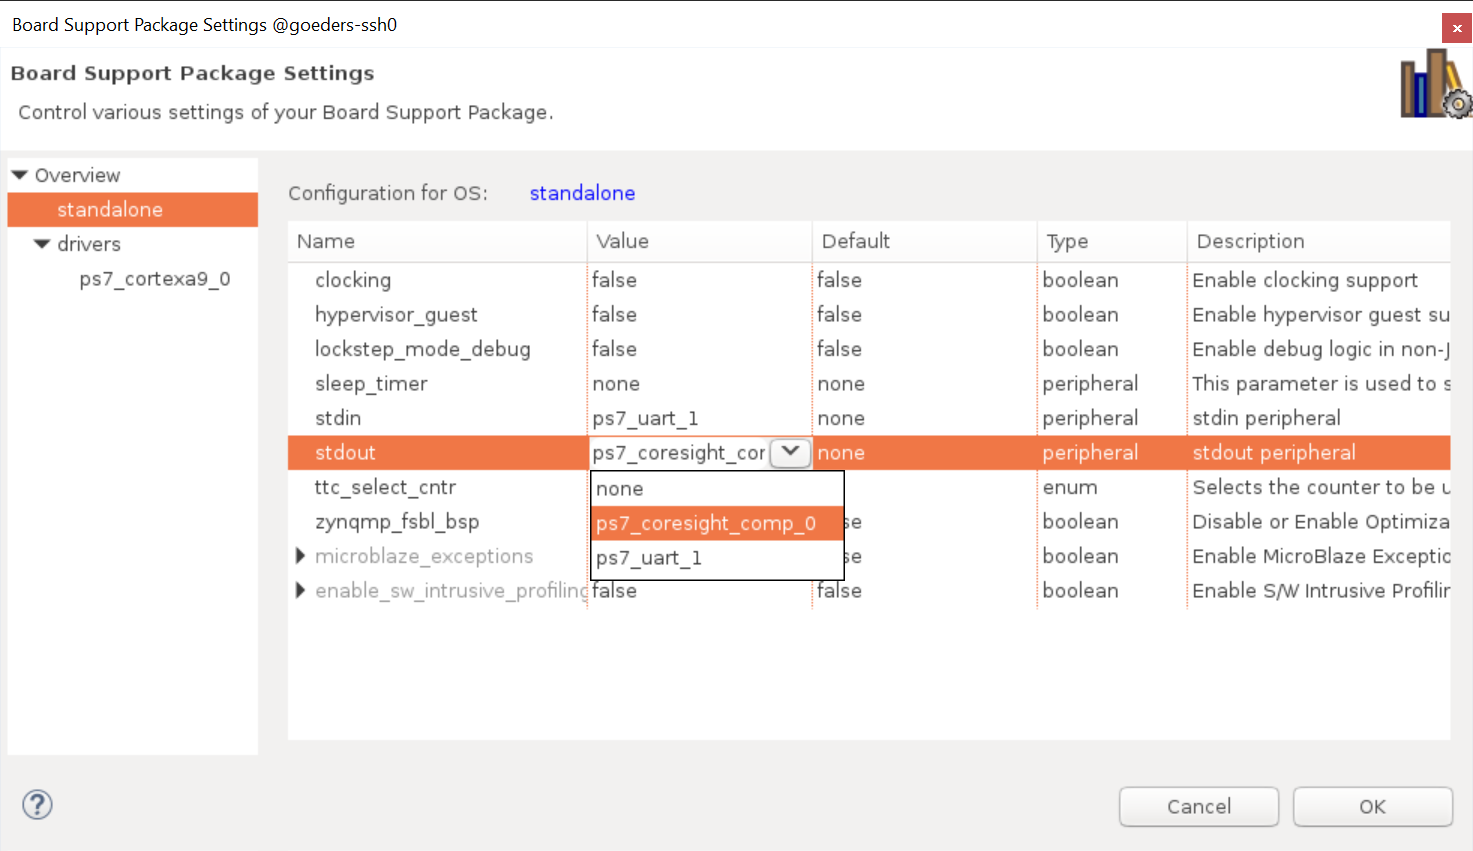
- Click OK to close the window and save the BSP settings.
- Expand your platform project, and double click on the platform.spr file. Select the standalone on ps7_cortexa9_0->Board Support Package, and click Modify BSP Settings.
- Build the BSP code. Right click on your platform project and choose Build Project.
Create the application project
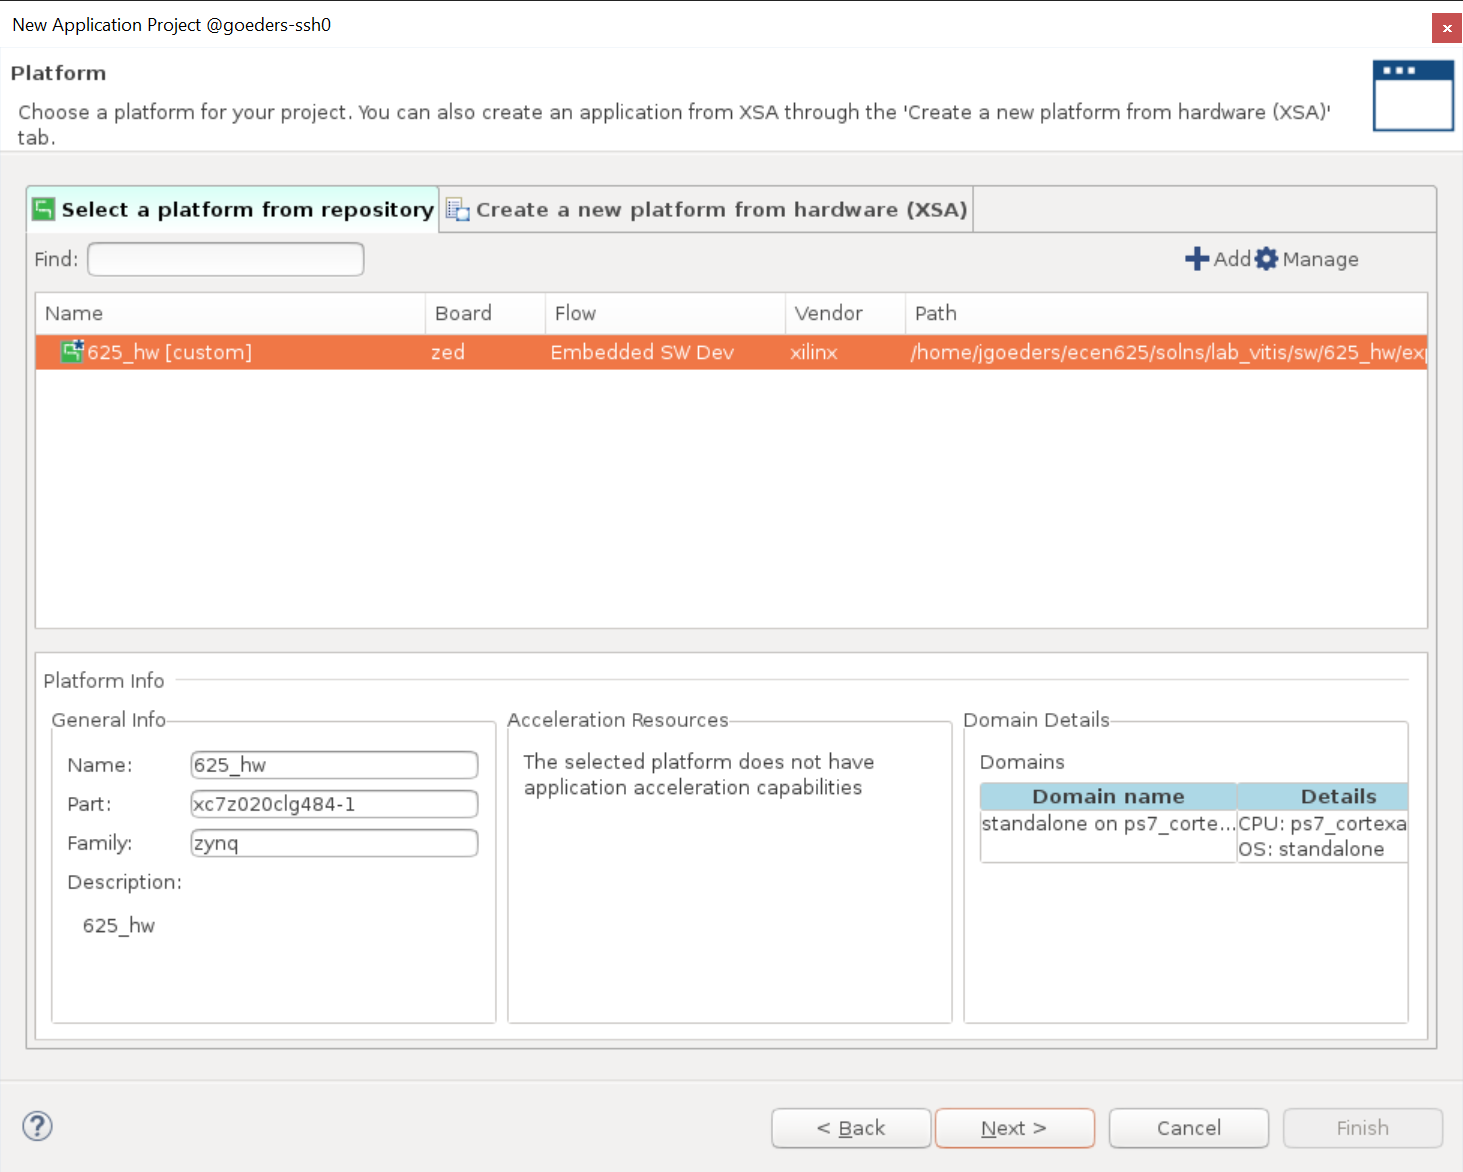
- File->New->Application Project.
- Chose your platform that you created in the last step.
- Choose an application name (ie. HelloWorld), and continue through the next screens.
- On the Templates screen, choose Empty Application (C++), and then click Finish.
- After you complete the wizard, find the src directory, and right click New->File, and create a main.cpp.
- Create a simple application:
#include <stdio.h> int main() { printf("Hello World\n"); } - Build your application. Right click on your application project and choose Build Project.
Run Your Applicaton on the Board
-
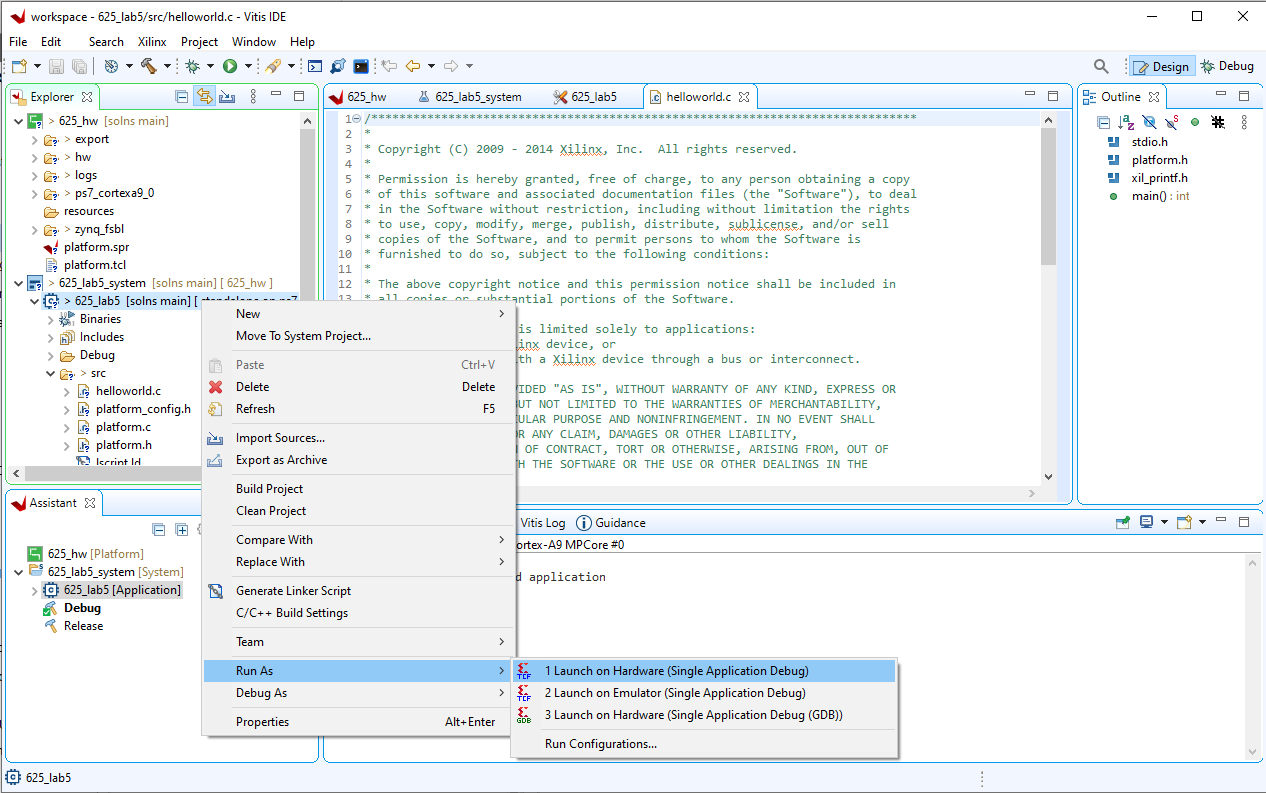
Right-click on your executable folder (down one level from the _system project created in the last step – see image below), choose Run As->Launch on Hardware (Single Application Debug.
-
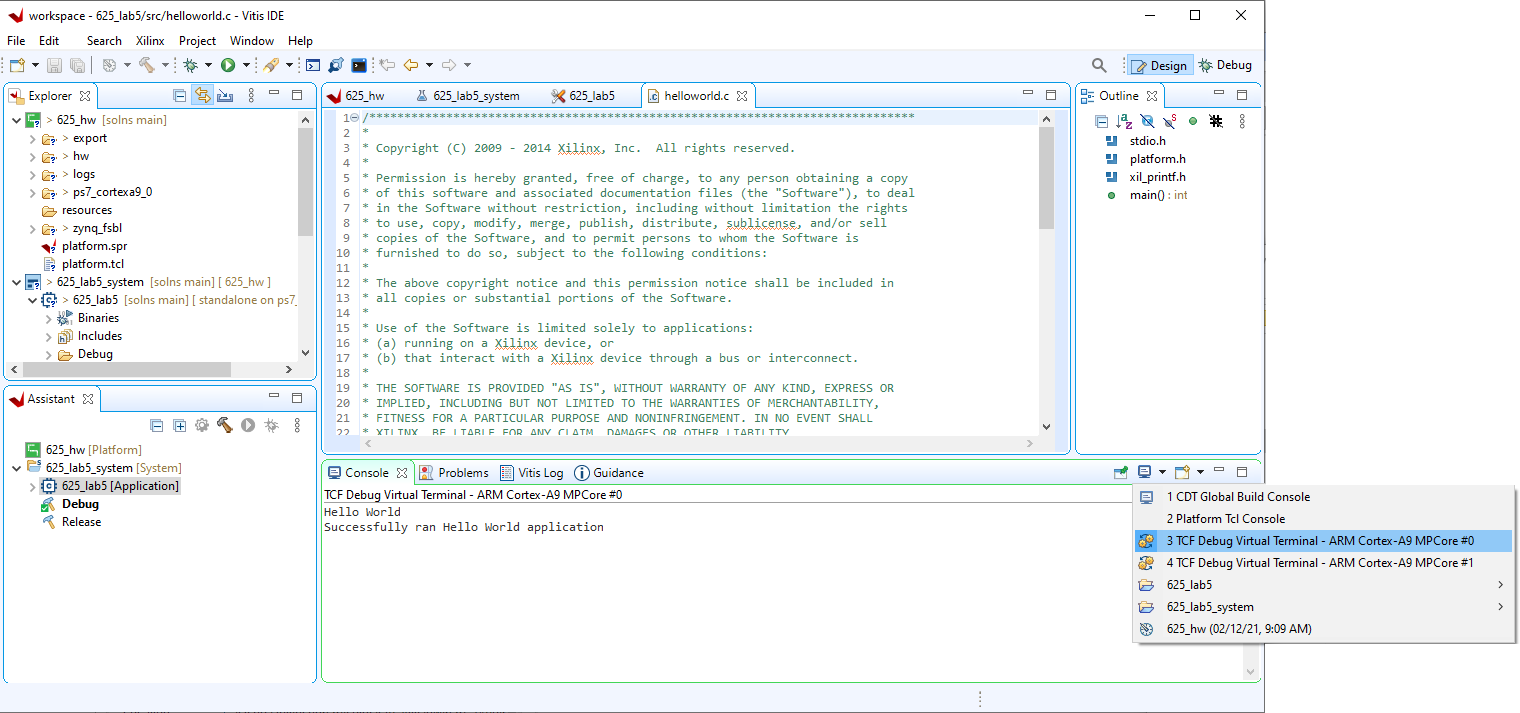
To view the program output, you will need to use the console selector button in the Console window to select the *TCF Debug Virtual Terminal - ARM Cortex-A9 MPCore #0 console. This is the JTAG console for core 0.
-
You should see the message Hello World.