Lab pass-offs will not be done in person. Instead, you will run a script that will perform the official submission of your lab to the GitHub repository. It will do the following:
- Tag your repository with the proper lab-specific tag
- Check to make sure that the
.commitdatefile in your tagged repository is created. (this will be used to determine if you submitted on time)
Important: Before submitting, make sure you have completed the Lifelong Learning: What’s Next? requirement for the lab. For multi-milestone labs, this is required with the final milestone only.
To submit your lab, run one of the following commands from within your lab repository:
make submit_lab1
make submit_lab2_m1
make submit_lab2_m2
make submit_lab3
make submit_lab4_m1
make submit_lab4_m2
make submit_lab4_m3
make submit_lab5_m1
make submit_lab5_m2
make submit_lab5_m3
make submit_lab6_m1
make submit_lab6_m2
make submit_lab7
make submit_lab8
If the script fails, see If the submission fails . . . below.
You may run the make submit_* script as many times as you like (there is no penalty for multiple submissions).
However, every time you run make submit_*, the submission date of your lab will be updated.
If your submission date is past the deadline for the lab, you will receive a late penalty as described in the syllabus.
Submitting complete, buildable code
The TAs grade your lab by cloning your tagged submission and building it with the standard build process. They will not repair your build for you. Before you submit, make sure that:
- Every source file you wrote is committed and pushed — not just saved locally.
- Every change you made to a
CMakeLists.txtis committed and pushed. The lines you uncomment inuserspace/drivers/CMakeLists.txtanduserspace/apps/CMakeLists.txtto compile your drivers and applications (including test applications) are especially easy to forget, because your own build keeps working after you edit them. - A fresh clone of your repository builds cleanly. The surest way to check is to clone your repository into a new directory and build it there.
If the TAs cannot build your submission — for example, because your CMake files are missing or configured incorrectly — and they have to modify your build in order to grade it, an automatic 10% deduction will be applied.
If you forget to commit your code and a TA has to reach out to you to obtain it, you will receive a 20% penalty for the first offense (equivalent to the minimum late penalty). For any subsequent offense, you will be required to resubmit the lab at the then-current date, and that resubmission will incur the associated late penalty.
Compiler Warnings
Your code must compile with zero warnings using the standard build process. If it doesn’t, a 10% deduction will be applied. This applies to every lab that compiles C/C++ code — not just the code you’re actively submitting for that lab. If a warning from an earlier lab’s code is still present, the same 10% deduction applies to the current lab too, until it’s fixed.
Valgrind
For labs where you submit standalone userspace applications, your code must also run cleanly under valgrind, with no memory errors or leaks reported. If it doesn’t, an additional 10% deduction will be applied. This does not apply to kernel driver labs, since kernel modules can’t be run under valgrind.
Valgrind is not required for Lab 1. For Lab 2, your code will be checked with valgrind and any issues will be reported to you, but no points will be deducted; use it as a chance to learn the tool before the deduction applies.
Instructions for running valgrind on your code, and for interpreting its output, are on the Valgrind page. Check your code before you submit; the TAs will run it the same way.
The table below shows which labs each policy applies to:
| Lab | Compiler Warnings | Valgrind |
|---|---|---|
| Lab 1: Hello World | Yes | No |
| Lab 2: Userspace Drivers | Yes | Checked, but no deduction |
| Lab 3: Clock | Yes | Yes |
| Lab 4: Space Invaders | Yes | Yes |
| Lab 5: Audio Driver | Yes | No (kernel module) |
| Lab 6: PIT Hardware | No | No |
| Lab 7: PIT Driver | Yes | No (kernel module) |
| Lab 8: DMA | Yes | Yes |
If the submission fails . . .
If your make submit_* continues to print messages saying that the commit file has not been created then you may not have GitHub Actions setup properly on your GitHub repository.
Follow these instructions to fix this problem (this is a one-time problem that occurs when you first setup your repository).
-
Visit the website of your repository
-
Click on the “Actions” button in the tool-bar of the web page.
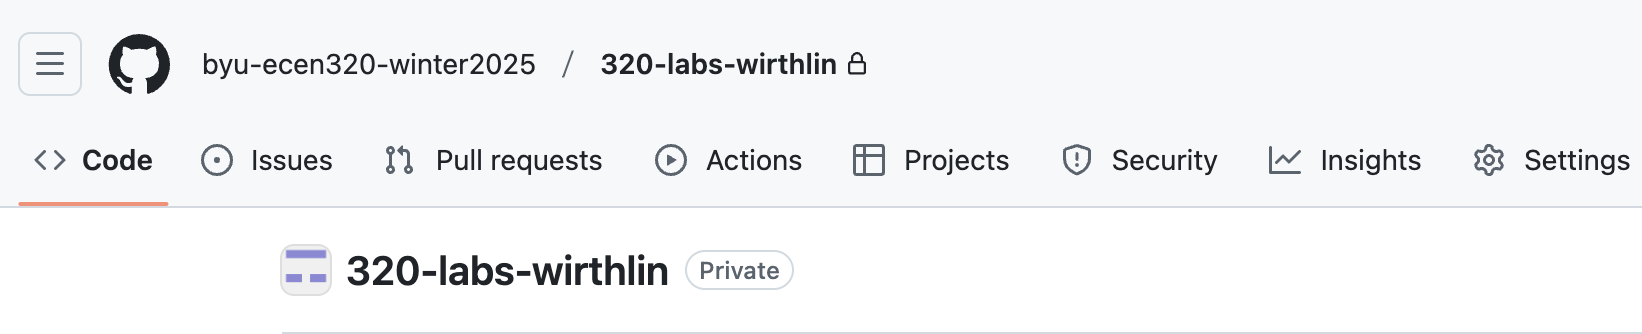
You may see the following image:
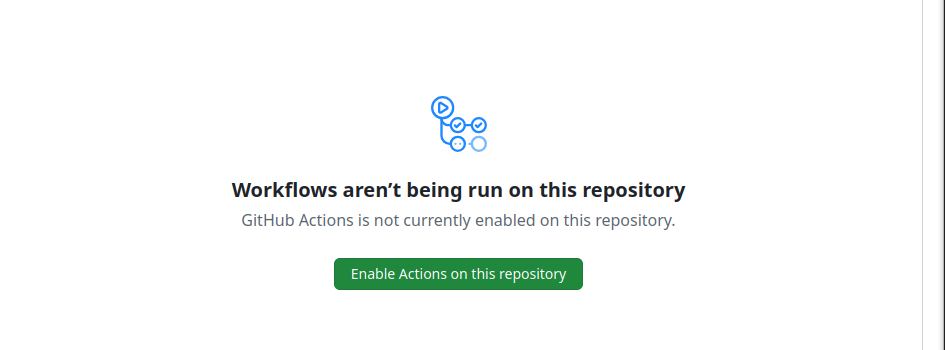
Click “Enable Actions on this repository”
-
Make a small change in your repository. (i.e., change the aboutme.txt or such). Recommit the file and push it to the repository.
-
Rerun the passoff script.