 ECEn 224/225
Table of Contents
Git Repositories
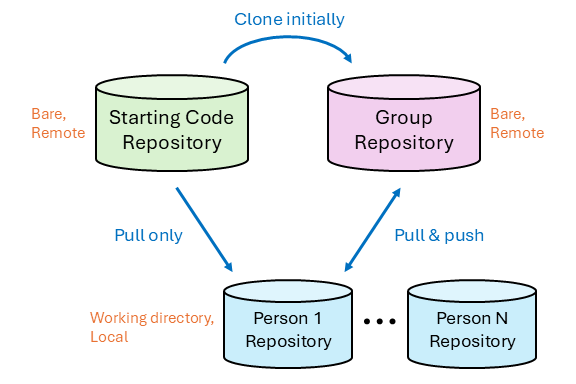
Git organizes code into repositories, which is another name for a collection of files. A bare repository just keeps track of commits, but doesn’t bother with keeping a working directory. Files are stored as “blobs” in a bare git repository and are not directly readable by a user. To view files stored in a git bare repository, you must first clone it into a local repository that includes a working directory of source code. A bare repository typically resides on a shared server and is often referred to as a remote repository. Since you don’t have permission to write to the starting code repositories, you will need to make copies of them on a server where you do have permission.
Git Configuration
First, let the git program know who you are so it can tag any changes you make to a repository. To set the default name and email address, run the following commands:
git config --global user.name "Your name here"
git config --global user.email your_email@email.com
Git Bare Repositories
Run the following shell script only once on a lab machine. It creates a directory and bare repositories for the starting code that will be used in the labs. Bare repositories are not directly viewable with a text editor. To organize your bare repositories together as a class, we use a CAEDM group directory.
~/groups/ecen225/setup_dir.sh
Git Local Repositories
A git local repository is a working directory where you edit your project files. Git working directories will be created in the next step that are viewable with a text editor by cloning the bare repositories. They will be created in a new directory called ecen225 in your home directory. Each of these repositories is a personal workspace to make edits and then commit any changes. For the SEMESTER indicated in the paths below, use ‘f’ for fall, ‘w’ for winter, and ‘s’ for spring followed by the last two digits of the year (e.g., f26). Replace NETID with you own NetID. If you are on a lab machine use this command sequence:
mkdir ~/ecen225 && cd "$_"
git clone ~/groups/ecen225/SEMESTER/NETID/labs.git
git clone ~/groups/ecen225/SEMESTER/NETID/doorbell.git
If you are on a personal machine use this command sequence:
mkdir ~/ecen225 && cd "$_"
git config --global init.defaultBranch main
git clone NETID@ssh.et.byu.edu:groups/ecen225/SEMESTER/NETID/labs.git
git clone NETID@ssh.et.byu.edu:groups/ecen225/SEMESTER/NETID/doorbell.git
We have two repositories in this class: One that contains several starter labs to teach you basic principles, and one that we will use as the basic template to create our doorbell. They both contain a README.md file which gives you instructions on what to do with the code.
If you want to commit changes you have made to a file called my_file.c and push them to the bare remote repository, use the following sequence of commands.
git add my_file.c
git commit -m "update to my_file.c"
git push
For more details about using git, see this tutorial or a brief overview in the next section.
Common Git Commands
Git Clone
A local working repository is created by cloning a bare remote repository. The new directory has editable files.
git clone your_bare_repository
Git Commit and Push
Once you have finished editing files on a local repository, you will need to commit and push the files to synchronize them with the remote version of your repository.
First you will navigate in a terminal to your git repository. If you are not in your repository folder you can run
cd path/to/your/git_repository_folder
Next, add all the file names to a list you wish to synchronize with the remote repository. You only need to add files that you’ve changed since the last git clone or commit command.
# You can list individual files
git add file1.txt file2.md ...
# OR use -A for all
git add -A
Then you need to group the files into one package called a commit. Git allows you to use commits as a checkpoint to save your progress.
git commit -m "Add a message here"
Finally, to push these changes to the remote repository, run:
git push origin main
The command tells Git to push the changes to the main branch in the remote repository called origin.
Git Branch
Git branches are a fundamental feature in Git that allow you to work on multiple versions of a project simultaneously. A branch in Git represents an independent line of development, enabling you to make changes without affecting the main project or other developers’ work. The default branch in a new Git repository is typically called main (or master in some older repositories), but you can create additional branches for specific features, bug fixes, or experiments. By using branches, you can isolate work, test new ideas, and merge them back into the main branch when they’re ready.
Here is a graph that shows some of the intuition of version control and git branches.

To create a new branch, use
git branch <new-branch-name>
You can then switch your active branch to this new branch with
git checkout <new-branch-name>
You can also list all of your branches with
git branch
To merge a branch into another, first checkout the branch you want to merge into. Then, use
git merge <feature_branch>
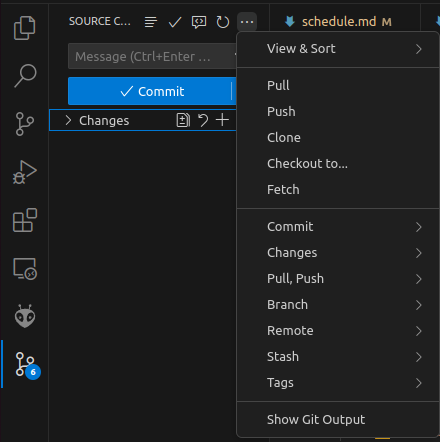
You can also use the git panel in VS code to perform all of these operations. The branch menu has all of this functionality.