Previous: Vivado Tutorial
Create Vitis Projects
Run Vitis (vitis), and choose a workspace location. I used lab_vitis/sw for my workspace location.
Create the platform component
The platform project generates the standalone software layer code, which provides a software layer to access hardware and processor features (timers, interrupts, etc) in a bare-metal environment.
- File->New Component->Platform.
- Chose a Component name. I chose 625_hw.
- On the next tab you must select the hardware design. Browse to your .xsa file.

- On the next tab, select the standalone operating system (i.e. bare metal), and choose the ps7_cortexa9_0 processor. Leave Generate Boot artifacts checked.
- Click Finish.
- Build the BSP code using the Build button in the Flow section in the bottom-left.
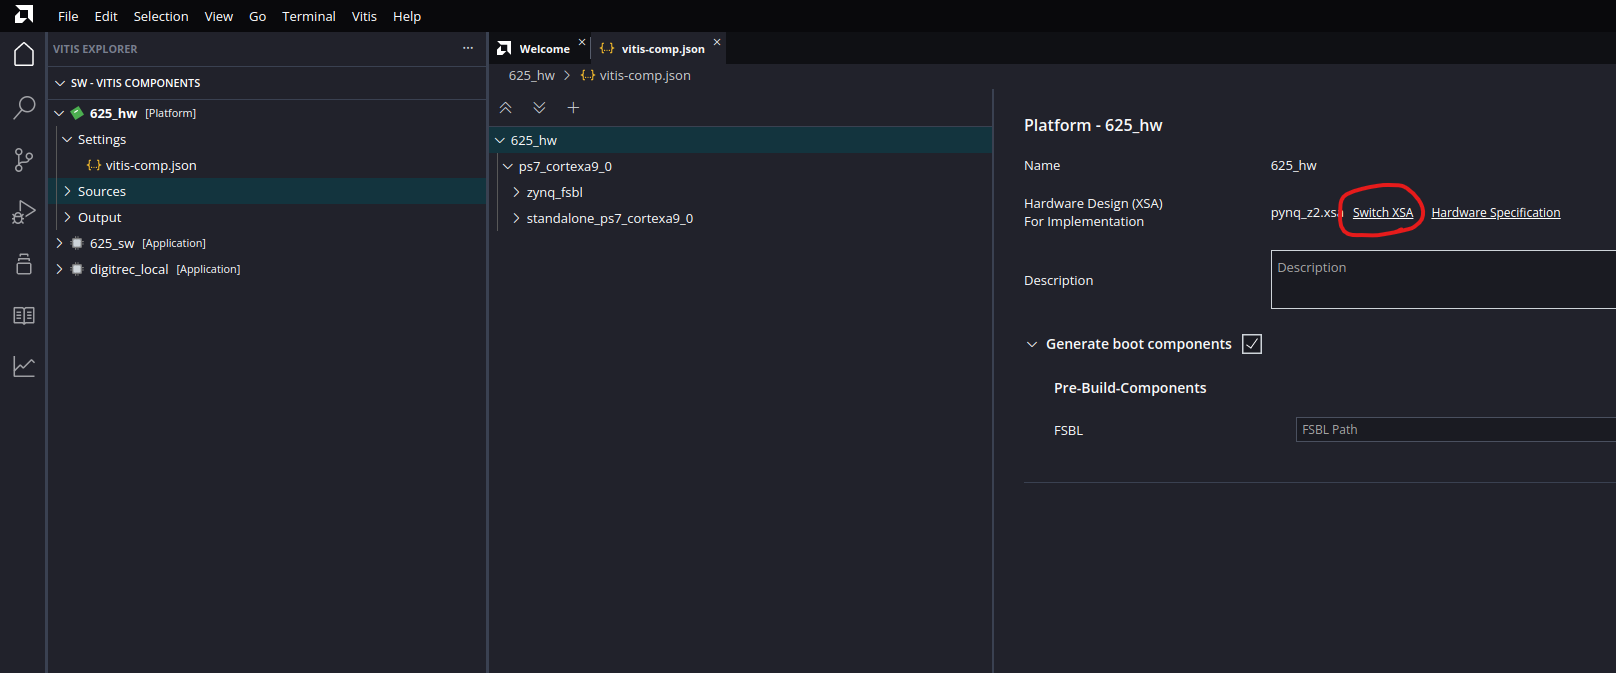
Important: If you change your hardware and regenerate your .xsa file, you will need to update your platform component. In your platform component, open Settings->vitis-comp.json, and then look for the Switch XSA button. Browse to your new .xsa file (may be the same path as before, but there is no refresh mechanism in the tool). Then rebuild your platform component.
Create the application component
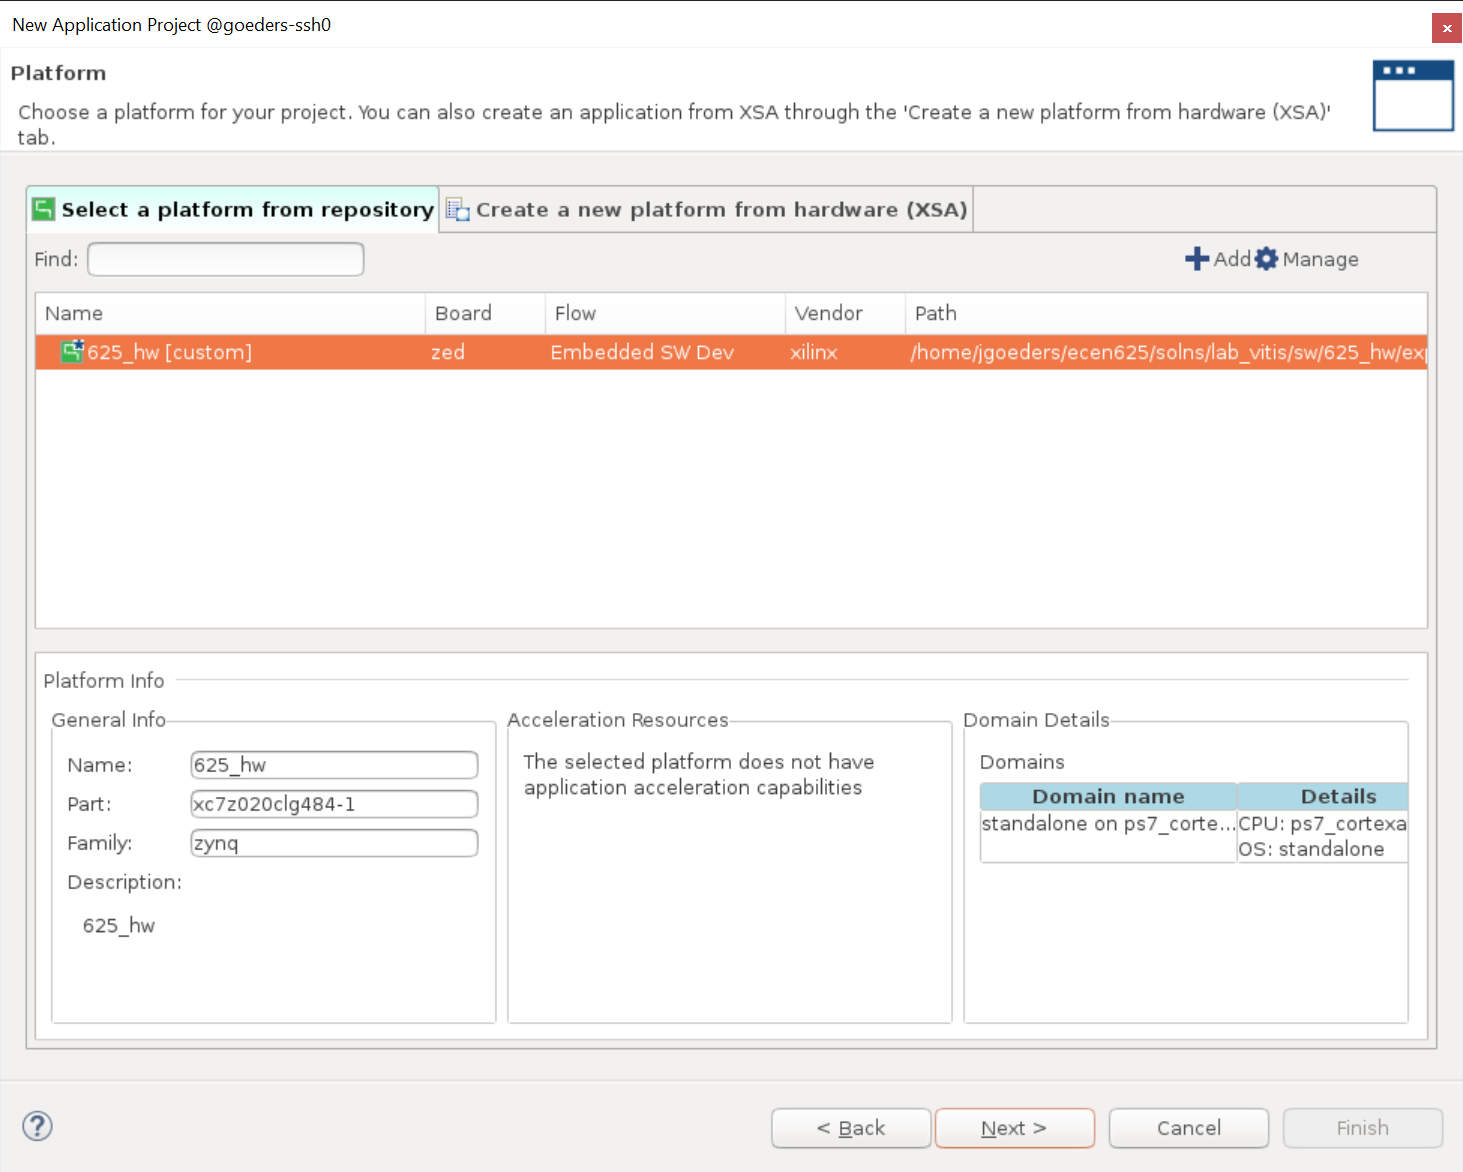
- File->New Component->Application.
- Choose a component name (ie. 625_sw), and continue through the next screens.
- Chose your platform that you created in the last step.
- Select the only available domain (standalone_ps7_coretexa9_0).
-
Skip past the Add Source Files tab, and click Finish.
- Create a simple application. Right-click on your src directory in your application component, and choose New File. Add a main.cpp file with the following code:
#include <stdio.h> int main() { printf("Hello World\n"); } - Build your application. Change the flow in the bottom-left to your application component, and click Build.
Run Your Applicaton on the Board
If you are running this on your own computer, you would use the Run button in the bottom left to program your board.
However, if you are using a PYNQ board on CCL1, you need to follow a different process to make sure you can share the boards with other users.
Find an Available Board
Check http://ccl1.ee.byu.edu:5000/ to see what boards are available. If they are all in use, please send a message on Teams and we can possibly add more boards.
Make note of the device name (ie. tul-ecen625-3).
Run Your Application on the Board
Use the run_elf_on_pynq_board.py script located in lab_vitis/program. Provide the following arguments:
- The path to your bitstream file.
- The path to your xsa file.
- The path to your ELF file.
- The device name.
For example:
python3 run_elf_on_pynq_board.py ../hw/pynq_z2.bit ../hw/pynq_z2.xsa ../sw/digitrec_local/build/digitrec_local.elf tul-ecen625-3
This should program the board and print the output of your program to the console. If you run into issues with this script, please reach out.