In the labs for this class, you will be completing some tasks on your computer, and some tasks on the PYNQ board. In this setup step, you will set up your Git repository and SSH keys on both your computer and the PYNQ board.
Extend your Partition
You should extend the PYNQ filesystem to fill your entire SD card (by default the filesystem only provides a small amount of free space, and doesn’t fill your SD card)
Run these commands. Please copy and paste them one at a time, and be careful in the process. It’s easy to mess up your entire SD card image:
sudo growpart /dev/mmcblk0 2
sudo resize2fs /dev/mmcblk0p2
Set PYNQ time
Run the following to update the time on your PYNQ
sudo apt install chrony
sudo chronyc -a 'burst 4/4'
sudo chronyc -a makestep
sudo timedatectl set-timezone America/Boise
This will fix the current time of the PYNQ, but if you have your PYNQ off for some extended period, and then turn it back on, you will may notice the time is wrong.
Computer Setup
📝 Run this on your computer.
Register your SSH Key with Github
- Run
cat ~/.ssh/id_rsa.pubto display your public key. Copy the entire outputted text, including thessh-rsaat the beginning and computer address at the end. - Go to https://github.com/settings/keys, click New SSH key button, and paste your key in the Key box. Give your key a name (like caedm) and click Add SSH key to save the key.
-
Check that you can now authenticate with Github by running
ssh -T git@github.comYou should see a message like this:
Hi <your_github_username>! You've successfully authenticated, but GitHub does not provide shell access.
Github Repository Creation
-
Sign up for your Github classroom repo using this link: https://classroom.github.com/a/h6lm94mB This will create an empty private repository on Github for you to use throughout the entire semester. You must create your repository using this link, or the TAs will not be able to grade your code.
-
You should now see the message below. Click the link to navigate to your repository.
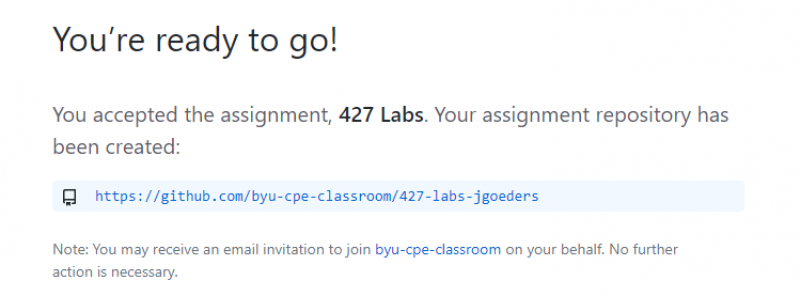
-
Your repository will begin empty, but you will need to import the starter code. To do this we will do a bare clone of the starter code repository, and push it to your repository. Then you can delete this clone. Make sure to replace the URL in the third step with the URL of your repository, that you can find by clicking the SSH button on your repository page. You can run these commands in any directory you want.
 git clone --bare git@github.com:byu-cpe/ecen427_student.git
 cd ecen427_student.git/
 git push --mirror git@github.com:byu-ecen427-classroom/427-labs-jgoeders.git
 cd ..
 rm -rf ecen427_student.git
Clone your Repo
- Go to your newly created repo.
- Click the Code button, and then the Use SSH link, as shown here:
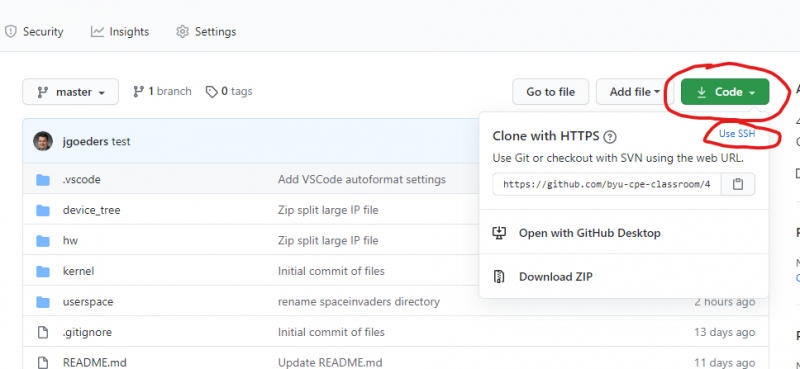
- Copy the URL that is shown. It should be something like: git@github.com:byu-cpe-classroom/427-labs-<your_id>.git
-
Clone the repository into a directory you want to use, for example:
git clone <github_ssh_address> ~/ecen427 - Open this in VS Code by running
code ~/ecen427
Add Starter Code Remote
- When you clone your repo, Git will create a remote called origin that is connected to your repo.
- You can view your remotes by typing
git remote, and even check the linked URL by typinggit remote get-url origin. -
Next, you should add a new remote. You can call it whatever you like, but a good name is startercode. This remote will link to the starter code repository. This will allow you to retrieve any updates I make to the code provided to you (I will probably need to make some updates to the code during the semester). You do this like so:
git remote add startercode https://github.com/byu-cpe/ecen427_student
Then, if you ever need to pull down changes I make, you can do the following to fetch the latest changes from the starter code and merge them into your code:
git fetch startercode
git merge startercode/main
PYNQ Setup
📝 Run this on the PYNQ board
Create SSH Key
Create an SSH key on the PYNQ by running ssh-keygen (you can just hit Enter a bunch of times to skip the prompts).
This will create two files in your ~/.ssh directory: id_rsa and id_rsa.pub. The id_rsa file is your private key, and the id_rsa.pub file is your public key. Do not share your private key with anyone.
Register with Github
Follow the same steps as above to register your PYNQ public key with Github. Check that you can now authenticate with Github by running
ssh -T git@github.com
Clone your Repo on the PYNQ
Follow the same steps as above to clone your repo on the PYNQ.
Configure Git
Since this is the first time using Git on the PYNQ system, you need to configure it. Run these commands (making sure to enter your name and email):
git config --global user.name "Your Name"
git config --global user.email your_email@example.com
Add Starter Code Remote
Repeat the steps above to add the startercode remote.