You will need to run the RARS assembler to generate the binary files to be loaded into your FPGA RISC-V design. Creating the binary files for your FPGA RISC-V involves a couple of important steps that are described in this tutorial.
The following command demonstrates how to assemble your assembly language program, and generate the memory files for use in your design:
java -jar ../resources/rars1_4.jar mc CompactTextAtZero a \
  dump .text HexText program_text.mem \
  dump .data HexText program_data.mem \
  dump .text SegmentWindow program_s.txt \
  program.s
The following example includes the previous example but placed in a single line for easier copying and pasting.
java -jar ../resources/rars1_4.jar mc CompactTextAtZero a dump .text HexText program_text.mem dump .data HexText program_data.mem dump .text SegmentWindow program_s.txt program.s
A detailed description of the command line options is provided below.
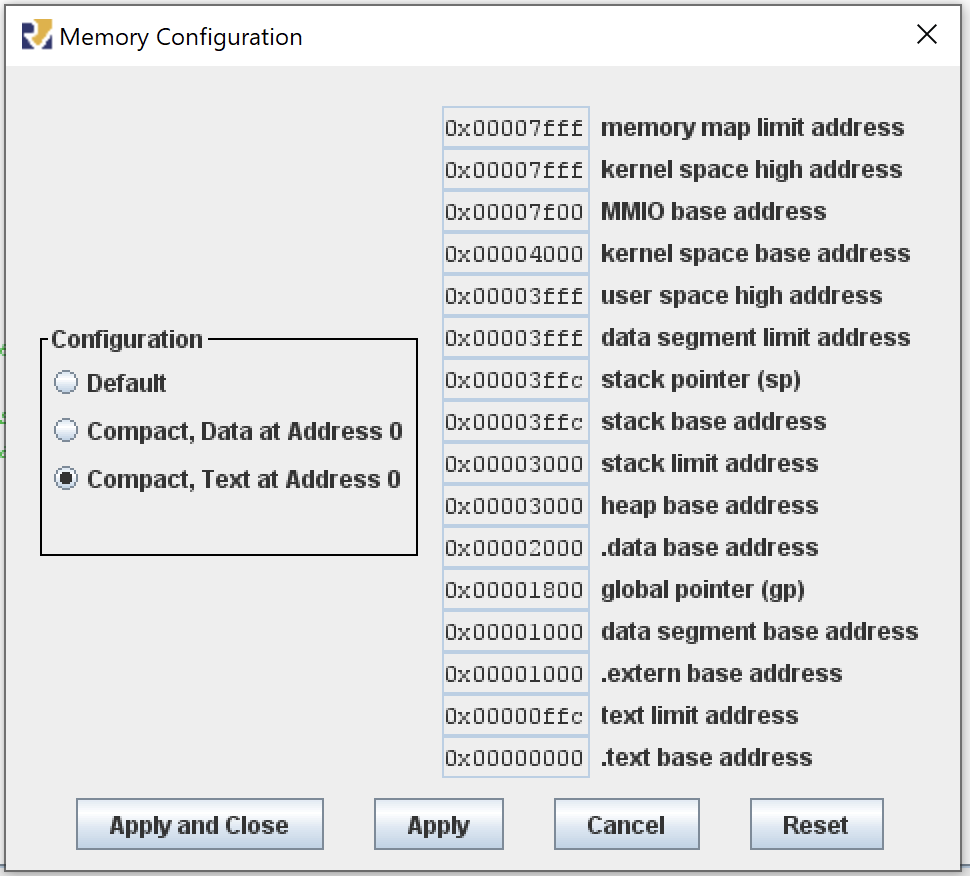
Memory Configuration
Because we have limited memory in the FPGA, we will use a different memory organization than the default RISC-V memory organization.
For your FPGA RISC-V designs, the .text segment starts at address 0x00000000 and the .data segment starts at 0x00002000.
The RARS assembler supports this as a preconfigured memory configuration named “Compact, Text at Address 0”.
To use this memory configuration, you will need to use the mc CompactTextAtZero command line option when running the assembler.
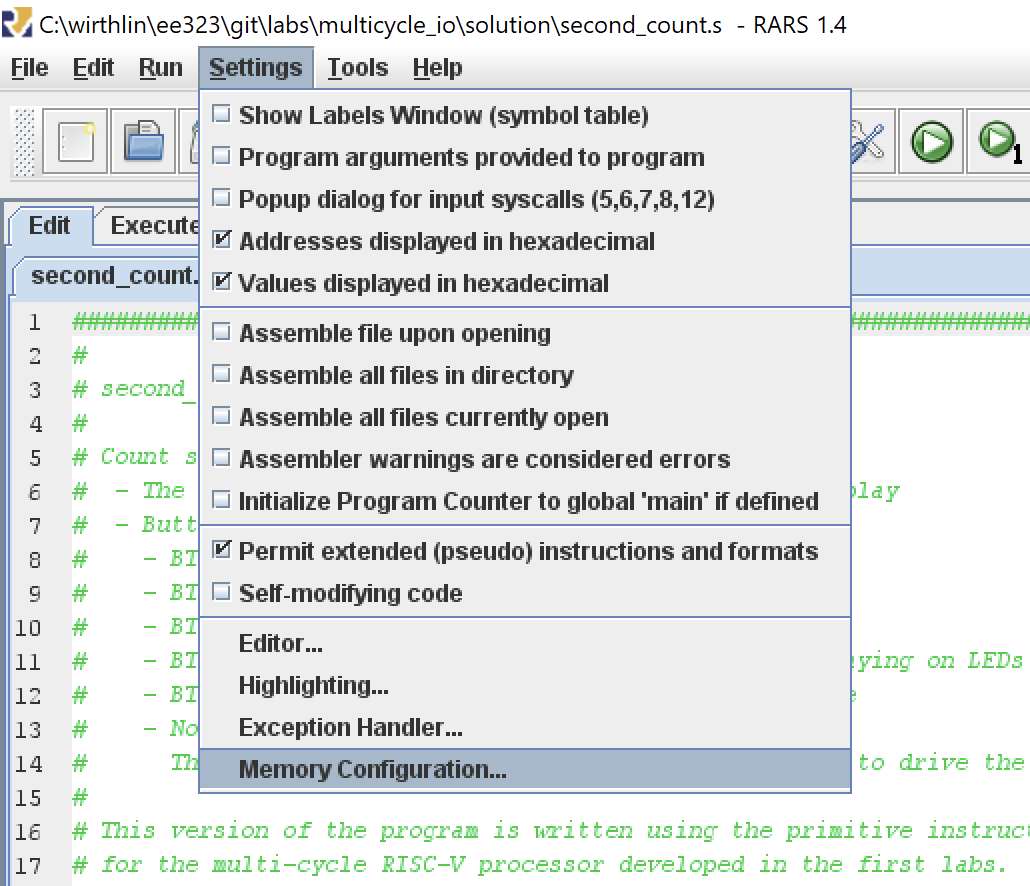
To change the memory configuration within the GUI, follow these steps:
- Select “Settings->Memory Configuration” menu option
- Click the “Compact, Texxt at Address 0” option
- CLick “Apply and Close” Screen shots of these steps are shown below.
Create Memory Files
To include the memory for your program (.text) and data (.data) into your FPGA, you need to generate text memory files that can be included with your Vivado project.
The dump option within RARS command line is used to generate these files.
The dump option requires three additional arguments: the memory segment (.text or .data), the format of the data (we will use HexText), and the name of the file to be generated.
The following example demonstrates how to use these options to generate the memory files for both the .text and .data segments of your program.
dump .text HexText program_text.mem
dump .data HexText program_data.mem
Note that the .mem extension is often used to specify memory configuration files within Vivado.
It is also very helpful to genereate a “debug” file that summarizes the original assembly and the values of the assembled instructions in hex side by side.
To generate this file, add the dump option using the ‘SegmentWindow’ format as demonstrated in the example below:
dump .text SegmentWindow program_s.txt
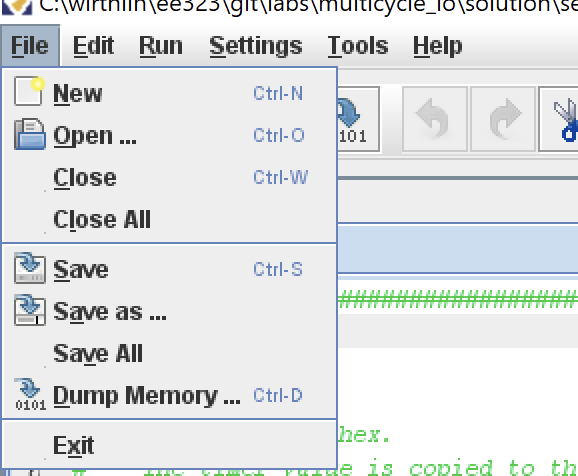
To generate these files using the GUI, select the “File->Dump Memory” menu option. Note that this option is only available after the asembly language program has been assembled.
The “Dump Memory to File” dialog box will open up giving you different options for dumpting the memory to a file. The dialog box has two different options that can be set. The left option is the “Memory Segment” and allows you to choose to dump the .text (instructions) or .data. The right option is the “Data Format” and allows you to select the format to dump the data. The format needed is the “Hexadecimal Text”. After choosing the appropriate options, click “Dump to File…” and choose a name for the file. It is helpful to use the same prefix for both the .text and .data files (such as ‘myfile_text.txt’ and ‘myfile_data.txt’ for an assembly file named ‘myfile.s’).
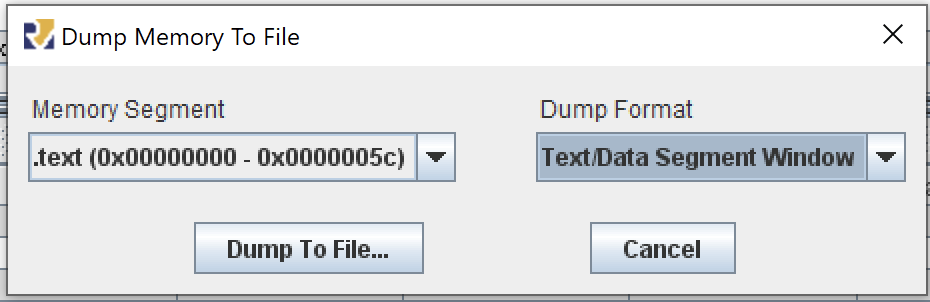
Although not required, it is also helpful to generate a debug file that summarizes the instruction memory, its labels, and addresses. This can be created by selecting the “Text/Data Segment Window” in the format option.