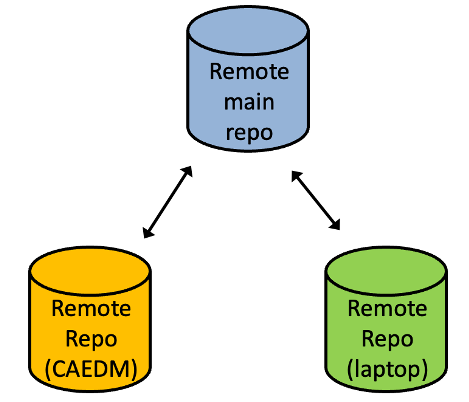
Now that you have a class repository with the starter code imported, the next step is to ‘clone’ the repository onto your host computer. This means that you will have two copies of the repository: a local copy on your host computer and a remote copy on GitHub. In fact, you can clone your repository into as many locations as you like. For example, you will almost certainly want to clone your repo onto your CAEDM file system that is used in the digital lab. You may also want to clone your repo onto your personal computer so that you can work on your labs at home. The following image demonstrates the relationship of these repositories:

The purpose of this tutorial is to help you set up a new local repository that corresponds to your remote classroom repository.
1. GitHub Clone Command
git clone git@github.com:byu-ecen320-winter2025/320-labs-<your_id>.git ~/ecen-320
Note that you will need to change the repository name to match your GitHub username. You can change the name of the destination directory to whatever you like, or you can leave the destination directory empty to clone the repository into a new directory with the same name as the repository. If this command fails it is most likely due to the fact that you do not have a ssh key setup for GitHub as explained in the GitHub SSH Key tutorial.
At this point you should have a new directory named ~/ecen-320 where your repository exists (you can name it whatever you want).
Change into this directory to execute the next set of commands.
2. Add ‘remote’ to starter code repository
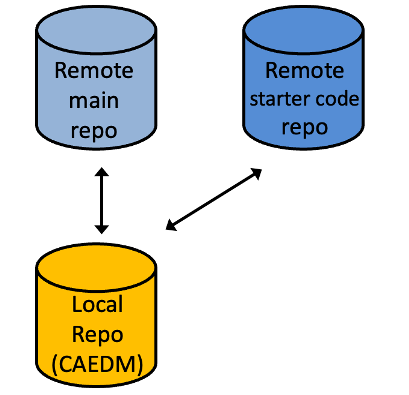
When you cloned your repo, Git creates a link, called a ‘remote’, to your GitHub repository. This remote is named ‘origin’ and points to your remote, private class repository. You will need to add a second remote (called ‘startercode’) to your repository that points to the class starter code repository. This repository is located at the following URL: https://github.com/byu-cpe/ecen320_student.
This secondary ‘remote’ will allow you to retrieve any updates to the laboratory assignment code throughout the semester. The following image demonstrates the relationship between your local repository, your remote main repository, and the class starter code repository:

To create this secondary remote, you will need to execute the following command:
cd ~/ecen-320
git remote add startercode https://github.com/byu-cpe/ecen320_student
Adding this remote is a one time task that you should complete every time you clone your repository on a new computer.
You can view your remotes to verify both remotes (a remote to your private repo and a remote to the class starter code) by executing the git remote -v command:
$ git remote -v
origin	git@github.com:byu-ecen323-classroom/323-labs-wirthlin.git (fetch)
origin	git@github.com:byu-ecen323-classroom/323-labs-wirthlin.git (push)
startercode	https://github.com/byu-cpe/ecen323_student (fetch)
startercode	https://github.com/byu-cpe/ecen323_student (push)
Finally, configure your GitHub repository to include your name and email. These settings will be used in the commit history of your repository.
git config --global user.name "Your Name"
git config --global user.email your_email@example.com
Congratulations! You have a working GitHub repository for the class and are ready to start adding content as you complete the labs.