Table of Contents
Overview
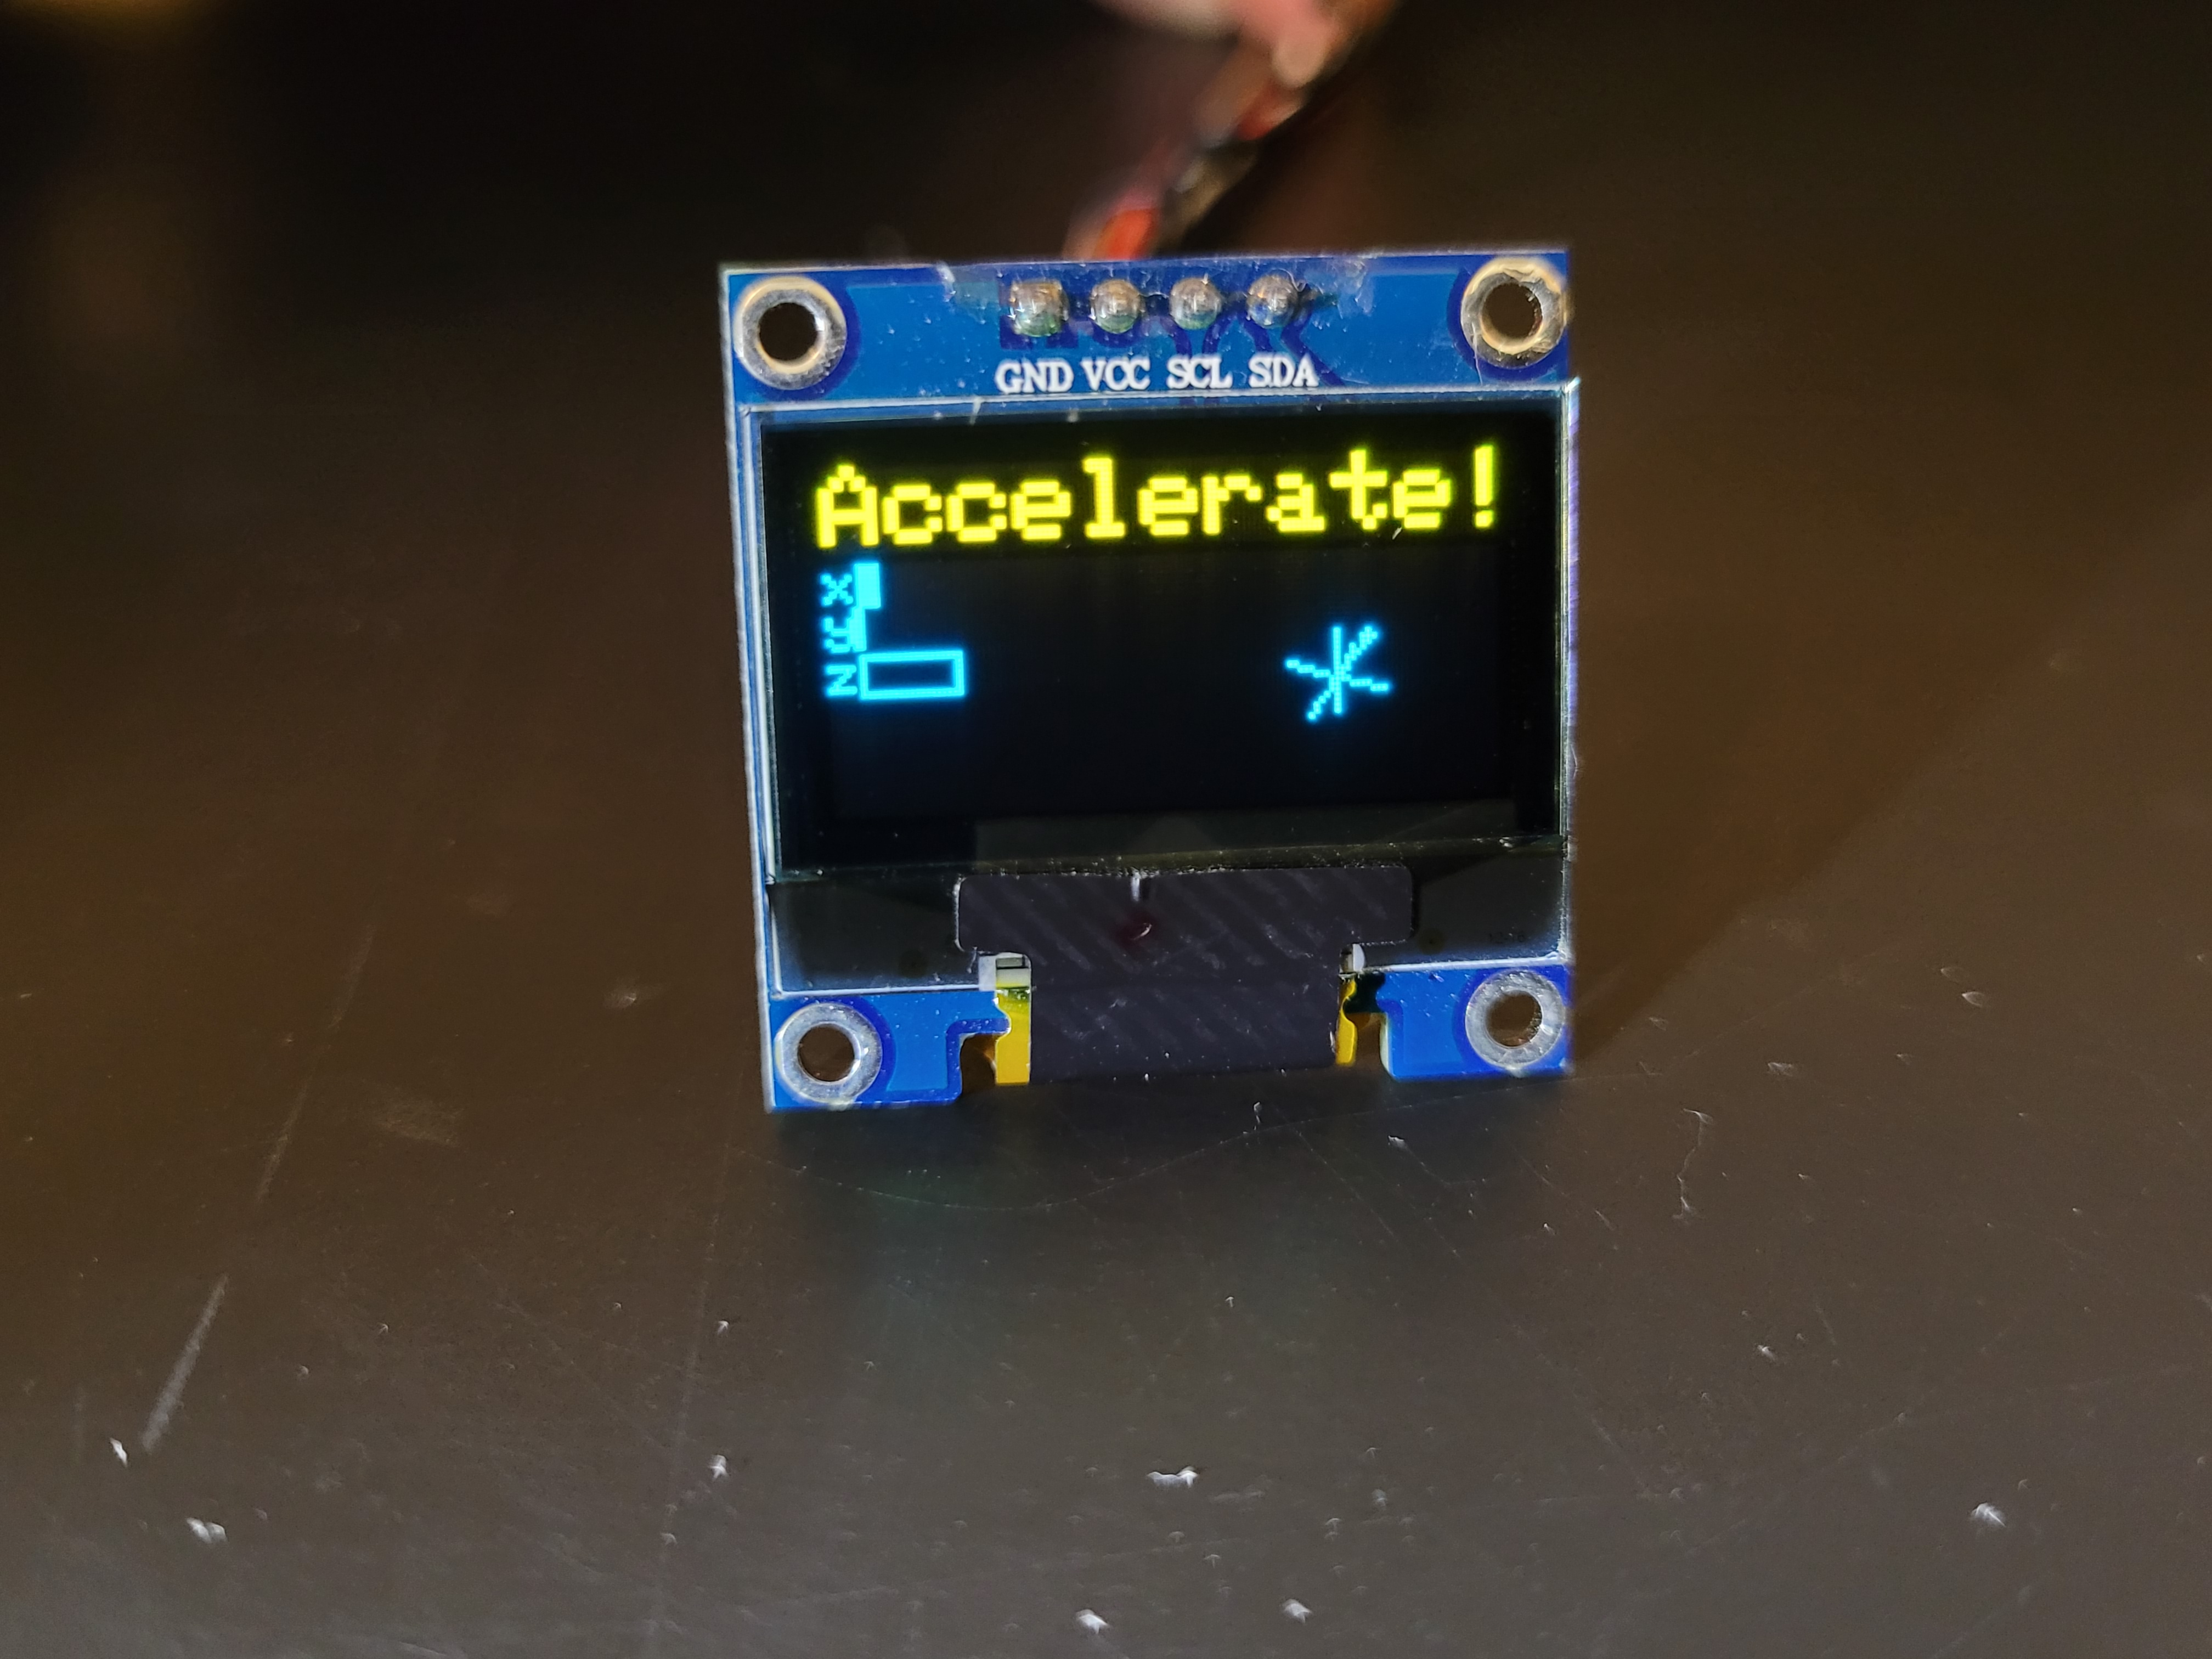
This lab is about reading data off an accelerometer and sending that information to an off-board device using the GPIO pins. In this case, we are sending the data to a small OLED screen that displays how much acceleration the board is experiencing in real time in 3 dimensional space.
There is a Help Video section at the bottom that goes with this lab. Some intructions may require you to watch the video or will be easier to understand when following along with the video.
Background/Preparation
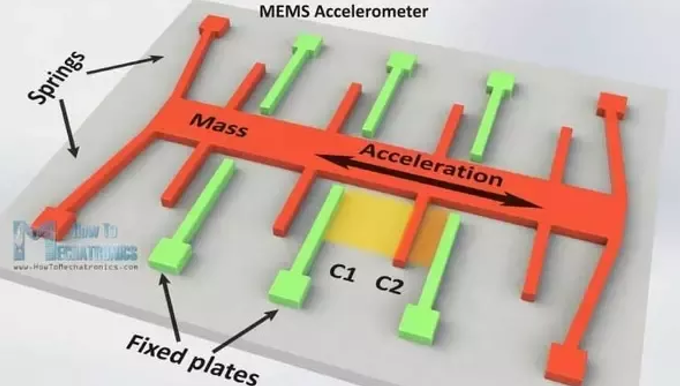
An accelerometer (“acceler-“ and “-meter”) is a circuit chip that measures the acceleration that chip experiences (from the inside). The gist of how one works is that there is a very small, delicate spring inside of the chip that also acts as part of a circuit. As that spring compresses or relaxes, the properties of the circuit change in a way that can be revealed by measuring the voltage in the circuit.
“GPIO” stands for general purpose input & output. From an engineer’s perspective, GPIO pins are pins that the engineer can program to do pretty much whatever he/she wants. They’re pins that don’t have a predetermined purpose, allowing the engineer flexibility to incorporate and interface with new components to meet his/her project-specific needs.
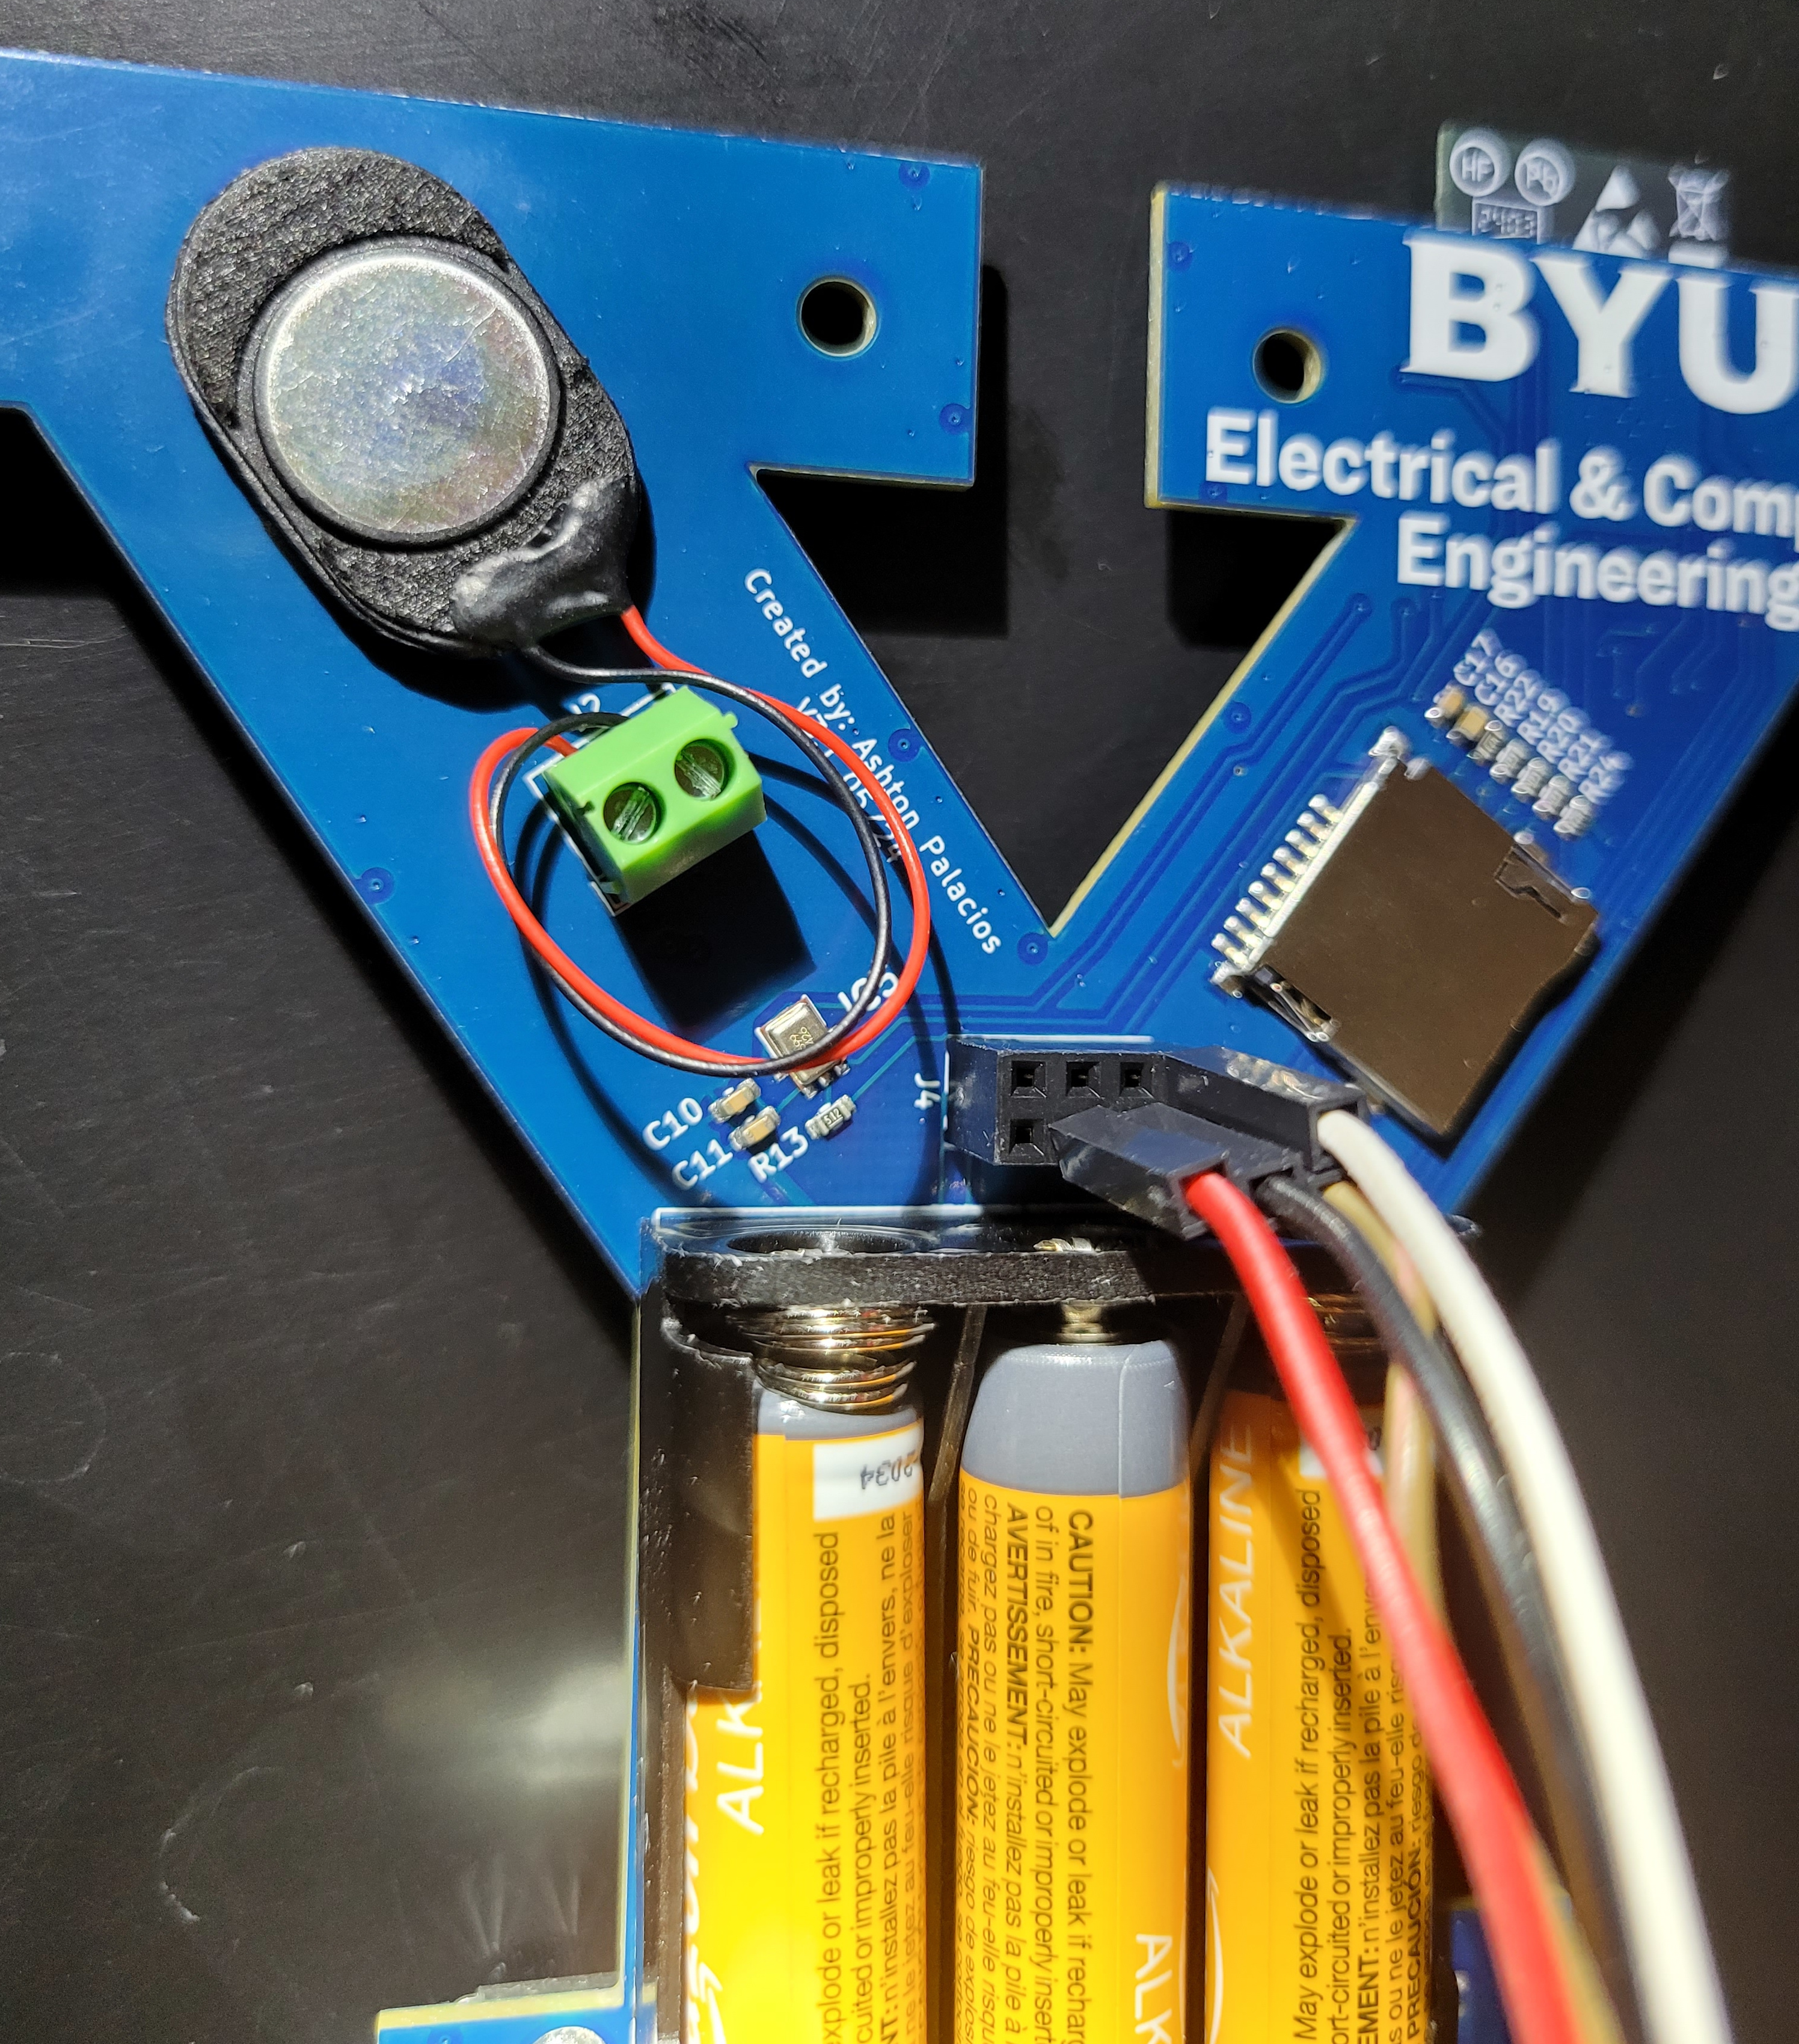
The GPIO pins on your Y-board are found on the back. While there are six pins, only three of them are actually GPIO. This is because three of them are reserved as 5V, 3.3V, and GND. Two of the GPIO pins can additionally support a communication named I2C. We rely on those pins’ support of that protocol in order to send data from the accelerometer to the off-board OLED display.
Equipment and Materials
• (1) Y-board • (1) OLED display • (4) Jumper wires • (1) Breadboard (if you prefer) • (1) USB data cable
Procedure
Step 1: Hardware Setup
- Plug your 4 jumper wires into the OLED screen
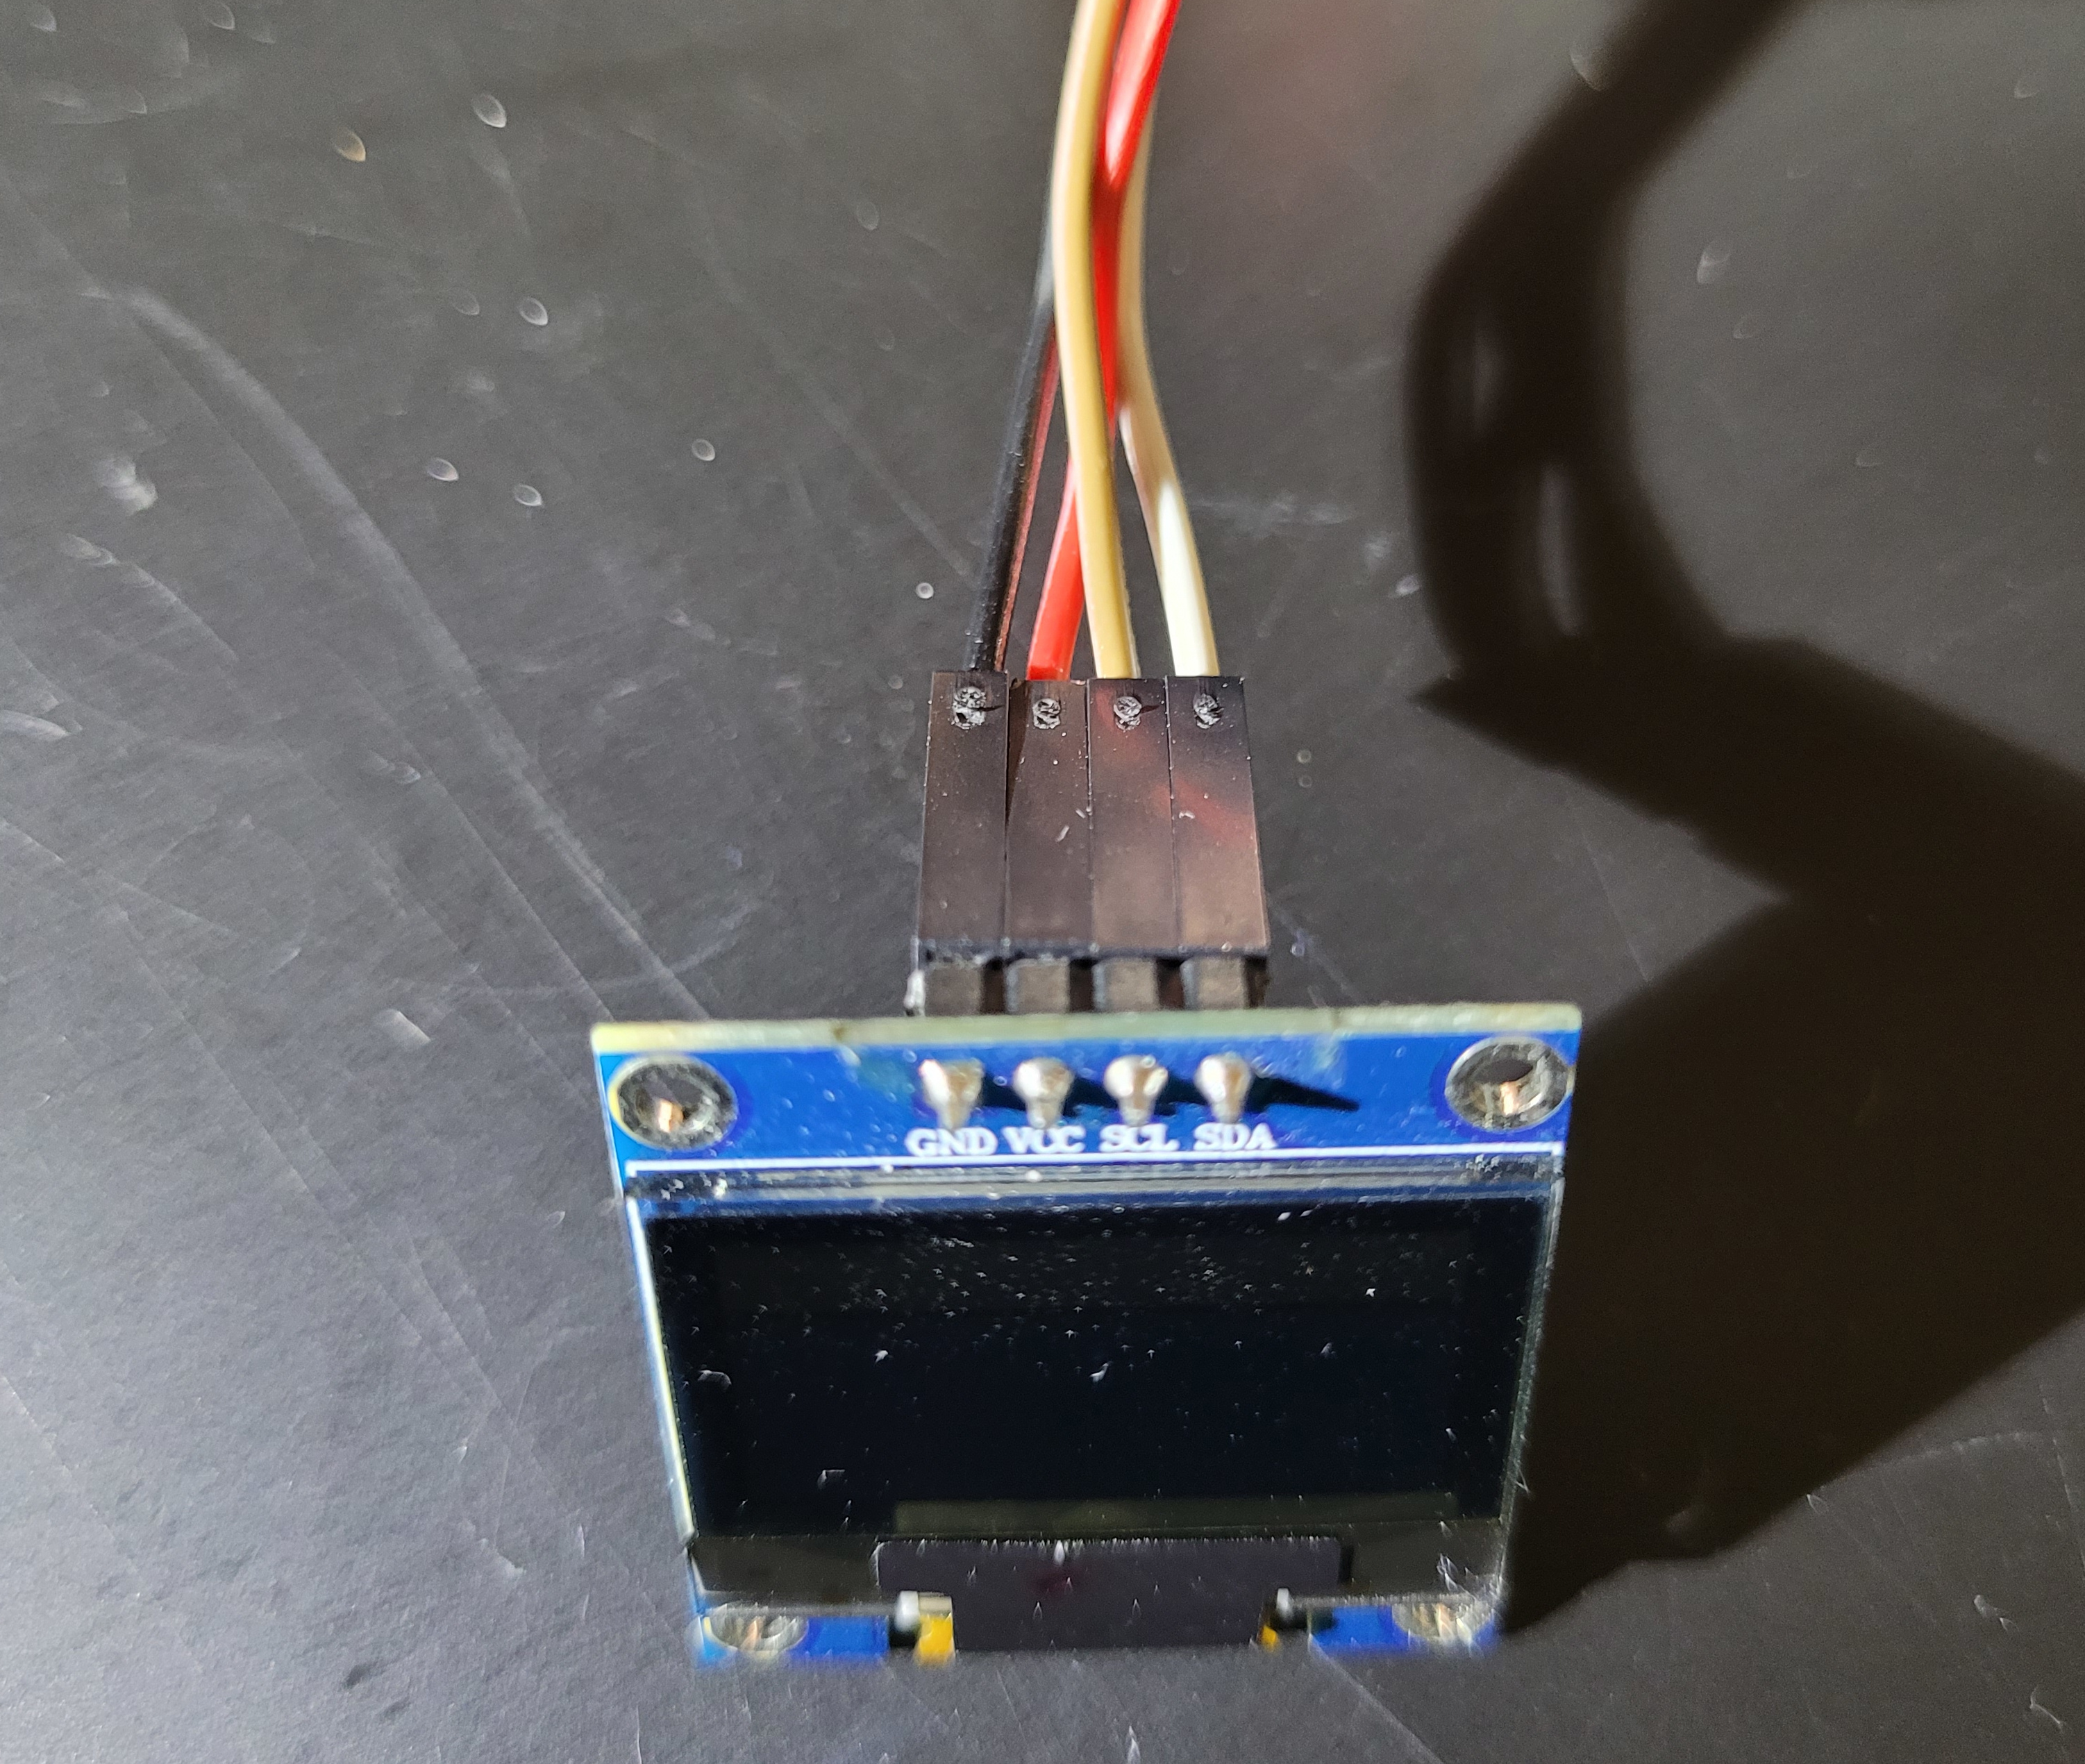
- Plug other side of those jumpers into the proper GPIO Pins (see key below)
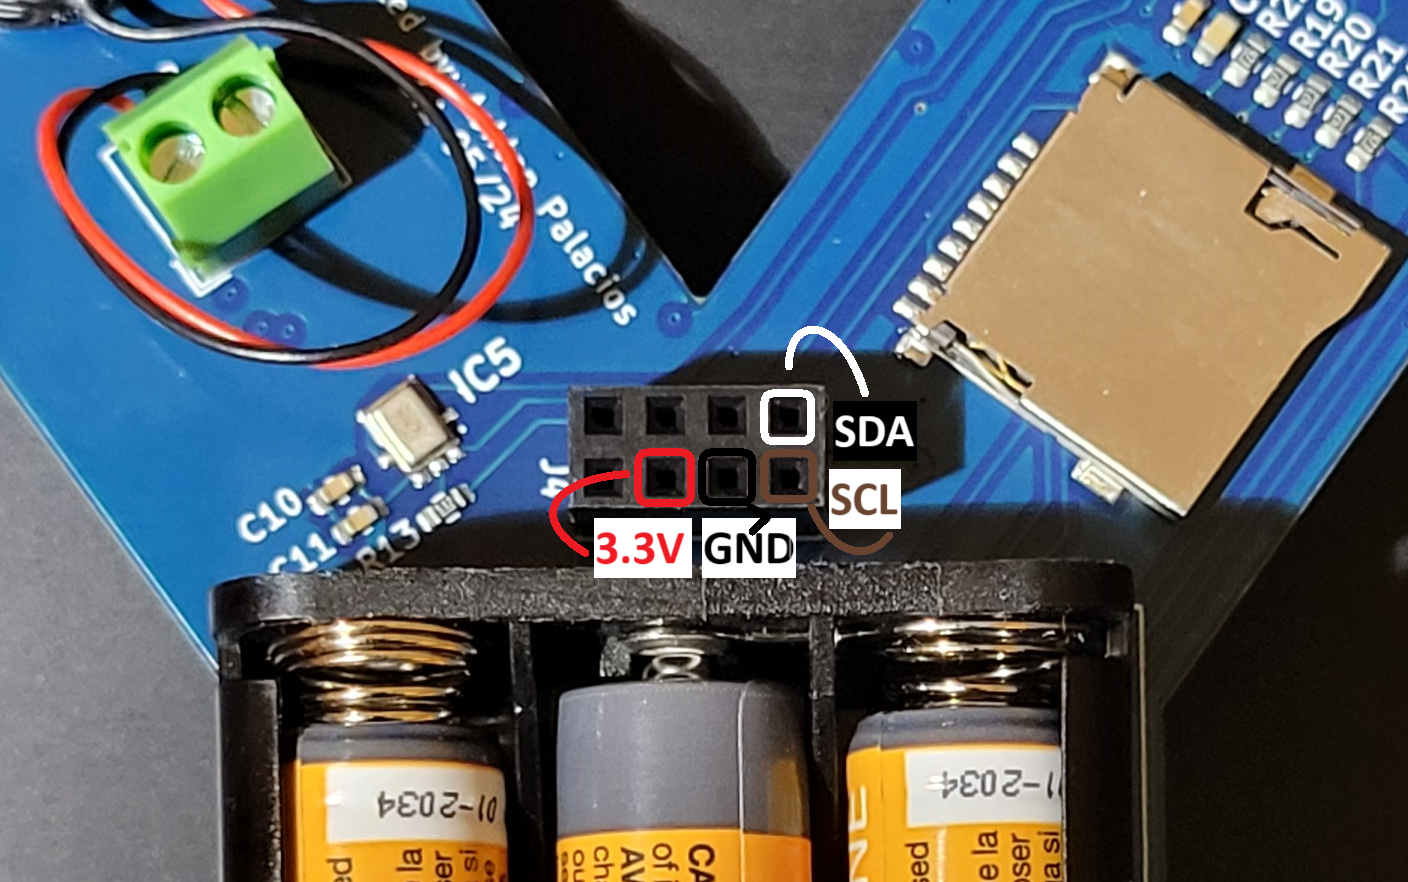
If you used the same colors as I did, it should look like the following:
Step 2: Software Setup
- Click on the “Source Control” button on the lefthand bar of VSCode (hotkey: Ctrl+Shift+G)
- Enter this URL: https://github.com/byu-ecen-192/y-board-accelerometer-gpio.git
- Choose a destination to save the lab files at
- Once you’ve opened the platformio project, build the project (hotkey: Ctrl+Alt+B)
- Upload the build to the Y-Board (hotkey: Ctrl+Alt+U)
Step 3: Tinker
Try out something cool yourself! I’ll list a few ideas below.
- Change the text at the top of the OLED (easy)
- Draw new shapes on the OLED (medium)
- Use the accelerometer data to tune the brightness of an LED (medium)
- Use each of the 3 axes of data to scale the brightness of red, green, and blue independently on an LED (medium)
- Connect the potentiometer to control the rotation of the 3D axis (hard)
- Program the buttons and/or switches to redefine which directions are ‘x’, ‘y’, and ‘z’ (hard)
- Reprogram the magnitude vector to display each component vector (hard)
Post-Lab Work (Optional)
If you have a pair, slap some sunglasses on your face a take an epic selfie with your cool lab. Feel free to post on social media or share with your friends. #byuecen
Rubric/Submission
Go to LearningSuite and submit your attendance and feedback for this lab