Table of Contents
Overview
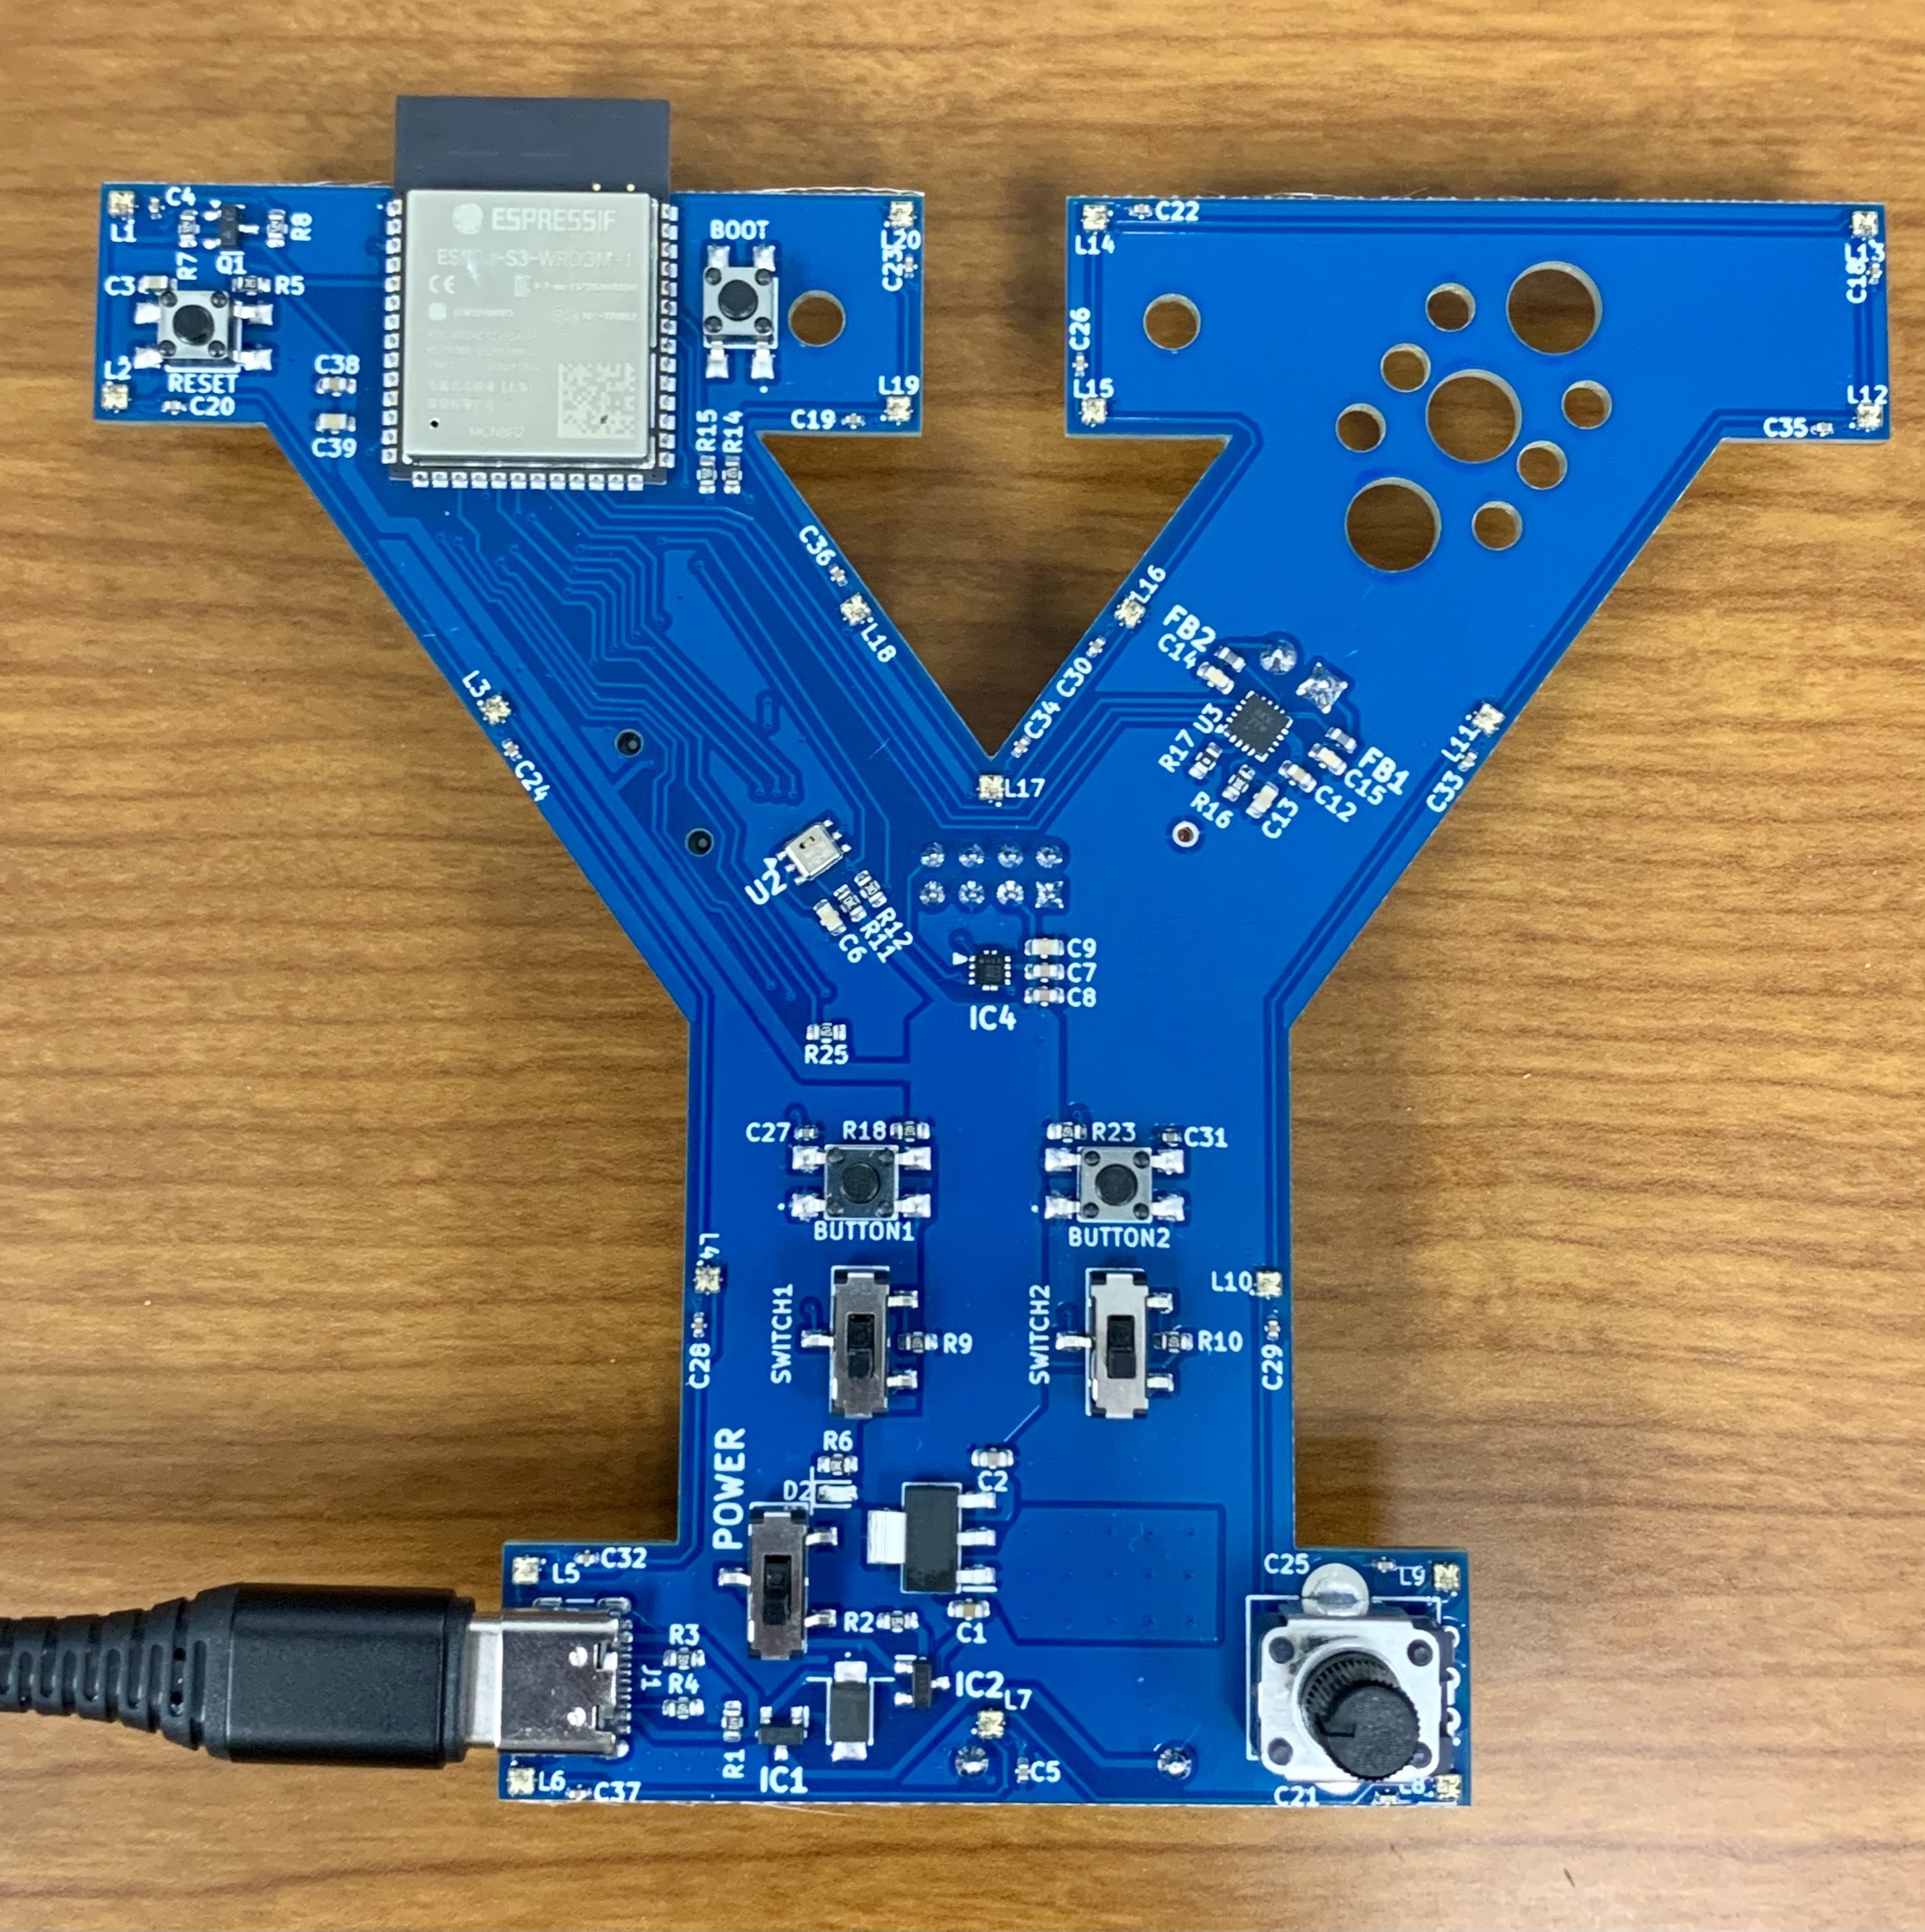
This lab will introduce you to the process of coding on the Y-Board. We will first write some code for the LEDs and buttons and upload it to the Y-Board.
Background/Preparation
- You should have finished the previous lab for a software, github, and PlatformIO intro.
Equipment and Materials
- Y-Board
- USB-C cord
Procedure
Getting the starter code
- Open vs code.
- Click the “Source Control” button on the left toolbar.
- Click “Clone Repository.” Note: if you do not see the option to Clone Repository then you will need to open a new window of VisualStudios Code (VSCode)
- Enter the url: https://github.com/byu-ecen-192/y-board-buttons-switches.git and hit Enter.
- A window will open and ask you to select the destination folder. Choose where to put it.
- Open the PlatformIO Project.
- Build and Upload the code in the main.c file to the Y-Board.
As you go through this lab, copy the example code into the respective section on VS Code main.cpp file to explore how each part works. Don’t forget to uncomment the corresponding function under the int main() section near the top.
led_exploration() (5-10 minutes)
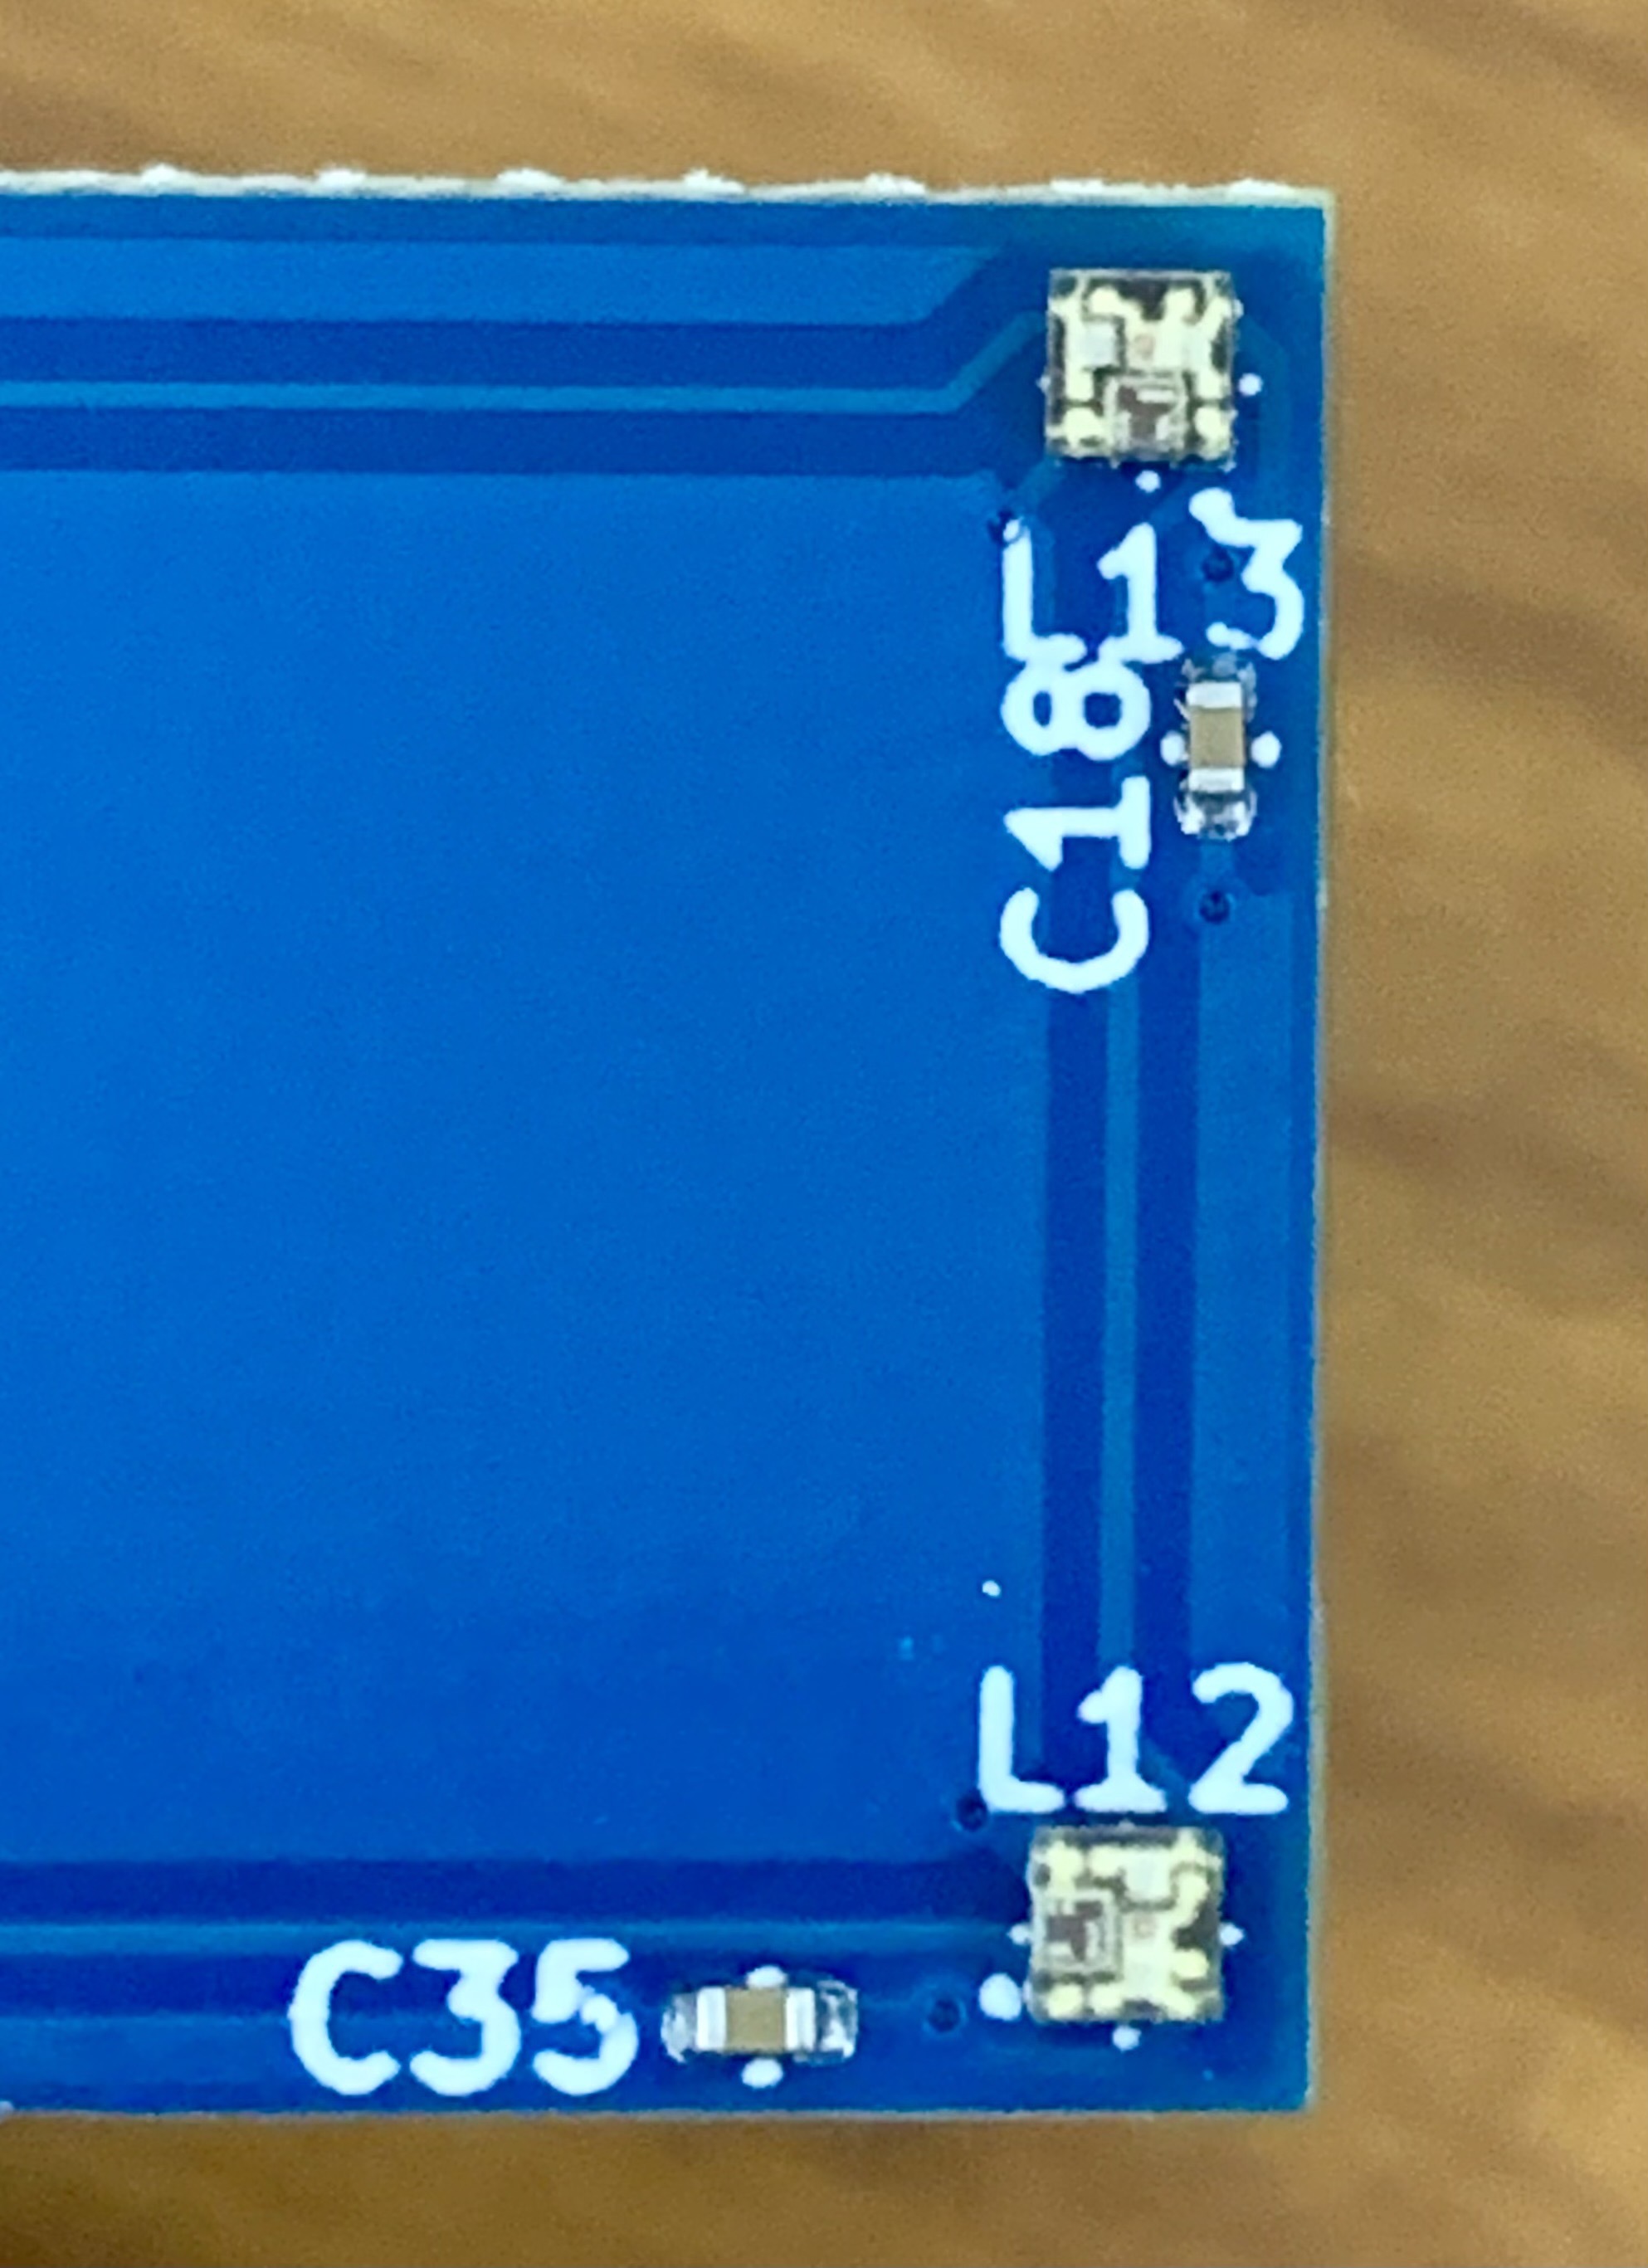
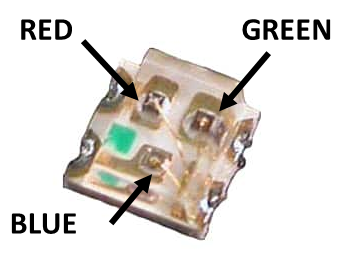
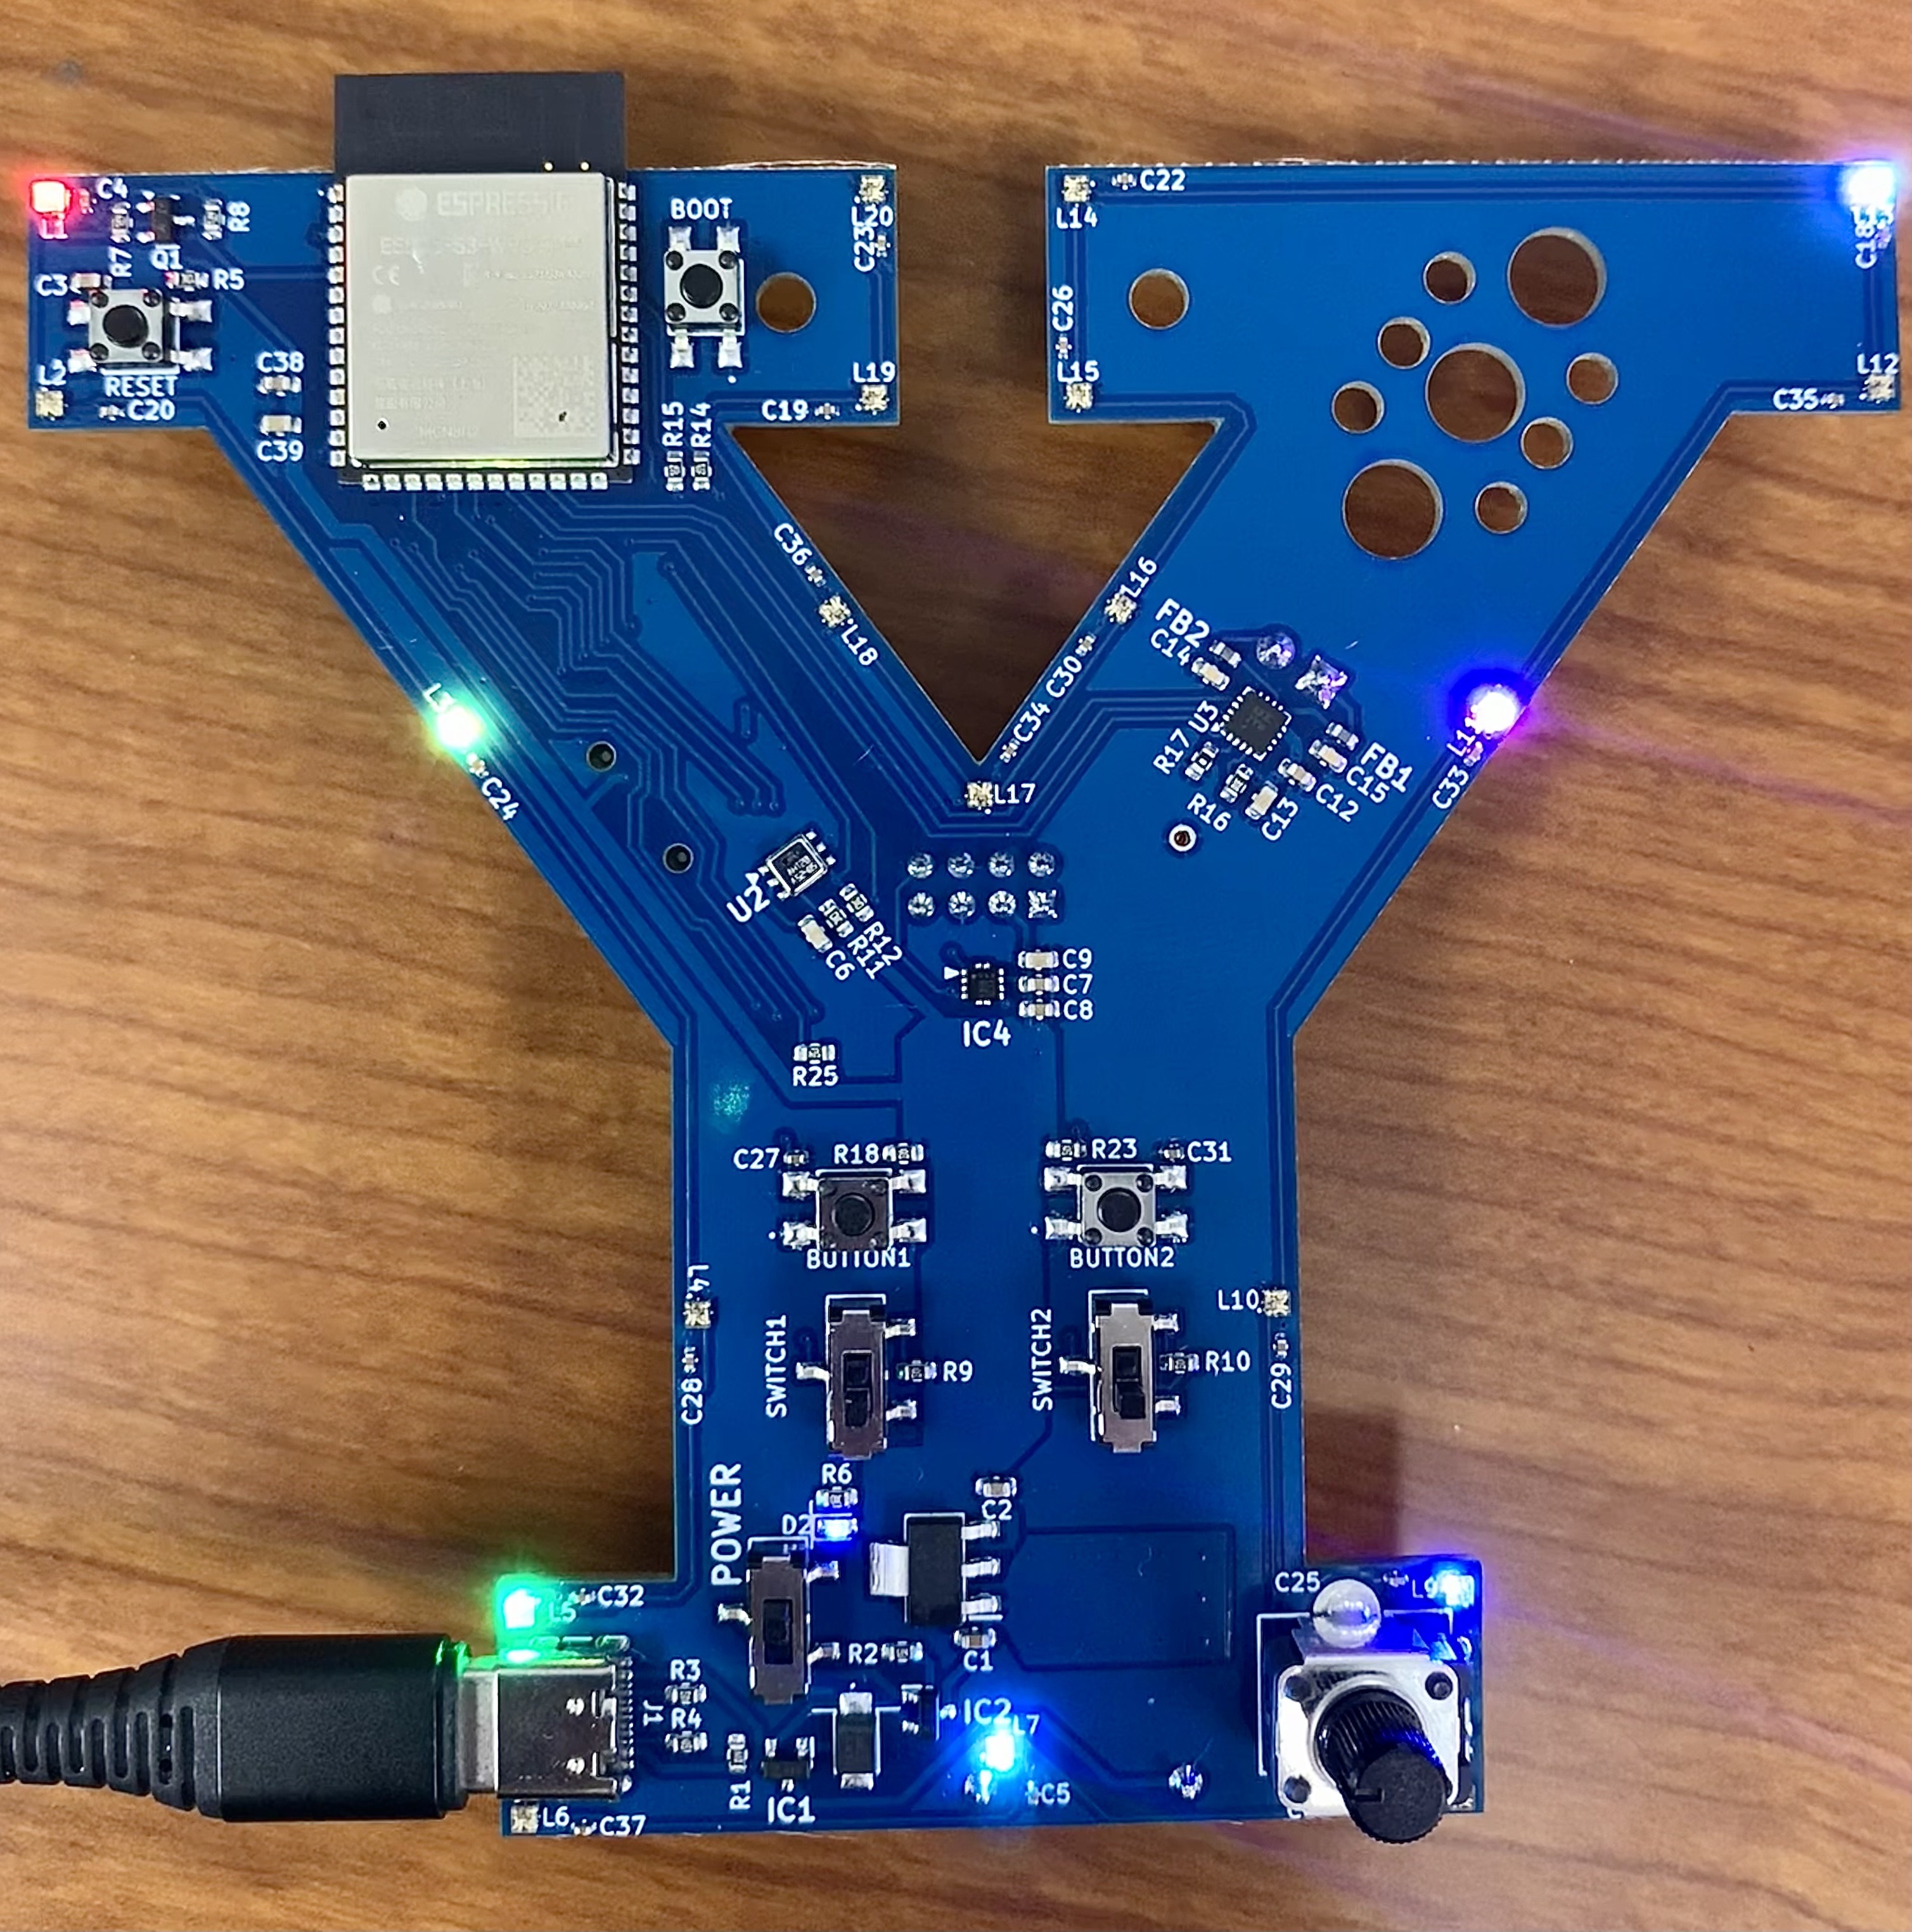
- Each LED, labeled L1 to L20, is an RGB (red-green-blue) LED, which means that it is actually three smaller red, green, and blue lights packaged together. You can set the brightness of the red, green, and blue lights individually, making the LED any color you like.
Functions
The function to set an LED looks like this:
Yboard.set_led_color(<LED number>, <red>, <green>, <blue>);
- The
<LED number>can be any value from 1 to 20. - The red, green, and blue values represent the brightness of that color and can be any value from 0 to 255.
You can change the brightness of an LED with this function:
`Yboard.set_led_brightness(<brightness>);`
- The brightness is specified as an integer between 0 (off) and 255 (full brightness).
You can also turn all the LEDs to the same color with this function:
`Yboard.set_all_leds_color(<red>, <green>, <blue>)`
Examples
- To make L3 display bright red, you should use this statement in your code (feel free to click the copy button on the far right):
Yboard.set_led_color(3, 255, 0, 0); - To make L15 display bright yellow, you should turn on the red and green pixels to max brightness:
Yboard.set_led_color(15, 255, 255, 0);
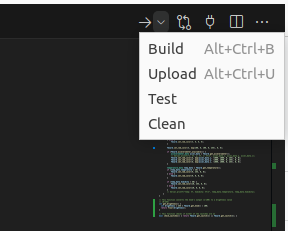
Copy and paste these two lines of code inside the brackets under the void led_exploration() function in VS Code (line 23). Don’t forget to click the “upload” arrow in the top right corner or bottom edge to program your board with new code!
Help: Where is the Upload Button?

- Note: If the code will build, but not upload, you may need to put the board into “booting mode”. To do this, hold the “BOOT” button while you press on the “RESET” button. The board is now in booting mode, and you can try uploading the code again.
- Once the code is uploaded, you will have to press the reset button to run the code.
Help: Where are the Boot and Reset buttons?
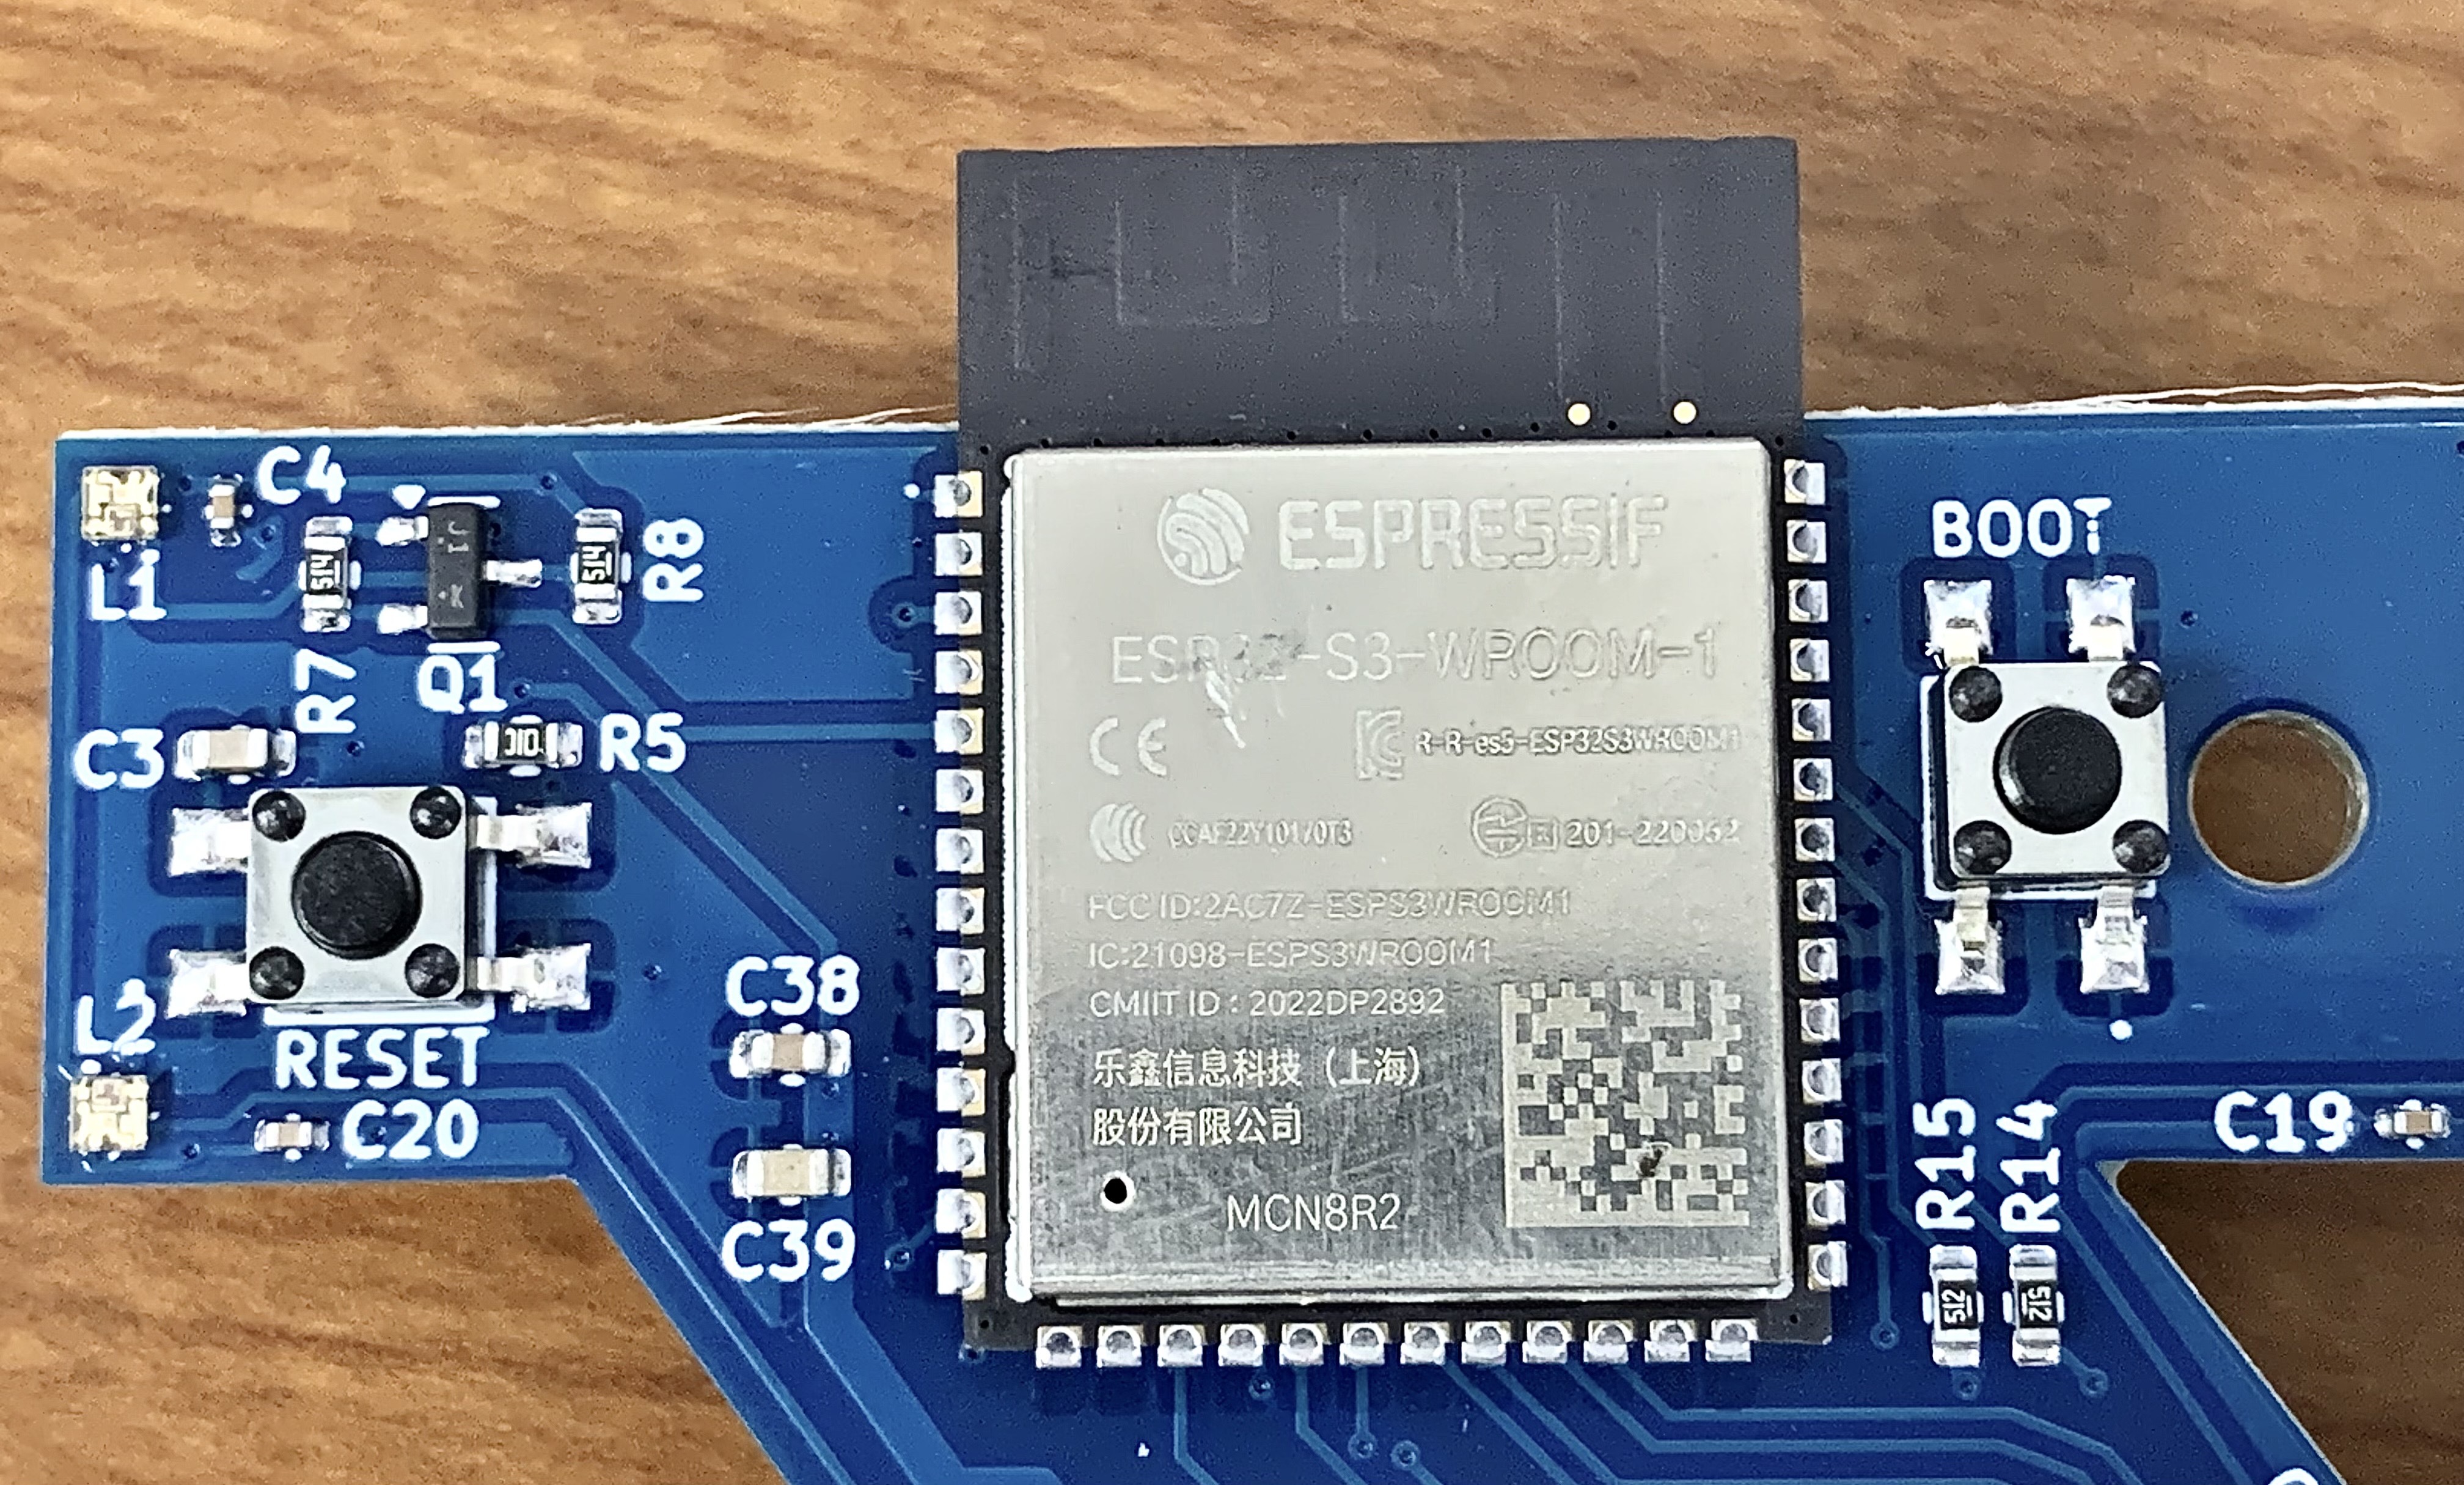
- Try putting this line of code before setting the LED colors and see what happens:
Yboard.set_led_brightness(10); - If you want to turn on all LEDs white, try this line of code:
Yboard.set_all_leds_color(255, 255, 255);
Activity
- Turn on at least one more LED with a different color. Feel free to play around with the brightness value or try turning on all LEDs the same color. Show a neighbor your LEDs. Try not to spend more than a couple minutes on this.
loop_exploration() (15 minutes)
While Loops
While loops run and re-run the code inside them until a certain condition is met. This saves us the trouble of copy-pasting the same lines of code over and over again. We can also use while loops to make our code run forever. What if we wanted to use a while loop to make the first 10 leds blink one time each, in sequence? We could do something like the following:
Paste this code inside the brackets of the void loops_exploration() function, and don’t forget to change which function is commented out under int main(). Also feel free to change the number of LEDs or the color.
int currentLed = 1;
while(currentLed <= 10) {
    Yboard.set_led_color(currentLed, 255, 0, 0);
    delay(250);
    Yboard.set_led_color(currentLed, 0, 0, 0);
    currentLed++;
}
- Reminder: If the upload fails, you may need to put the board in “booting mode” by holding the “BOOT” button and pressing the “RESET” button.
More Details
- This loop has a loop condition that isn’t always true, because we increment the value of currentLed every time it runs using currentLed++;. We want it to run as long as currentLed <= 10 is true. Once currentLed is 11 or larger, the loop won’t run again.
- The
delay(250)means it will wait for 250 ms, or a quarter of a second, before turning the next LED on.
For Loops
A for loop to do the same thing as above looks like the following:
for(int currentLed = 1; currentLed <= 10; currentLed++) {
    Yboard.set_led_color(currentLed, 255, 0, 0);
    delay(250);
    Yboard.set_led_color(currentLed, 0, 0, 0);
}
More Details
- "for" loops and "while" loops can do the same things, but "for" loops are better for running code a certain number of times and "while" loops are better for running code until a certain condition is met in our program.
- Notice the similarities between a "for" loop and a "while" loop. We still declare a variable called
currentLed, we still have a loop condition that keeps track of whether the loop should run again, and we still incrementcurrentLedevery time the loop runs. But in the "for" loop, we do all of that on a single line inside the parenthesis. This is a nice way to organize our code and keep track of our variable in one spot.
Replace the while loop code with the for loop code and upload it. You should notice that it does the same thing.
Be careful with the number of brackets when replacing code. If you have extra brackets, the code will not run.
Example
Make all the LEDs blink. On for 500ms then off for 500ms, repeated forever.
while(true){
    Yboard.set_all_leds_color(255, 255, 255);
    delay(500);
    Yboard.set_all_leds_color(0, 0, 0);
    delay(500);
}
Replace the previous code with this example code under the void loop_exploration() function to test it out. Feel free to change the delay time, brightness, or colors of the LEDs as you wish. Try not to spend more than a minute or two on this.
Activity
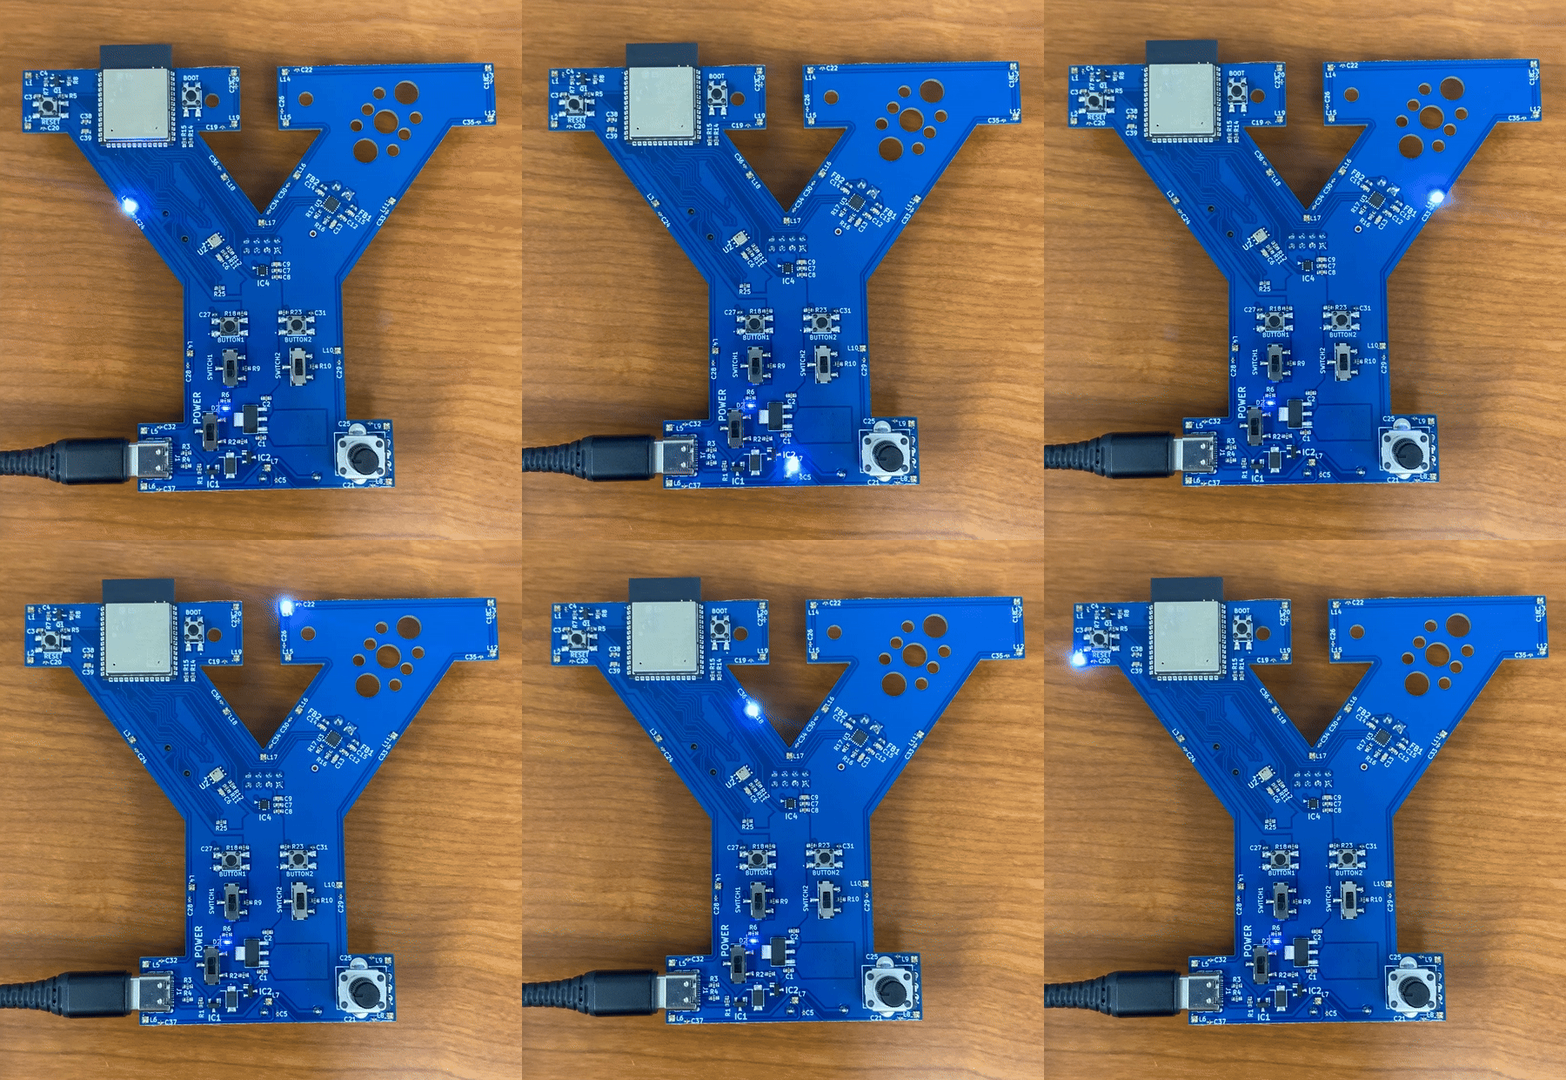
- Make a single LED circle the board continuously. Use whatever color or delay time you wish and show a neighbor when you have completed this challenge.
- Hint: use the code from the For Loops section as a base, change the number of LEDs, and make it loop forever (putting everything inside a
while(true)loop, like in the example above).
- Hint: use the code from the For Loops section as a base, change the number of LEDs, and make it loop forever (putting everything inside a
button_exploration() (15 minutes)
Functions
The function to determine if a button is pressed is:
Yboard.get_button(<button_number>);
And the function to determine if a switch is ON is:
Yboard.get_switch(<switch_number>);
Each of these functions returns true if the button/switch is pressed or ON, and false otherwise. <button_number> or <switch_number> should be the number of the button or switch whose position you want to check as an int (eg. 1, or 2).
What are Conditionals?
You don’t need to upload this code, so when you feel like you understand conditionals, continue to the next section and upload the “Examples” code.
We use if statements to evaluate conditionals that are true or false:
if (Yboard.get_button(1)) {
    Yboard.set_led_color(1, 255, 0, 0);
}
More Details
- If Button1 is pressed,
buttons_get()will return atrue. - This if statement can also be written as
if (buttons_get(1)==true), but thetrueis implied in the if statement above.
Additionally, we can chain conditionals together using && or ||. The && symbol is called a “logical AND”, and the || symbol is called “logical OR”. In this context, “logical” just means a computer could understand it. Here’s an example of using each:
if(Yboard.get_button(1) && Yboard.get_button(2)) {
    Yboard.set_led_color(1, 255, 0, 0);
}

if(Yboard.get_switch(1) || Yboard.get_switch(2)) {
    Yboard.set_led_color(1, 0, 0, 255);
}
Example
We can use an else block to make the board do something else when the if block is false.
Copy and paste this code into the void button_exploration() function and upload it. Don’t forget to change which funtion is commented out under int main().
while(true) {
    if (Yboard.get_button(1)) {
        Yboard.set_led_color(1, 255, 0, 0);
    } else {
        Yboard.set_led_color(1, 0, 0, 0);
    }
}
- This code says that the LED will only be on when the button is being pressed. Otherwise, it will turn off.
- The infinite
while(true)loop here is very important because you want the code to continuously check the state of Button1.
We can chain as many conditionals together as we want by using else if blocks:
while (true) {
    if (Yboard.get_switch(1) && Yboard.get_switch(2)) {
        Yboard.set_led_color(1, 255, 0, 0);
    } else if (Yboard.get_switch(1) || Yboard.get_switch(2)) {
        Yboard.set_led_color(1, 255, 255, 0);
    } else {
        Yboard.set_led_color(1, 0, 0, 0);
    }
}
- Notice that this example uses switches instead of buttons.
Replace the previous example with this code and upload it. Remember to be careful with the number of brackets. Also feel free to change the LED colors.
Activity
- Use multiple buttons and/or switches and their combinations to turn on an LED (or all LEDs) with different colors. Use at least 4 combinations. Show a neighbor what you chose to do.
- Hint: You will have three
else ifstatements, and your finalelsestatement should turn all LEDs off.
- Hint: You will have three
potentiometer_exploration()
Functions
The function to get the position of the wiper looks like this:
Yboard.get_knob()
- The value returned is between 0 and 100, representing the position of the knob. The value is 0 when the wiper is at GND, and 100 when the wiper is at Vcc (input voltage value, meaning no resistance).
Example
We can set this value to a variable to be used in other places
int value = Yboard.get_knob()
This value can be used in several other places to change the brightness, color, timing, or even within conditionals and loops. For example:
Yboard.set_led_brightness(255*value/100);Yboard.set_led_color(1, 255*value/100, 0, 0);delay(value)if (value >= 50){<do something>} else {<do something else>}
Try out this example under void potentiometer_exploration(), and don’t forget to uncomment this function under the main function.
while(true){
    int value = Yboard.get_knob() * 255/100;
    Yboard.set_all_leds_color(value, 255-value, 0);
  }
- Multiplying the value by 255/100 is not necessary, but it will make the max value be 255 instead of 100 so that the max brightness or color can go up to 255.
final_challenge()
Come up with your own challenge to combine the use of LEDs and at least two more of the following:
- buttons
- switches
-
forloops - potentiometer
Here are some examples:
- Use a switch to change which direction the LED circles the board
- Use a button to increment the color of all LEDs little by little from pure red to pure blue
- Use the potentiometer example and add the use of switches to change which range of colors the LEDs are changing between
- Add on to any other example given
- Any other combination you can think of