Table of Contents
Overview
In his lab you’ll be setting up your coding environment, and learning the basics of programming the microcontroller on the Y-Board. The end product will be a comprehensive hardware test.
Equipment and Materials
- Y badge board
- Usb c to usb cable
- Computer with vs code
Procedure
Setting Up the Environment
- Open VS code.
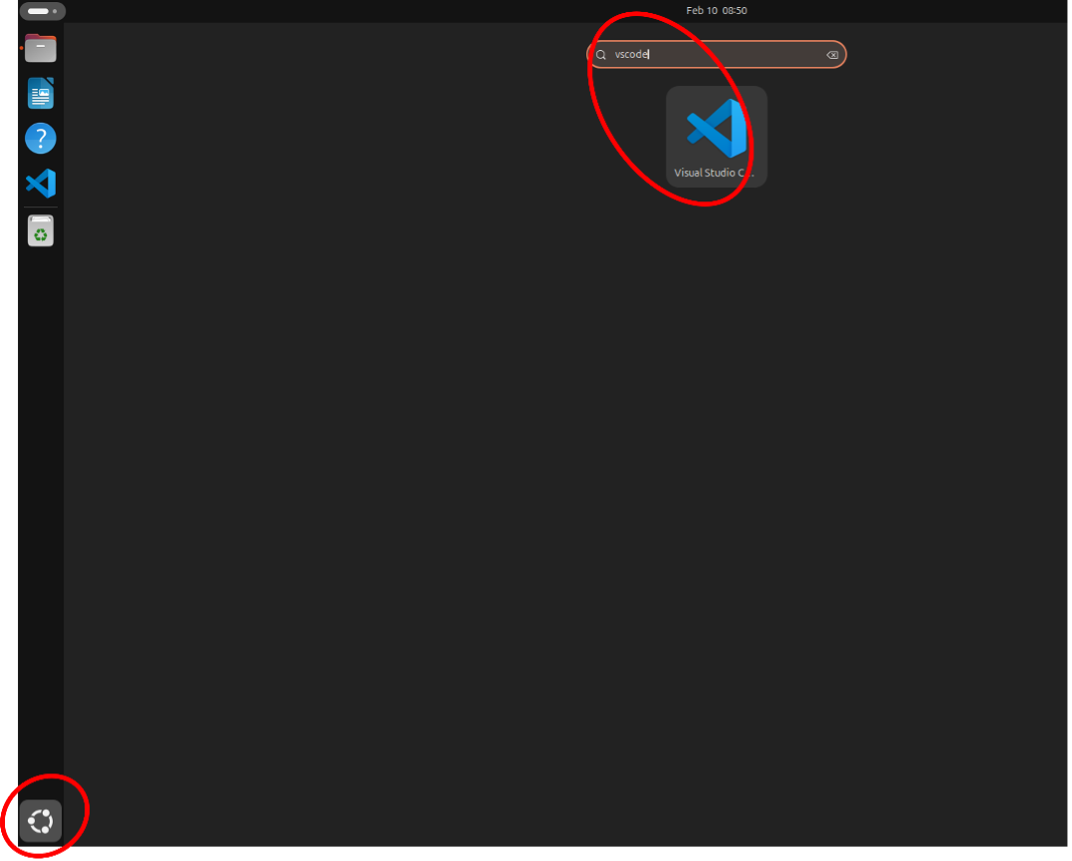
- Click on “Extensions” on the left side.
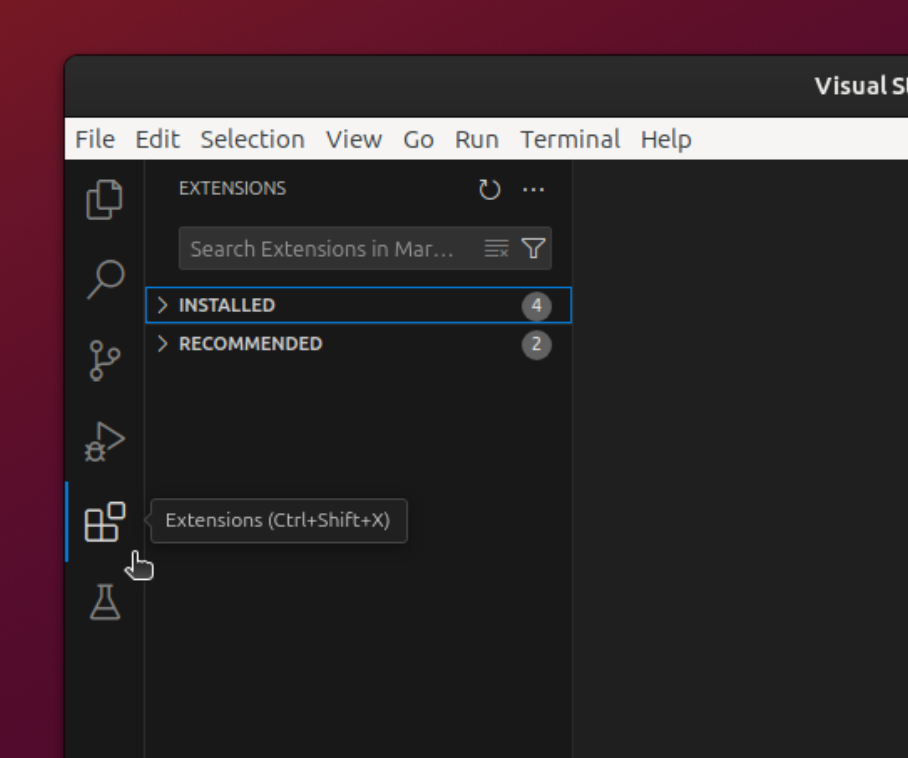
- Install PlatformIO.
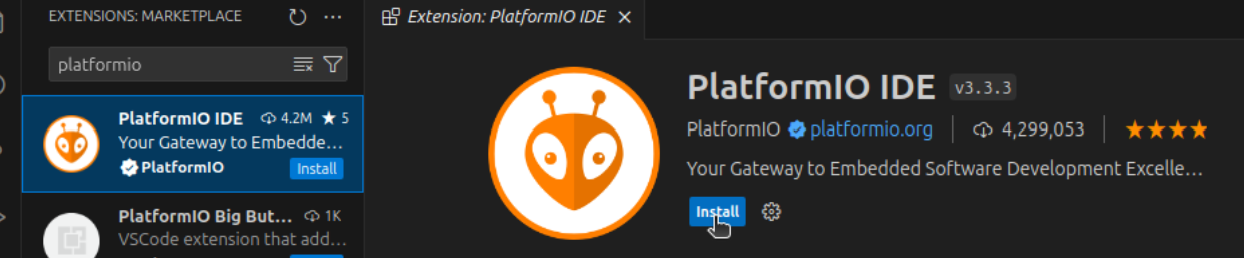
- In the Extensions marketplace (Ctrl + Shift + X), search for “PlatformIO”.
- Install the first result (PlatformIO IDE).
- Note: The installation may take up to 10 minutes. Watch the loading bars in the bottom right corner *
- If it takes longer than 15 minutes, ask a TA for help. You may need to uninstall and retry if the installation gets stuck.*
Getting the starter code
Now that PlatformIO is setup, you are ready to get the code for this lab.
- Open VS code.
- Click the “Source Control” button on the left toolbar.
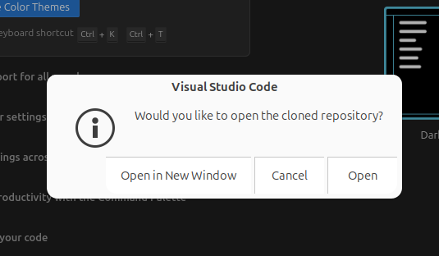
- Click “Clone Repository.” Note: if you do not see the option to Clone Repository then you will need to open a new window of VisualStudios Code (VSCode)
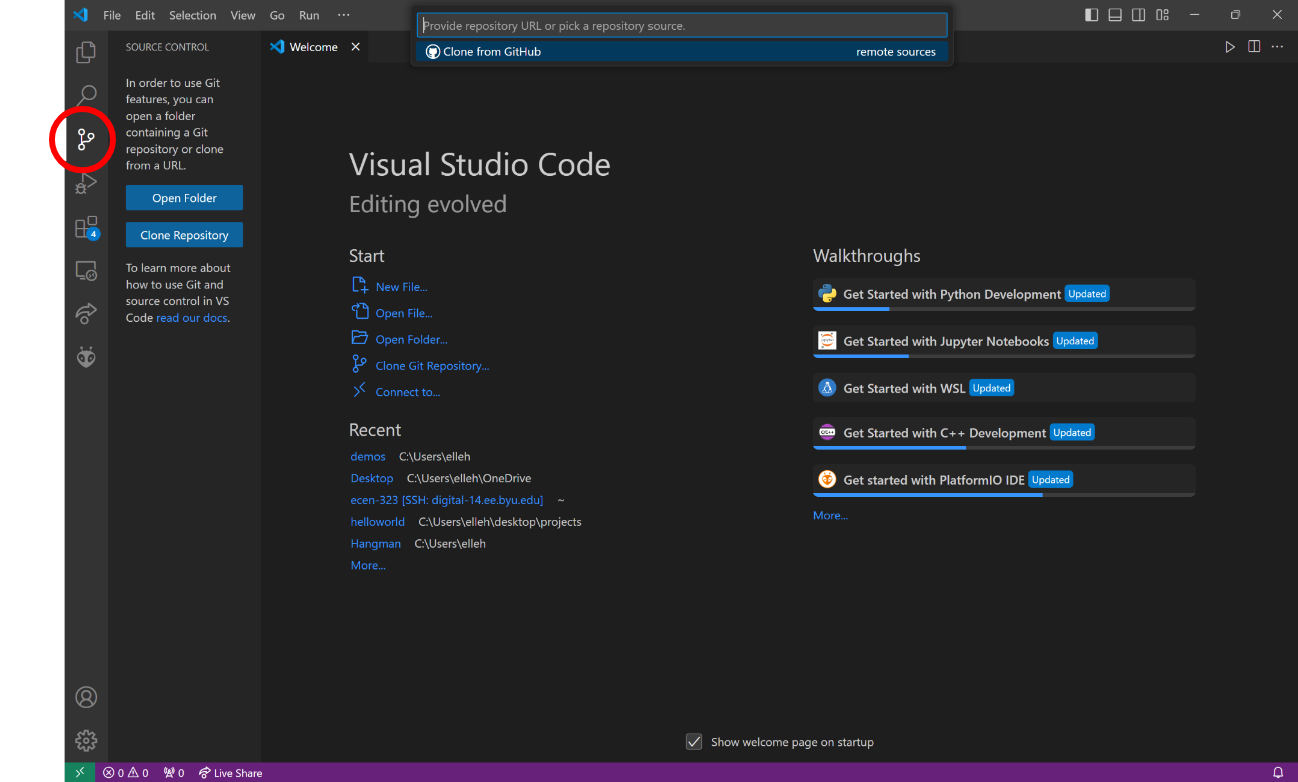
- When prompted, Enter the url: https://github.com/byu-ecen-192/y-board-introduction.git and hit Enter.
- A window will open and ask you to select the destination folder. Choose where to put it.
- Click OPEN and select Trust the Authors. Watch the loading bars in the bottom right corner—PlatformIO may take a few minutes to set up the first time you open a project.
Uploading Code
Now you’re ready to upload the code to the Y board.
- Connect the Y board to your computer using a USB-A to USB-C cable, and don’t forget to turn on the Y board’s power switch.
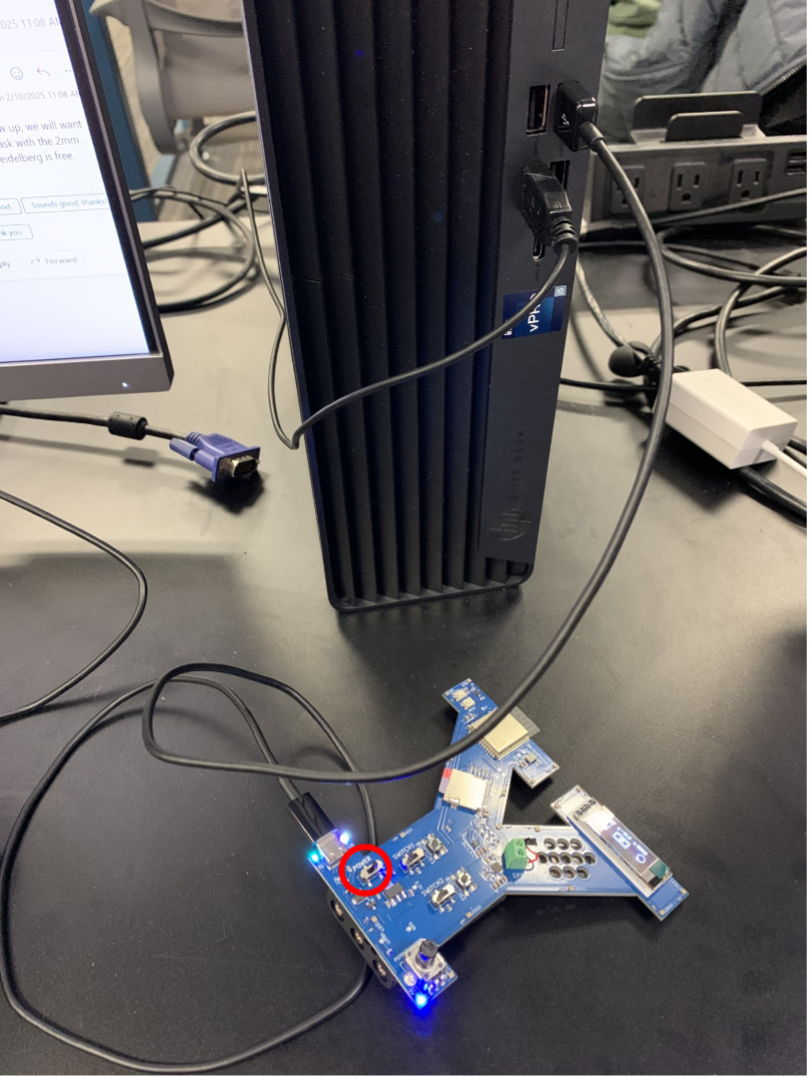
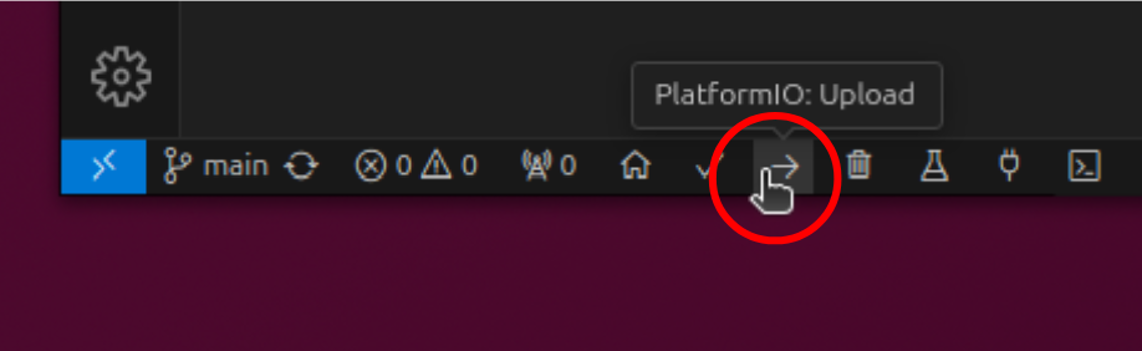
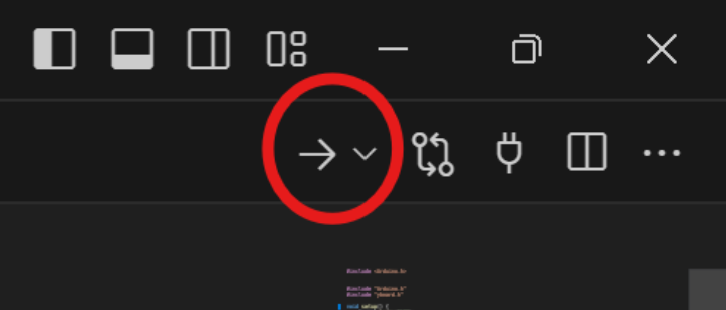
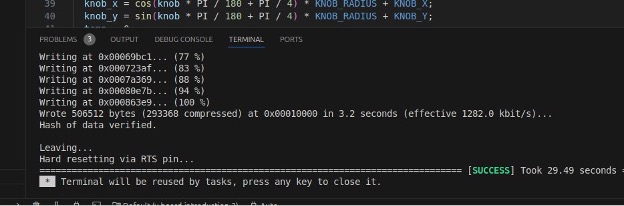
- Click the upload button in the bottom left or top right of VS Code screen to upload the code to the ESP32 on the Y board.
- If everything went well, the bottom of the screen should display ‘Success.’ If you don’t see this, ask a TA for help.
Hardware Test
The code you uploaded lets you test all the hardware features of the Y board. Use the table below to explore its features. Experiment with the board and get comfortable with it –we’ll be using it frequently throughout the semester.
| Yboard | Code Test |
|---|---|
| Screen | Displays status of switches, buttons, and potentiometer |
| Potentiometer | Led 5 changes brightness |
| Flip switch 1 (left) | Led 1 turns on |
| Flip switch 2 (right) | Led 2 turns on |
| Push button 1 (left) / Speaker | Play fight song and light all the LEDs |
| Push button 2 (right) / Microphone | Hold the button down to turn on all LEDs; the microphone records while the lights are red. |
| When you release the button, the LEDs turn green, and the recorded sound plays back. | |
| Accelerometer | Three LEDs on the bottom of Y board change color depending on x , y, and z rotation. |
| Power Switch | Turns on/off the Yboard :-P |
Background
Microcontrollers
A microcontroller is a compact computer on a chip. They’re used in things that need some level of intelligence to perform a function but don’t require a whole computer. At the heart of a microcontroller is a central processing unit, or CPU. It’s much simpler than the CPU in your laptop or desktop but is optimized to perform tasks efficiently with limited resources. Microcontrollers come with their own memory to store the program (instructions) and to store data temporarily while it’s running. They have built-in input/output interfaces, which means they can read signals from and send signals to other devices. For example, a microcontroller in a vending machine reads inputs from the buttons you press, and controls outputs like returning change or vending a snack.
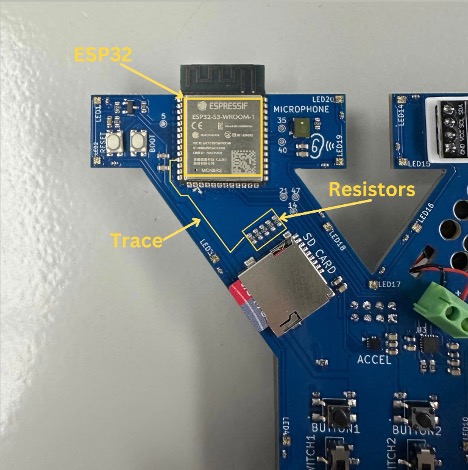
The microcontroller we’ll be using for this class is an ESP32-S3 mini. This microcontroller has a dual-core microprocessor which means it can handle more complex tasks compared to single-core microcontrollers. It runs at a clock speed of up to 240 MHz, which is faster than other microcontrollers, allowing it to process data quickly. One neat feature that we’ll explore in future labs is its built-in support for Wi-Fi and Bluetooth. You can find the microcontroller located on the top left of your Y-Board. The esp32 is connected to the various components (buttons, switches, LEDs etc) by through traces (which are like wires embedded into the printed circuit board). One is highlighted in yellow in this image:
For the rest of the labs in this course, we’ll be learning how to control different components on the Y-Board with our microcontroller. To do this, we need to be able to give it instructions by writing and uploading a program. We’ll use visual studio code and an extension (platform io) to help us with this.
Github
Github is an online platform where developers store, share, and collaborate on code. When you “clone a repository,” you’re making a copy of someone else’s project (which is stored on GitHub) onto your own computer. This lets you work on the project locally.
PlatformIO
We installed the PlatformIO extension. This will get the code we write, ready to be sent to the microcontroller. In every project going forward we’ll have a platformio.ini file. Let’s take a look at what’s inside of this one.
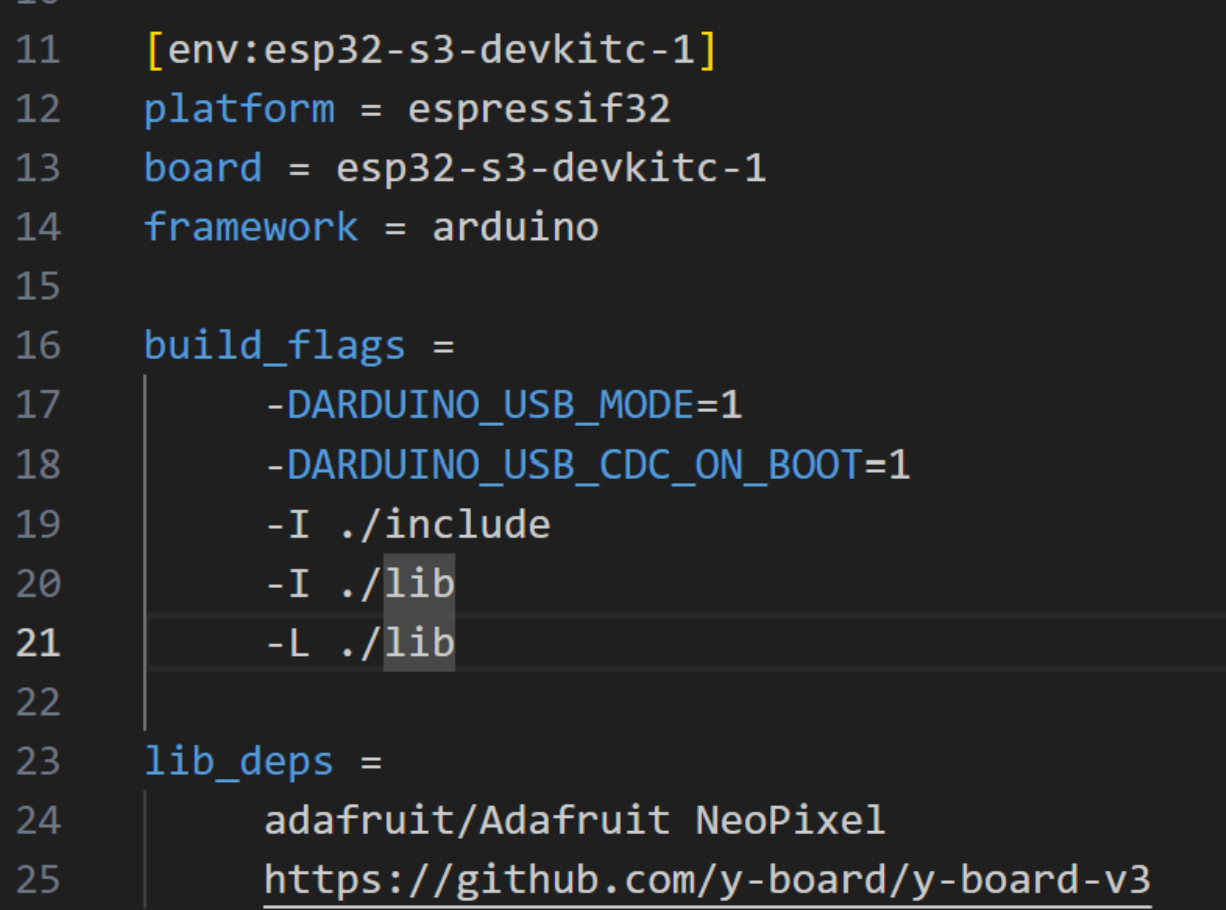
Lines 11-14: These specify what kind of microcontroller we are uploading to and the format of code we are using.
Lines 16-21: These tell the compiler that we need to include extra files in addition to the main code. The lib and include folders hold files that help make the screen, speaker, and other components function.
Line 24: This line specifies a library that is needed for the board to function.
Line 25: This also specifies a necessary library. Notice that it is a link to a github repository. When this link is included, it goes to github and uses the repo, just like when we cloned the initial repository.
Programming in C++
We’ll be coding in C++ for these labs so remember to end every line of code with a semicolon. You can make one-line comments with two slashes
// like this
or multi-line comments by wrapping them in a slash and asterisk,
/* like this
longer comment
On more than one line */
Functions are in this format:
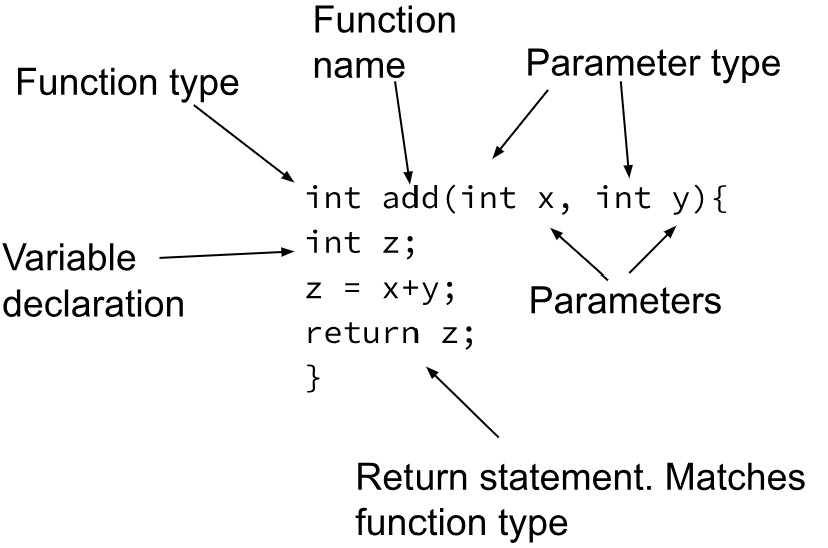
The return type and return are used for functions that do something like a calculation. When their function is called from somewhere, it is run and whatever was calculated will be returned to the called. For example:
void main(){ // this is our main function
	int answer; // variable declaration
	answer = add(40, 2); // this calls the other function
}

int add(int x, int y){ // the return type is an integer
	int z;
	z = x+y
	return z; // gives main 42 when function called in this case
}
The code you download has several folders. In one called src, there is a file called main.cpp. This is the main file your Y-Board will run. In this file, you’ll notice that there are two functions. void setup() is run only once when we power on the Y-Board. It helps connect the esp32 to buttons, LEDs and the like. void loop() is run continuously as fast as it possibly can (this is where clock rate from the background comes into play). You’ll notice that the return type for both is void, meaning they don’t return anything.
In our setup() loop, we initialize all the necessary parts of the board by calling some functions. This will get the esp32 ready to send and receive signals. We also play a song.
In our setup() function, we initialize all the necessary parts of the board by calling some functions. This will get the esp32 ready to send and receive signals. We also play a song.
- Let’s run the code! First, plug the board into the computer. Next, push the upload button at the bottom left or top right of the vs code screen to send it to the esp32.
Troubleshooting

Sometimes the code will appear to upload properly, but nothing will happen on the board. First, make sure the board has batteries. Then, if it still doesn’t do anything, press the reset button and it should start working.

or

Power off the badge. Then while holding the boot button, switch it back on and upload the code. When the code starts uploading, you can let go of the boot button. If this doesn’t work, try it once more. It almost always works by the second time.

Remember to turn the board on and plug it into the computer you’re using before trying to upload code.

Try a different USB port, cord, or restart vscode, or restart the computer.
Post-lab Work
Show your friend, coworker, or roommate your cool board and its hardware test. Explain what the hardware test is doing.